It is important for every driver that the car obeys him well in any situation. One of the main systems of a car is the steering system. Therefore, every breakdown of the steering system leads to a deterioration in driving quality, and possibly even to an accident.
It is for this reason that it is important to always monitor the condition of the steering system and promptly carry out its repair and maintenance. Today we will talk about the VAZ 2114, or more precisely about its steering rack.
The steering rack itself is a long rod with attachments and two outgoing parts. The steering rack is responsible for the handling of the car and also for the safety of the driver, so if it breaks down, you should immediately begin repairs.
You can understand that the rack requires replacement by the following signs: when you turn the steering wheel, you hear a knock and play appears. In this case, the knocking sound most often appears only when driving; if it is heard when turning the steering wheel while parked, then the steering rack definitely requires immediate replacement - this means that the breakdown has started and the rack is in critical condition.
Steering rack VAZ 2114 - what it consists of
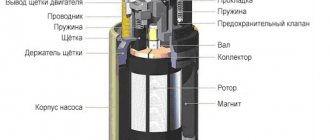
Before proceeding directly to the verification process, you need to know the design features of the steering rack. Let's look at what elements it consists of:
1 – protective cap; 2 – steering gear housing; 3 – rack; 4 – drive gear; 5 – inner tie rod end ; 6 – spacer sleeve; 7 – tie rod mounting bolt; 8 – connecting plate; 9 – support sleeve; 10 – steering gear support; 11 – rack support sleeve; 12 – protective cover; 13 – clamp; 14 – rack restrictive ring; 15 – sealing ring of the rack stop; 16 – nut; 17 – rack stop; 18 – roller bearing; 19 – ball bearing; 20 – retaining ring; 21 – nut sealing ring; 22 – gear bearing fastening nut; 23 – boot; 24 – lock washer
Steering rack VAZ 2114 - the main reasons for failure
Reasons for failure
When the issue of rack adjustment has been sorted out, you can consider the reasons for its failure:
- Wear . Each car mechanism has its own running life.
- Due to uneven roads, the pressure on the rack is significantly increased.
- Inadmissible acceleration at extreme wheel position.
- Mechanical damage caused during operation.
Steering rack VAZ 2114 - signs of malfunction
Let's look at each of the signs and what can cause them to appear. It should be noted that some problems, for example knocking, may not be related to the mechanism itself.
- So, the free play on the steering wheel has increased, that is, it dangles more; the increased travel can additionally manifest itself in the appearance of a beating in the steering wheel when braking.
This problem may be associated with loosening of the ball pins to the stabilizer strut, increased clearance in the ball joints, or increased clearance between the rack and pinion.
- If play is detected in the steering wheel, first of all you should inspect the steering ball joints. It rarely happens, but it is possible that the nuts securing the tips have become loose and the pin has begun to come out of the seat, causing a significant gap to form at the mounting point. Fixing such a malfunction is simple, just tighten the nuts.
- Ball end wear is much more common, resulting in a gap between the pin and the body. This problem can be eliminated by changing the tips.
- Play in the steering wheel can be formed due to an increase in the gap between the rack and pinion. During the operation of this mechanism, these elements gradually wear out, and the gap between them increases. Repairing this problem comes down to an adjustment that just requires tightening the adjusting stop nut correctly.
- A knock in this mechanism can be caused by play in the tips, an increased gap between the rack and gear, as well as loosening of the mechanism itself.
- As for the tips and rack clearance, the repair of the mechanism is indicated above, that is, just tighten the thrust nut and that’s it.
- Regarding the loosening of the fastening, it is enough just to tighten the nuts securing the clamps that hold the mechanism, and the problem will be solved.
- Stiff rotation of the steering wheel may be due to damage to the support bearing of the shock absorber strut (the case when a problem with the suspension affects the steering mechanism), damage to the rack bushing, wedging of the steering tips, or wedging of the steering gear bearings.
- In the case of a worn support bearing, the repair boils down to removing the support and replacing the bearing.
- If the reason for the tight rotation is the support bushing, then you need to put a new one in place of the damaged one, and lubricate the mechanism itself.
- If there are problems with the tips, they should be checked and replaced if necessary. The same applies to drive bearings.
Adjusting wheel alignment with a caliper
It should be noted that after repairing many faults, adjustment of the wheel position (wheel alignment angles) will be required.
All work with the steering mechanism can be done with your own hands; there is nothing particularly difficult about it. But after work, especially on the steering tips, the toe angles will need to be adjusted, which is best left to specialists.
If a malfunction occurs, you will first need to diagnose the mechanism to identify the unit that caused it. First, the condition of the tips is checked. To do this, they are removed from the support and checked manually. With a working tip, the finger moves in its body with effort, but it should not get wedged to any position; such a tip can be put in place and continue to look for faults. If it moves freely and there is some play, then it is replaced.
Next, the gap between the rack and gear is adjusted. For this, a special 6-sided key is used. With its help, the thrust nut is tightened until it stops, and then loosened by ¼ turn. After this, the nut is fixed using punching. If the adjustment is made correctly, and the condition of the rack is still satisfactory, then the knocking should disappear. If the adjustment does not help, then most likely the wear of the main components is quite severe and a major overhaul of the mechanism is required with the replacement of the rack, which can also be done with your own hands.
Installation Rules
Installing the steering wheel is a dismantling process in reverse order. If you can handle the removal, then you will be able to install it.
- Installation begins by transferring the mark from the old steering wheel to the new one. Be extremely precise: the correctness of further control of the machine depends on this. The mark on the new part should be exactly in the same place as on the previous one.
- Put the steering wheel back in place. Make sure that the mark on it and on the front panel match the same as in the case of the old part.
- Replace the central nut and tighten it. If it does not fit tightly in the socket head, insert the wire strands between them. When the nut is in place, remove the wires and secure the nut tightly.
- Replace the steering wheel cover and tighten all screws.
- Make sure the steering wheel is straight. If even a slight displacement is observed, the part will have to be reinstalled.
- Replace the battery terminals and test your new steering wheel by driving it away from major roads. At first, its diameter may be unusual, but the ease of driving should remain the same.
if the nut falls out of the socket, use the wire strands
The most difficult thing in the process of replacing the steering wheel on a VAZ 2114 and 2115 is choosing the right parts. Pay attention to the markings on the steering wheel, covers and, if necessary, adapters. In some cases, it may be necessary to replace the steering column switches. But dismantling and installing a new steering wheel itself will not cause you any particular difficulties if you strictly follow all the instructions.
Do-it-yourself self-diagnosis and check of the VAZ 2114 steering rack
So, to check the steering rack you need to measure the gaps in it.
This can be done either on a removed mechanism (which is even better) or directly on the car. Now let's move on to the process:
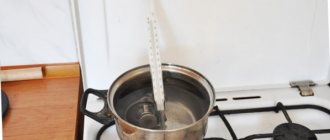
Set the mechanism to the middle position. It can be determined by its dimensions - ( 87±0.25 ) mm from the gear axis to the rack end. Using a special device, we load the unit to a force P = 500 ± 20 N (51 ± 2 kgf). The distance from the gear axis should be – 84 mm .
The maximum permissible movement of the rack “X”, measured through the relative movement of the pressure punch 1, should not exceed 0.12 mm . After assembly, the torque of the gear in the area of the rack stroke should be in the range of 50–200 N·cm (5.1–20.4 kgf·cm) at a rotation speed of 30 min-1 .
How to disassemble the steering rack of a VAZ 2114 and replace worn parts
In addition to a helper and new slats, you will also need a set of tools and materials. Be sure to include in this list:
- Set of wrenches;
- Jack;
- 17mm hex wrench;
- Balloon wrench;
- Bricks or similar materials (to support the front of the car without wheels);
- Puller for steering rods (not necessarily needed, you can do without it);
- Dry rags;
- Litol type lubricant;
- The almighty WD40.
Now you can proceed directly to replacing the steering racks. We strongly recommend that you follow the established procedure for conducting operations.
- Place the car on a level surface. No, a simple floor in your garage is enough, it is not necessary to level it with cement.
- Apply the parking brake to keep the car from moving.
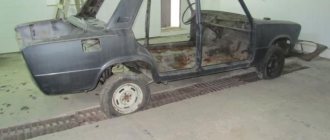
- Raise the car on a jack, place logs or bricks under the front, and then remove the wheels.
- Remove the negative cable from your battery for safety reasons. Nobody needs electric shocks today.
- On the driver's side inside the passenger compartment, near the pedal block, unscrew the locking fastening bolt of the cardan of your steering shaft.
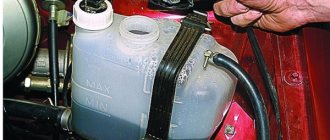
- Remove the adsorber directly from the engine compartment. You can put it aside for now.
- Remove the cotter pins, which will allow you to then remove the mounting nuts from the tie rod ends.
- Using a rod puller, the ends are removed from the racks. If for some reason the puller is missing, it can be replaced by gentle, successive blows to the tips. Don't damage their threads just by doing this. They usually lend themselves, so many people do without pullers.
- Treat the rack clamp fixing nuts with an anti-rust agent. Now we are talking about the almighty WD40. Wait a while for the composition to be absorbed.
- Using a wrench, unscrew the fastening nuts. Processing with a Vedash should greatly simplify this task for you. There are four nuts in total.
- Remove the rack by pushing it through the passenger side, that is, the right side of your VAZ 2114.
- We recommend replacing the boot at the same time as replacing the racks. Over time and during the period of operation, the steering boots seriously wear out, so it is hardly worth trusting old boots to work with new racks.
- The tips are removed from the slats. At the same time, try to count the number of turns with which the nuts were tightened. This will allow you to fasten them back as close to precision as possible at the reassembly stage and, with peace of mind, go to the service station, where they will adjust the wheel alignment.
- Take your new rail, remove the plugs from it.
- Next, take Litol or a similar lubricating liquid into your hands and fill the body with this composition as much as possible.
- The ends are mounted back onto the rods. Try not to mix up the places of the nodes, although they are different from each other. However, as practice shows, this does not prevent many do-it-yourself repairmen from confusing them.
- The new rail is placed in its rightful place. To do this, the nuts are attached to the studs of the clamps.
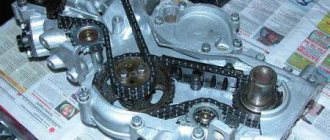
- Now you will need your friend, comrade, assistant. Ask him to help guide the shaft drive gear to the seat located directly on the rack housing. The splines must line up exactly. Be sure to check this moment.
- A locking bolt is fixed on the cardan.
You can safely perform all other work in the reverse order of the dismantling described above. In this case, each thread must be treated with Litol. This event will allow you to more easily deal with disassembling the elements during subsequent repairs. Or it will be a pleasant surprise for the new owner of your VAZ 2114.
Dismantling process
There is electronics inside the steering wheel - the signal of a VAZ 2114 car, so first of all you need to disconnect the negative terminal of the battery. By turning the front wheelset to the “straight” position, you can begin dismantling:
- The first step is to unscrew the seven screws on the covers located under the steering wheel. Once the fasteners are removed, the lower casing can be detached. The top section should only be removed when the steering column is pointing down;
Remove the cover
- After this, you need to remove the decorative trim. It has no fastenings, so it can be removed with a flat-head screwdriver. This must be done carefully, as the plastic here is fragile. Under the cover there will be two screws that hold the signal button - this also needs to be removed;
- Next, you should unscrew the steering wheel fastening nut so that it stays on the shaft, that is, you do not need to completely remove it;
Unscrew the 2 bolts located behind the removed cover and remove the cover and remove the plastic component
- When the last fastening is removed, the steering wheel can be knocked down with a sharp blow and removed. In this case, a rubber hammer will help, as it will not damage the surface of the steering wheel.
Important! The steering wheel in the VAZ 2114 sits tightly on the spokes, so with a sharp jerk the parts may be damaged. When the hub is removed from the spokes, you can finish the fastening nut.
Installing the steering wheel is done in the reverse order. An important point is the pointer switch ring. When installing, it must be rotated so that the pin can fit into the groove of the ring. If a non-standard product was purchased as a replacement, then the process is the same; the only differences can be in fastening and fixing.
Required spare parts
For repairs, you will need to buy a new steering rack (article 21080-3400012-10, 2108-3400012-10, 21080-3401010-10) assembled.
Required Tools
The steering wheel is usually removed in two cases: it needs to be repaired or completely replaced. It is not recommended to choose sports models, as they will not allow you to pass a technical inspection of the car. If the choice was made towards a third-party manufacturer, then you need to buy the steering wheel in a car store - the product must have a warranty.
To work you will need:
- Phillips and flathead screwdrivers, as well as an extension for them.
- Set of keys and sockets.
- Rubber hammer.
Important! Before removing the steering wheel, you need to make sure that the wheels of the VAZ 2114 are level and, most importantly, straight. If the front wheel set is turned to the left or right, the steering wheel parts may be damaged during removal.
Steering wheel removal process
There is a signal inside the steering wheel that receives power from the battery, so the first thing you need to do is turn off the power to the car. To do this, you just need to disconnect the negative terminal. After this, you can safely begin the dismantling process.
- Remove the ignition key from the lock.
- Turn the steering wheel so that the system locking the steering shaft is activated. Your steering wheel is now locked in a straight position.
- In order to subsequently correctly install the new part while maintaining control accuracy, apply a mark to the steering wheel with a pencil. Place a similar mark on the dashboard right next to it.
- Using a straight screwdriver, pry the cover with the Lada inscription on the steering wheel and remove it. This element is attached using ordinary plastic clips, so removing it is not difficult. However, due to the thin plastic, the part breaks easily. If you plan to continue using your old steering wheel, be careful.
- Under the trim you will see two screws. They hold the steering wheel cover. Unscrew them using a Phillips screwdriver and then remove the cover.
- In the central part of the structure you will see a large nut. It should be unscrewed using a 24 mm socket.
- The steering wheel no longer holds anything. To remove it, grab the steering wheel with both hands and pull each side in turn. There's no point in trying. If the part has not been dismantled before, it will be quite difficult to move. Do not try to remove the part with one jerk: you may accidentally injure yourself.
- If attempts to remove the steering wheel using the method described in point 7 are unsuccessful, use a small hammer and drift. In addition to additional tools, you will need an assistant. One person from the pair should pull the steering wheel, and the second should hit the drift attached to the end of the steering shaft with a hammer.
This is interesting: Replacing the gasket under the valve cover on a VAZ 2101-2107
Removing the steering wheel for VAZ 2114 and VAZ 2115
First of all, you need to remove the trim; the screws under the trim should be unscrewed using a 24mm socket; you should unscrew the central screw; if it is not possible to remove the steering wheel by hand, use a hammer.
Experts recommend not turning off the central nut completely, as it can protect you from serious injury in the event sudden break of the steering wheel. Make several turns while performing step 6, and when the part comes off the steering shaft, unscrew it completely by hand.
Video: how to remove the steering wheel on VAZ 2114 and 2115 cars
In this simple way you can dismantle the steering wheel on a VAZ 2114 and VAZ 2115.
VAZ 2114, is it possible to install an amplifier yourself?
The work will take no more than two hours if you do everything without haste and with breaks. There is no need to remove the VAZ steering rack; there is no need to even disconnect the rods. You will need a small set of keys: for 10, 13 and 17. The last two are needed. It is advisable to have a good set of tools, since pliers, for example, may be needed at any time.
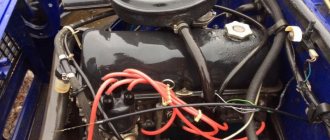
First you need to remove the left clamp and install the amplifier clamp located on the left on the studs. Moreover, its eye should be facing upward. After this, tighten all the nuts. The clamp on the right side of the steering rack is replaced in the same way. Then you need to put the corner of the rack on a pin located on the cross beam of the car body.
If there is an adsorber tube, remove it first and then install it on top of the corner. The entire structure must be tightened by placing a large washer on the stud. Next, the cross member is installed; its two bolts must be tightened simultaneously.
If there is a gap of about 1 cm in the structure, you will need to rearrange the clamps. Most likely, you mixed them up and installed them incorrectly. This completes the installation, now you can check the VAZ power steering rack in action.
The difference will be immediately felt, the car's handling will become much better, and it will be easier for you to stay on course. If necessary, adjust the rack to minimize the backlash.
What you need for repairs
Before starting repairs, purchase a repair kit. It can be small and include only bushings, oil seals, boots, etc. There is also a large repair kit, which also includes a rack. There are a lot of companies that produce such repair kits, so which one to choose is up to the owner to decide. But it’s better to choose a manufacturer who is an official supplier of spare parts to the car plant.
To make repairs, you won’t need much:
- Set of open-end wrenches;
- Screwdrivers;
- Rags;
- Lubrication;
- Repair kit;