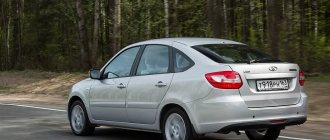
01/26/2021 20,434 VAZ Granta
Author: Ivan Baranov
Every car has a dashboard where the main instruments of the vehicle are located. Thanks to the tidy, the driver knows at what speed he is traveling, what equipment is turned on and what is the condition of the main components of the car. In this material, we invite you to find out what the Lada Granta instrument panel is, what indicators are installed on it and what malfunctions you may encounter in its operation.
[Hide]
Symbols on the Lada Granta dashboard
Information panel Grants liftback in the “Standard” and “Norma” configurations:
- Tachometer needle: indicates the crankshaft speed in online mode. The green zone indicates the permissible speed, the red zone indicates exceeding the recommended range;
- engine breakdown: many are familiar with the “Check Engine” sign. The orange indicator goes out immediately after the engine starts, otherwise correct the problem. As soon as the indicator lights up while driving or does not go out after starting, immediately stop the power unit, carry out diagnostics, and repair the breakdown;
- left direction indicator (green color indicator);
- low engine oil level in the system (red): after starting the engine, the indicator should go out within the first five seconds;
- activation of the anti-lock braking system ABS: yellow indicator;
- immobilizer: yellow indicator color, displays the security mode of the equipment;
- critical temperature of the cooling system: red diode. When reaching 115 C, the indication is accompanied by a sound signal;
- emergency condition of the brake system: red indicator. The problem must be resolved quickly, as there is a high probability of the brake calipers blocking. Most often, the reason is insufficient brake fluid in the expansion tank of the master cylinder. It is installed in the engine compartment;
- right turn signal;
- battery status: red indicator. Common breakdowns: lack of charge, mechanical damage, impact;
- electronic speedometer needle;
- exchange rate stability system (ESC): when the engine starts, it operates in one of three modes: on, off, emergency;
- upshift: only with pre-installed automatic transmission;
- activation of high beam headlights;
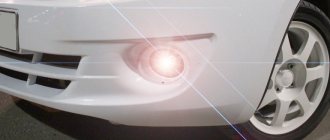
- activation of PTF, running lights;
- low beam activation;
- cancellation of odometer readings: daily mileage;
- monochrome LCD display - on-board computer;
- car door open alarm;
- indicator of reserve fuel remaining in the fuel tank;
- low tire pressure indicator;
- electric power steering status indicator;
- airbag status indicator.
Diagnostics of the instrument cluster on Lada Granta
1.
Turn on the ignition while holding the “Reset” button pressed. All positions of the familiar areas (segments) should light up on the LCD - the LCD is being monitored.
2.
Press any of the control buttons. The LCD should indicate the firmware version (for example, VEr 10).
3.
Press any of the control buttons. The following error codes (if any) should be displayed on the positions of the first and second lines of the LCD:
- 2 – increased voltage in the on-board network; 3 – fuel level sensor error (if a break in the sensor circuit is detected within 20 seconds); 4 – coolant temperature sensor error (if an open circuit in the sensor is detected within 20 s); 5 – error of the external temperature sensor (if there are no sensor readings within 20 seconds, the indication on the LCD is “-°C”); 6 – engine overheating (the criterion for triggering the acoustic alarm is met); 7 – emergency oil pressure (the criterion for triggering the acoustic alarm is met); 8 – defect in the brake system (the criterion for triggering the acoustic alarm is met); 9 – the battery is discharged (the criterion for triggering the acoustic alarm is met); 10 – error detection in the data packet.
4.
Press the “RESET” button and hold it for no more than 3 seconds. Error codes should clear to zero.
5.
Press any of the control buttons. All familiar positions should light up on the LCD, thus starting the LCD control.
On-board computer capabilities
The LCD display accumulates data from a number of programmed sensors. They send information online for decryption and subsequent output.
For example:
- daily mileage data;
- remaining fuel;
- current time;
- current transmission;
- temperature outside.
*configuration may vary depending on the technical characteristics and modification of the vehicle.
Switches and levers under the steering wheel
The right switch under the steering wheel is responsible for the window cleaner and washer. The switch turns on electrical circuits when the ignition is on. The switch lever can be moved to the following positions
0 - windshield wiper and washer off
1 — intermittent wiper operation mode is on (non-fixed position)
2 — intermittent wiper operation mode is turned on (fixed position). In intermittent operating mode, the windshield wiper blades make one stroke at regular intervals of several seconds, regardless of the presence of drops on the windshield (in a variant, an automatic wiper control system is installed
3 - low speed windshield wiper enabled
4 - high speed windshield wiper enabled
5 — by moving the lever toward you, the windshield washer is turned on (not a fixed position)
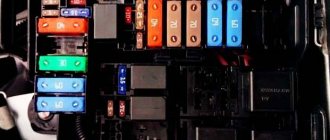
Typical malfunctions of the Granta liftback dashboard
- mechanical damage, which contributed to the failure of the contact board and terminals;
- exceeding the permissible voltage in the network, short circuit;
- failure of one / several sensors, which resulted in the transmission of incorrect, incomplete information to the on-board computer;
- ingress of moisture or aggressive chemical liquid, which resulted in failure;
- manufacturing defects;
- violation of installation technology;
- purchase of non-original products.
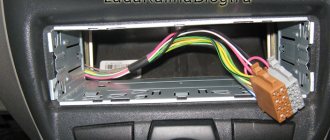
Sequence of actions when dismantling the dashboard
The reasons for disassembling and replacing the Grantback liftback dashboard are very varied: damage, installation of a new diode, etc.
- We unscrew the three mounting bolts around the perimeter. Carefully remove the assembled unit so as not to damage the contact boards, electrical wiring, and terminals;
- Remove the instrument panel mount for the Lada Granta liftback;
- To replace the tachometer/speedometer needles, you need to move the lever up a little and turn it counterclockwise.
After the final replacement and maintenance, we reassemble the structure. Self-repair of the front panel of the Grant liftback is completed.
Refinement of the Granta liftback dashboard
The basic equipment of the dashboard of the Lada Grant “Norma”, “Standard” is quite simple and uninformative. The defect was promptly corrected by manufacturing a new panel sample. It is installed exclusively on the “Lux” modification. An alternative option outside the factory version is provided. In order to increase the information content, a new instrument layout and external design are used:
- the borders of the instruments are separated by a chrome insert;
- more space is allocated for a computer monitor;
- the owner can independently choose the color design of the backlight in order to reduce eye strain;
- basic (important) information is now displayed at the top of the display.
Information about the Lada Granta instrument panel software
- turn off the ignition;
- press and hold the mileage reset button in pause mode;
- activate the ignition;
- release the pressed button.
Information about the software version and hardware model will appear on the monitor. The data must be used when purchasing a new shield.
Where is it installed?
Note that the Gazelle instrument panel can be found on other cars. These are Sobol and Volga. The device has the same connection diagram. Externally, these shields look identical.
There are several types of these panels:
- Old Euro-1 model. Installed on cars from 1994 to 2002 inclusive.
- Old Euro-2 model. These shields can be found on Gazelles with a new “face” (with teardrop-shaped headlights).
- New sample. They are still installed to this day on Next, starting with Gazelle Business.
Below we will look at the features of each Gazelle instrument panel.
Reviews from Lada Granta owners about the functionality of the dashboard
| № | Positive |
| 1. | Nikolay, 39 years old: in general, I am satisfied with the information content of the console, the display is bright. True, it shines a little in the sun, but this is not so significant. |
| 2. | Konstantin, 41 years old: I bought Grant a year ago in the “Lux” configuration with a new dashboard. I'm 100% satisfied. |
| 3. | Vitaly, 44 years old: I bought a Granta in 2013, the old instrument panel was good, but it was deformed after an accident, I replaced it with a new version from the “Lux” version. Identical in fastenings. |
| 4. | Dmitry, 37 years old: during a side collision with Renault, the dashboard and dashboard were damaged. I didn’t upgrade to a luxury one, I bought my original one. |
| 5. | Vladimir, 39 years old: he will buy Grant second-hand, he is happy with everything, the panel is good and informative. True, at night it is too bright, sometimes it strains the eyesight. |
| 6. | Kirill, 45 years old: I work as a taxi driver, I drive all the time, I’m happy with the panel, it’s informative. The on-board computer quickly displays all the necessary data. |
| 7. | Vladislav, 34 years old: after a major overhaul, friends recommended installing a new panel from the Luxury configuration, but he left the old one and is happy with everything. |
| Negative | |
| 1. | Vladlen, 44 years old: the old instrument panel is not very informative, often displays information and speedometer readings incorrectly. Installed from Lux configuration. Now there are no complaints. |
| 2. | Sergey, 33 years old: after the accident, I replaced the front console, including the panel, since the old version was unfinished and damp. |
| 3. | Vyacheslav, 39 years old: I drove the original device for a month and replaced it with a luxury version, it is much better and more informative. |
Owners' opinions on the functionality of the dashboard were divided, as expected. If we objectively compare the two panel models, then the winner is the “Lux” package. Regarding the duration of operation, efficiency of data output, and accuracy of readings, they are identical. The internal filling is the same, with the exception of the external design.
Electrical diagram of the grant of the rear part of the VAZ 2190
Electrical diagram of the rear part of the car: 1-block of the rear wiring harness to the block of the instrument panel wiring harness; 2-rear wiring harness block to the instrument panel wiring harness block; 3-side direction indicator right; 4-side direction indicator left; 5-handbrake sensor;
6-element for rear window heating; 7-interior lighting lamp; 8-switch in the driver's seat belt; 9-trunk light; 10-electric fuel pump module; 11-light right; 12-trunk lock electric motor; 13-switch for interior lighting; 14-additional brake signal;
15-left lamp; 16-rear wiring harness block to the rear left door wiring harness block; 17-rear wiring harness block to rear right door wiring harness block; 18-rear wiring harness block to the front right door wiring harness block; 19-rear wiring harness block to the front left door wiring harness block; 20-airbag control unit; 21-rear wiring harness block to license plate light wiring harness block.
- 1 – indicator of lubricant pressure in the crankcase of the power plant;
- 2 – generator connector;
- 3 – power supply to the fuel mixture supply valve;
- 4 – cooling system thermometer;
- 5 – sending a signal to the dashboard;
- 6 – adsorber purge;
- 7 – speedometer;
- 8 – mass air flow sensor;
- 9 – DPKV;
- 10 – DC in front of the catalyst;
- 11 – control pulse device;
- 12 – oxygen concentration sensor in exhaust gases;
- 13/14 – coil and spark plugs, respectively;
- 15 – injector drivers;
- 16 – ignition contact group;
- 17 – detonation measurement sensor.
Good day everyone, I’ve been on the Internet for two days now searching for a bunch of wires coming into the connector on the instrument panel. I need to find out which wire the signal is coming from so that the “seat belt not fastened” lamp turns off, and what appears on this contact plus or minus or disappears? There is no such information in repair magazines, but if I simply didn’t see it there, and you poke my nose at it, I won’t be offended, but I’ll say thank you.
Read more: Rear axle VAZ 2106 design, oil change, repair