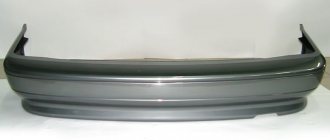
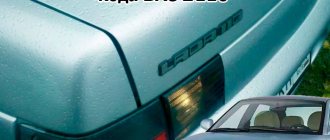
Rear bumper removal and installation
Removal
Place the car on a two-post lift and brake it with the parking brake (electro-hydraulic lift type P3.2G).
Disconnect the ground wire terminal from the battery (spanner 10).
Raise the car to a height convenient for work.
For car 2194:
Unscrew three bolts 1, Figure 2-1, of the lower fastening of the bumper to the body (replaceable head 10, knob).
Figure 1 – Lower bumper mount:
1 – bolt of the lower fastening of the bumper to the body
Unscrew the self-tapping screw 1 on the right and left side, Figure 2, fastening the bumper to the rear fender, self-tapping screw 2 fastening the mudguard apron to the rear fender and self-tapping screw 3, fastening the mudguard apron to the bumper, remove the fastener 4 fastening the mudguard apron to the bumper (Torx head T20, 10, wrench, flat screwdriver).
Figure 2 – Side mounting of the bumper:
1 – self-tapping screw securing the bumper to the fender;
2 – self-tapping screw fastening the mudguard apron to the rear fender;
3 – self-tapping screw securing the mudguard apron to the bumper;
4 – clamp for fastening the mudguard apron to the bumper
Remove the rear lights.
Unscrew eight bolts 1, Figure 3, of the upper bumper mounting (replaceable head 10, knob).
Figure 3 – Upper bumper mounting: 1 – bolt of the upper bumper mounting to the body
Disengage the bumper from the side brackets and remove the rear bumper.
For car 2192:
Unscrew two bolts 1, Figure 2-4, and two self-tapping screws 2 of the lower fastening of the bumper to the body (replaceable head 10, wrench, Phillips screwdriver).
Figure 4 – Lower bumper mount:
1 – bolt of the lower fastening of the bumper to the body;
2 – self-tapping screw for the lower fastening of the bumper to the body
Unscrew self-tapping screw 1 on the right and left side, Figure 5, fastening the bumper to the rear fender, self-tapping screw 2 fastening the mudguard apron to the rear fender and self-tapping screw 3 fastening the mudguard apron to the bumper, remove the fastener 4 fastening the mudguard apron to the bumper (Torx T20 head , 10, wrench, flat-head screwdriver).
Figure 5 – Side mounting of the bumper:
1 – self-tapping screw securing the bumper to the fender;
2 – self-tapping screw fastening the mudguard apron to the rear fender;
3 – self-tapping screw securing the mudguard apron to the bumper;
4 – clamp for fastening the mudguard apron to the bumper
Remove the tail lights
Unscrew eight bolts 1, Figure 6, of the upper bumper mounting (replaceable head 10, knob).
Figure 6 – Upper bumper mount:
1 – bolt of the upper fastening of the bumper to the body
Disengage the bumper from the side brackets and remove the rear bumper.
Installation
Installation is carried out in the reverse order of removal.
Reasons for removing and replacing bumpers
During operation, these body cladding elements are subject to numerous mechanical impacts, which causes the paintwork of the products to deteriorate, chips and even cracks to appear. Not to mention impacts in accidents or other circumstances.
Reference. In winter, the fragility of plastic increases under the influence of low temperatures, so it becomes easier to break. To get a crack, it is enough to rest the bumper against a high snowdrift.
The front body kit of the Lada Kalina suffers especially badly, as dirt from under the wheels and stones from oncoming cars get into it. Damaged paintwork can be restored, and broken plastic can be soldered, but sometimes it’s easier to replace the bumper, given that you can do it yourself.
The reason for removing and replacing the facing elements of the VAZ 1118 may be other circumstances:
- if it is possible to repair and paint a broken part, it must be removed from the car;
- when you need to carry out other types of body repairs or change headlights (unit - headlights);
- The owner of the car does not like the stock bumpers and wants to do a little tuning - install elements of a different shape.
Reference. Some Lada Kalina cars in the budget configuration were equipped with black unpainted body kits. To improve the appearance of a car by painting or replacing parts, they still need to be dismantled.
Purpose of a car bumper
The front bumper, like the rear bumper in the Lada Kalina car, serves to protect body components and assemblies of various systems from external mechanical influence, for example, during an accident. The device is not a protective element for the driver or his companions, because airbags and other power components of the body are used for this. The body element is capable of absorbing part of the energy from a collision, thereby reducing the level of destructive impact exerted by inertia on the body components located behind it. This is true for high speeds. When driving at minimum speeds, the plastic element is able to completely absorb the impact energy of a collision, preventing destruction of the car body and systems.
Manufacturers in the vast majority of models use plastic as a material for this design. The device is secured using clips, screws, and self-tapping screws.
Let's return to the question, how to remove the bumper? The removal procedure itself should not be difficult if the owner is aware of all the attachment points of the product, since forgetting to unscrew a well-hidden fastening component during dismantling creates a risk of breaking a section of the plastic element or one of its brackets.
Some Lada Kalina owners are inclined to replace the bumper in order to install a tuning product. This is done for the sake of improving the appearance of the car, but we should not forget about the standards governing the size and location of mounting points in height. Next, we will tell you how to remove the bumper, as well as how to replace it.
Removing and installing the front body kit
Since the bumper of the Lada Kalina car is attached in many places, including from below, it is most convenient to carry out work in the inspection hole. If necessary, you can do it without it, but then you will have to look for the lower screws by touch or lie under the car to see them.
Advice. Change body parts with an assistant supporting one side of the body kit while you remove the other. Otherwise, the element may fall and hit the concrete, causing part of the paintwork to fly off. The services of an assistant will also be needed when installing a new part.
The list of tools for disassembly is quite short:
- Phillips-head screwdrivers of different lengths;
- 10 mm socket wrench or socket;
- extension cord and ratchet wrench.
At the moment, there are 2 generations of VAZ 1118 cars, and they are disassembled in different ways. Therefore, the order of work must be considered separately for each modification.
Kalina 1
If you have fog lights installed, then before starting work, disconnect the battery and follow this algorithm:
- Open the hood lid and unscrew the 3 screws holding the plastic radiator grille and carefully remove it.
- Do the same with the bottom grille, removing the 2 screws that secure it.
- Behind the grille there are 2 screws securing the bumper itself, unscrew them.
- Move into the inspection hole and unscrew the 3 lower bolts located in the center.
- Remove 2 pairs of lower screws located on the sides. They attach the body kit to the fender liner from below.
- There are 2 more pairs of screws located in the front of the wheel arches; unscrew them last.
Advice. When unscrewing the last screws, turn the wheel so that it does not interfere with your ability to insert the screwdriver properly.
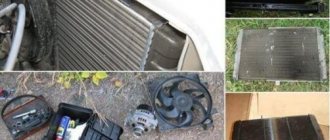
Corrosion of body parts is often found under the removed element. To see the whole picture, remove the plastic amplifier (you need to unscrew 3 bolts) and remove the rust, then touch up these areas.
In case of corrosion of body parts, remove the plastic reinforcement and remove the rust
An important point when installing a new bumper is that you need to put it in place correctly and secure the latches.
- Put on one side of the element immediately, and pull the other side together with an assistant. He should press on the corner of the part from the front, and you - from the side, until a characteristic click is heard.
- Then screw all the screws into place.
- Connect the connectors.
- Install gratings.
Photo of the attachment points of the part
Front bumper on Kalina 2
On the new Lada Kalina model, the front body kit is attached differently: the lower screws are located far from the plumb line of the element, so it is very inconvenient to unscrew them without an inspection ditch. But you don’t need to dismantle the radiator grilles to get to the hidden fasteners. The removal operation is performed as follows:
- Open the hood and remove the negative battery terminal.
- From the inspection hole, unscrew the 3 bolts screwed to the bottom of the car. Two of them are in the center, the third is to the side (to the right in the direction of travel).
- Unscrew 2 pairs of lower screws located at the edges of the bumper.
- As in Kalina 1, unscrew 2 pairs of screws connecting the part to the fender liner and located in front of the wheel arches.
- Unscrew the 6 bolts of the upper mounting of the body kit; they are located on the horizontal panel above the radiator.
Reference. The same front bumpers are used on hatchback and station wagon body types, so there are no differences in the work.
The procedure for dismantling and replacing the front body kit is carried out together with an assistant, as described above. Immediately after removing the element, disconnect the power supply connectors for the fog lights, and when installing, do not forget to connect them back.
Where is the fastener located - photo
How to disassemble the front bumper - video
Removing and attaching rear body kits
To remove the rear bumper of the first generation model, the tool kit must be supplemented with a short Phillips screwdriver, since it is impossible to insert a long one between the tire and the wheel arch, and turning it from the side is inconvenient. In addition, TORX key screws (the so-called sprocket) are used for fastening to the fender liner.
Advice. Usually the back of the car gets more dirty than the front, so it is recommended to wash and dry the car before disassembling.
Later generations of hatchback and station wagon cars are even more difficult to disassemble, because the rear lights have to be removed to remove the body kit. The primary fastening of the elements is also provided with latches, so they are removed in the same way as the front bumper. But due to the difference in design, disassembly must be considered separately.
To install the rear body kit, you must repeat the presented algorithm in reverse order.
Removing the rear element of Kalina 1
Disassembly work can be carried out without an inspection hole, since the lower bolts are located close to the overhang and access to them is not difficult. The procedure is as follows:
- Unscrew the 3 screws located at the rear of the wheel arch. Two of them hold the mudguard, the third is located a little higher.
- At the back of the mudguard there is 1 more bolt with a 10 mm head, unscrew it.
- Using a 10 mm wrench, remove the 3 bolts securing the bumper from the bottom. Two of them stand in the middle, the third is a little to the left (in the direction of travel).
- Open the trunk lid and unscrew the 4 screws of the upper body kit mounting.
The main thing is to carefully pull the edge of the part and release the latches
Then proceed in the same way as with the front element. Pull the side of the part, unlocking the plastic latches, and carefully remove it with an assistant. If you need to get to the body, then unscrew 3 more bolts and remove the plastic bumper reinforcement.
Places where fasteners are located
Differences in disassembling Kalina 2
To remove the rear bumper of a station wagon or hatchback, you will need to open access to the bolts that are hidden under the bottom of the lights, for which the latter will have to be removed. Their fastening consists of bolts with 8 mm socket heads located behind the rubber seal of the trunk lid. The bolts need to be unscrewed, and the lights need to be pulled out, disconnecting all the wires.
Attention! Before disassembling, be sure to disconnect the battery terminal.
Removing the body kit from the Lada Kalina 2 hatchback body is carried out in the following order:
- From below, the part is screwed to the body with a pair of bolts (located in the middle) and two self-tapping screws (at the edges). Loosen and unscrew them.
- Under the wheel arches, unscrew 3 screws (TORX keys T10 and T20) and remove the rubber retainer from the mudguard.
In addition to 3 TORX screws, there is a plug
On a hatchback there are a couple of bolts in the center and a couple of screws on the sides
The difference between disassembling Kalina 2 in a station wagon is that the element is attached to the body from below with 3 bolts, but there are no side screws. In other places the fastening is the same - 3 screws under the arches and 8 bolts around the luggage opening.
How to remove the front bumper of LADA Kalina
Required tools : Phillips screwdriver and two keys for 10 and 13 mm. In this case, a 13 mm socket wrench is needed.
- Unscrew the three screws securing the upper radiator trim;
- And we remove it by removing the two latches (shown by arrows) of the cladding from engagement with the brackets. Below the car, in the right wheel arch;
- Using a Phillips screwdriver, unscrew the three self-tapping screws securing the fender liner to the front bumper. Similarly, we unscrew the screws on the other side of the car;
- Using a 10mm socket, unscrew the three bolts securing the front bumper to the body.
- Using a Phillips screwdriver, unscrew the two screws securing the grille to the bumper;
- And remove the Kalina grille;
- Using a Phillips screwdriver, unscrew the two self-tapping screws securing the bumper to the bumper beam;
- Use a 10mm wrench to unscrew the two outer bolts, and use a Phillips screwdriver to unscrew the two middle self-tapping screws of the upper bumper mount.
- Applying the necessary force, remove the sidewall flange of the ampere from the body bracket. We perform a similar operation on the other side of the car;
- Remove the front bumper of Kalina;
- Using a 13mm socket, unscrew the four bolts securing the energy-absorbing beam of the front bumper to the body;
- And we remove the beam.
Installation of the Kalina front bumper is carried out in the reverse order, ensuring uniform gaps between the bumper and body parts. After the bumper is secured to the body, we press the sides of the bumper to the body brackets until their flanges are fixed on the body brackets.
The process of replacing a bumper on Kalina
So, the time has come for “X”, everything is ready to get to work. It is worth clarifying that the car must be installed on a pit or a lift, since access from below will be required. Without them it will be very difficult to dismantle the bumper.
Necessary tool
If you dismantle the front bumper of Kalina, you will need tools. You don’t need anything fancy, just the most common tools, namely: flat-head and Phillips-head screwdrivers, 8- and 10-size wrenches. It would be more convenient to use sockets instead of wrenches.
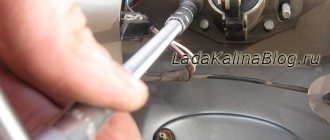
Let's look at the step-by-step process of removing the front bumper:
- After unscrewing 3 screws, remove the radiator grille.
Fastening bolts are marked with an arrow
Now you need to remove the grille on the bumper itself. To do this, you need to unscrew 2 screws.
Unscrew the fastenings of the fender liner to the bumper.
We climb up from below and see three screws securing the bumper from below. They need to be dismantled.
- Now, we remove the bumper from the engagement of the wings.
- With a slight movement of your hands, remove it first from one side and then from the other.
We move the bumper to the side.
- Assembly, as always, is in reverse order.
This is how you can easily and simply remove the front bumper on Kalina.
How to remove the rear bumper of LADA Kalina
Required tools : Phillips screwdriver and two 10mm wrenches.
- In the wheel arch of the right rear wheel, use a Phillips screwdriver to unscrew the screw for the upper fastening of the bumper to the body, as well as three screws for fastening the rubber mudguard (the third screw is not visible in the photo);
- From the bottom of the car, use a Phillips screwdriver to unscrew the screw of the lower fastening of the rubber mudguard and remove the mudguard. Similarly, remove the mudguard of the left wheel;
- Using a 10mm socket, unscrew the three bolts of the lower bumper-to-body mounting;
- Having opened the trunk lid with a 10mm head, unscrew the four bolts of the upper fastening of the bumper to the body.
- Grasping the side of the bumper with both hands and applying the necessary force, remove the top of the side from the flange of the body bracket. We perform a similar operation on the other side of the car;
- Remove the rear bumper of Kalina;
- Using a 10mm socket, unscrew the three nuts securing the energy-absorbing beam of the rear bumper;
- And we take it off.
Installation of the Kalina rear bumper is carried out in the reverse order.
To remove/install Kalina's front and rear bumpers with your own hands, an assistant is not required. By the way, do you know how to install a tuning bumper?
Tools required for dismantling
Replacing Klin bumpers is easy to handle when the right tools are used. These include:
This set of tools must be prepared in advance so as not to select it as the work progresses. In addition, using any other “suitable” tool is highly undesirable, since in this case you can damage the body of the car itself and the damper. As a result, you will have to spend extra money because of such a trifle.
How to remove the rear bumper without problems
Today I decided to make a few more topics on repairing the Lada Kalina and stopped at the rear bumper, I decided to prepare material on the removal and installation of this body part. It took me personally at least one hour to complete this work, although at first I thought that I could do it faster. So, consider below the tool that you will need for this procedure:
- Ratchet or wrench with 10mm head
- Extension
- crosshead screwdriver
Replacing the front bumper of a VAZ
To remove the VAZ bumper you will need tools that are available to every driver.
Photo gallery: tools for dismantling work
Before you begin dismantling the part, you need to familiarize yourself in detail with the design features of your car. Owners of the Lada-Kalina Sport may encounter the fact that when tuning, installing a new bumper on the car will not be easy, since it is difficult to fit in its regular place. When removing the bumper in the cold, difficulties may arise due to some fastening features. There is only one thing that can be advised to the owners of such cars: carry out repair work with the participation of an experienced auto mechanic or driver who has already carried out a similar procedure on this model.
The procedure for removing and installing the rear bumper on the Lada Kalina
Before starting the repair, it is first better to spray all threaded connections with a lubricant, such as WD-40, so that there are no problems with soured bolts during work.
- The first step is to remove the rear mudguards and fender liners, if your car has any.
- After this, you can unscrew the screws securing the bumper to the car body; they are located at the very top on each side, as shown in the photo below:
- Now you can start unscrewing the upper bolts of the rear bumper, there are 4 of them and everything is clearly demonstrated below, they are covered a little by the trunk sealing rubber:
- Then we unscrew the 3 lower bolts, still using a 10mm head with a ratchet extension. You need to bend over and put your hand a little under Kalina’s butt. The last one is located near the exhaust pipe, and the rest are to the right, they are clearly visible, so you’ll figure it out:
- Now you can carefully remove the bumper from the latches on the sides on each side. To do this, you need to grab the end and pull it towards you with a little effort. As a result, the part should move slightly to the side. We carry out the same procedure on the other side of Kalina:
- It should come out of there without any problems, after which you can freely remove the bumper from the car, since it is no longer attached to anything:
- And this is what your Kalina will look like without this body part, by the way, it’s quite good
- If, in addition to the bumper itself, it is necessary to remove the plastic amplifier, then you need to unscrew 3 bolts, two at the edges and one in the center, as shown clearly in the photo below:
- And you can easily remove it from the car by grasping it with your hand and moving it to the side:
And here is the actual final result of the work done:
If these parts need to be replaced, then we buy new spare parts and install them in the reverse order.