Adjusting door handles Lada Granta
Often, after time has elapsed on a Lada Granta car, the doors begin to open and close with some effort.
To fix the problem in question with this car produced by AvtoVAZ, you have to contact a service station. In this case, you need to purchase door closers and door stops for Lada Granta. But you can eliminate this kind of defect yourself. This must be done quickly, especially if the problem occurs on the front door. It is better to eliminate it as soon as it appears, in order to avoid side effects and more serious damage. In order to make opening doors more comfortable, it is necessary to perform certain actions. The main one is adjusting the door locks.
Sometimes the owners of the Lada Granta Liftback, produced by the famous AvtoVAZ company, have to deal with various modifications after purchasing the vehicle. This happens for the reason that after even a short mileage, minor breakdowns or problems often appear at first, and if they are not eliminated in time, they develop into more serious ones. Many owners consider the most common defect to be the fact that the front door locks do not function well and open with great difficulty.
Possible problems and ways to solve them
You can, of course, buy Lada door closers and door stops and make repairs in accordance with the instructions. But this operation can be performed in a more productive way. To carry it out you need:
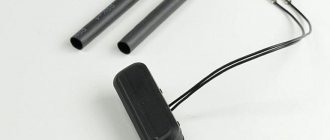
- rubber tubes;
- screwdriver;
- Silicone Grease.
A common symptom of a broken lock is that a loud sound appears before the door opens/closes. The design of the front door lock is made in such a way that the metal can sometimes rattle. In order to eliminate this problem, you need to remove the lock itself and put rubber tubes of the required size on the levers. Immediately all sounds coming from ahead will disappear. When closing the doors, only a bang will be heard, and all sharp and loud sounds will be a thing of the past.
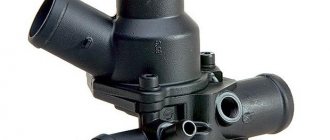
If the car has a universal body, then you should also adjust the lock on the trunk door. The locking tongue itself fits into the bracket. You need to find it and check the tightening of the screws. Then the lock must be lubricated with silicone grease, and then the door must be checked by opening it. If the lock does not work properly, you need to screw on the rubber stops, but they should not be over-tightened. Then check the drive rod of the Lada Granta door lock.
If jamming and play are observed, they should be eliminated. Moreover, all this must be done at once. You can also buy limiters for the trunk lock. Before purchasing Lada door closers or door stops, you should first consult with a specialist. Having received the necessary and important information, you can choose the highest quality limiters. Problems with the operation of the lock can be solved by making a quality adjustment. To do this, certain actions must be taken.
You should pay attention to the gap between the drain and the top edge of the door. The optimal size of the gap is considered to be a hole into which a plastic card can fit. In this position, the aerodynamic sounds and the tightness of the fit to the drain will be balanced.
Most often, the reason for poor lock performance is the difference in the radius of curvature of the upper door frame. If you look at it in detail, you can see that when simultaneously adjusting the locks at the rear of the car, they always touch the top of the sealing rubber differently. Tight opening compresses it much more in the closed position. To adjust the locks, you can use the following method.
You need to twist a thick paper tube and insert it into the upper part of the window frame, while slightly lowering the glass. Then press in. This procedure must be done several times, using your hands to bend the frame when closed. By following these tips, you can handle the repair yourself. The only thing is that you need to have Lada Granta door stops in stock. But you should not refuse help or advice from a specialist, since sometimes the repair scheme can be very complex.
Adjustment process
To perform adjustment work, you can contact specialists so that they do everything professionally and efficiently. At the same time, they will need door closers and door stops; these can be purchased at a specialized store. In order for the locks to work well and the doors to open and close without problems, they must be disassembled. If suddenly the gap turns out to be larger or smaller, the entire door profile should be changed.
If the gap is smaller, lower the glass all the way down. Then close it with one click, take it by the top edge and push it towards you a couple of times with a little effort. And if the gap on the front door turns out to be wider, then you need to open it with the window down and, resting your foot on the trim, pull the door to the inside several times. Then it will be possible to move on to the main problem associated with the poor functioning of the lock.
➤ Rear right grant door lock - troubleshooting
Rear door locks from Grant
The dismantling of the door handle on the Lada Grant is carried out in the event of mechanical damage, deformation, or detection of a defect. The design of the handle is simple, and the fixation scheme is intuitive.
Removing the outer handle. Preparatory stage
Necessary materials and tools to remove the rear door handle:
- car keys;
- rags;
- graphite lubricant;
- new components (as needed).
Sequence of actions when replacing the rear right (left) door handle
We carry out the work modularly, since initially it is necessary to dismantle the casing, the internal filling, and unscrew the handle latches.
Stage No. 1: dismantling the card.
- We place the car on the site, provide priority safety measures, and activate the parking brake.
- Open the rear left door and raise the glass to the top position.
- We twist the blocker (soldier).
- Use a screwdriver to pry up the fastening of the window lifter handle, remove it from the grooves, and remove the lock.
- We pry the plastic insert in the center of the card and unscrew the bolt.
- The remaining three bolts are located in the lower perimeter of the card, as well as behind the door handle.
- The plastic card is attached to the metal body with ten clips. During the dismantling process, be extremely careful, as the clips are too fragile and often break.
- Snap off the card in a counterclockwise direction.
Stage No. 2: disconnect the door lock rod and remove it from the door cavity.
- Using an “8” socket with an adapter, unscrew the bolt securing the handle.
- Using a screwdriver, carefully pry and disconnect the lock bars from the inside.
- We move the handle in the “forward” direction and remove it.
This completes the process of dismantling the unlocking element. Next, we carry out preventive maintenance, install new parts, and assemble the structure in the reverse order.
Review of Manufacturer Prices
| Name/article | Price, rub. ) |
| External handle 11180-6205151-00 | From 425 |
| RENAULT/LADA 11180-6205151-00 | From 385 |
| 11180-6205150-00 | From 420 |
| Internal handle 21900-6205181-00 | From 135 |
| 21900-6205180-00 | —/— |
| Bolt M5x10 00001-0038331-21 | From 10 |
| Nut M5 00001-0038318-01 | From 10 |
| Screw M6x10 00001-0032759-01 | —/— |
| Lock washer 00001-0026053-71 | —/— |
*prices are current as of November 28, 2018.
Recommendations for selection
Without a doubt, when choosing, give preference to parts with factory catalog numbers. Purchase consumables exclusively from official representative offices, service stations, and auto stores.
Before purchasing, check the catalog numbers of parts with the actual data specified in the operating instructions. If such a book is not available, seek advice from service center specialists, download recommendations from the Internet.
Step-by-step instructions for dismantling the rear right (left) door lock on a Lada Grant
We carry out the work modularly: dismantling the card, removing the internal filling, handle, lock.
- We repeat the previous steps.
- Using a screwdriver with a Phillips bit, unscrew the fastening of the intermediate lever of the locking rod and move the base of the lever.
- We remove the locking tab from the standard hole. Use a screwdriver to unscrew 3 bolts
- From the end of the door, unscrew the three screws securing the lock at the base.
- We remove the lock assembly with an electric drive through a special technological window.
- We press the latches on the sides and disconnect the block with wires from the product.
- If necessary, remove the rod, press out the plastic lock, and turn it around the axis.
We lubricate the moving mechanisms, install a new lock, and assemble the parts in the reverse order.
The rear door lock cannot be repaired if it shows signs of deformation of the housing.
Rear door lock device
Adjusting the rear door lock
The doors are difficult to open, the lock is jammed, an extraneous squeak appears when unlocking - the first signs of the need to adjust the door lock. The problem is common among domestic transport.
The left side wears out prematurely due to frequent use.
Inexperienced owners practice eliminating damage by lubricating the mechanism. However, the effectiveness of such a solution is low. Service station technicians recommend the following adjustment:
- Loosen the bracket using an impact screwdriver.
- Move the bracket up (down) a few millimeters, while simultaneously trying to slam the door. We move the mechanism a few mm and check for functionality
- As soon as we achieve the result, we firmly fix the bracket.
- Lubricate the rod with a thin layer of Litol, graphite lubricant.
This completes the adjustment of the rear door locks.
The above algorithm is effective provided the lock is in good condition. What to do if there is a curvature or deformation on the door frame? In this case, the experts advise making improvements:
- We open the back door.
- We insert a plastic stopper into the lock so that it does not close.
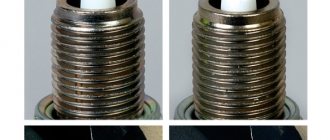
- Using a triangular file, carefully file off the sharp ends of the lock teeth. We do this carefully so as not to break the mechanism. The place to be filed with a file
- We remove the plastic stopper and check that the mechanism is working properly.
Along with adjusting the lock, you have to adjust the door. The reason is the increase in the radius of curvature of the frame. The defect is common and can be corrected by straightening the curvature.
No special tool is needed, the strength of the hands of the master (repairman) is enough.
Since 2015, AvtoVAZ has launched mass production of rear door locks of a new type on the Lada Grant. This is a modernized version of the previous locking mechanism.
The main difference is not only in cost, but also in the change in design and the use of durable polymer. This made it possible to significantly reduce the knocking sound when hitting a metal loop.
Rear doors don't open well
Be it Lada Kalina or Lada Granta - both of these cars are now very popular among Russian car enthusiasts. However, on some models during operation, a malfunction such as rear doors that are difficult to open is observed.
And this happens because the doors or locks were poorly adjusted at the factory. This deficiency can be eliminated by contacting an official dealer, or you can fix everything yourself.
Door adjustment process
While adjusting the door
Before you start work, first inspect all the gaps for the correct geometry of the body, on the sides, top and bottom, and depending on where the inaccuracy is found, you should start working.
Tools required: Impact screwdriver and socket set
Adjusting the bottom of the door
- Open the car window.
- Apply light blows with your palm to the bottom of the door.
- In order for you to understand more clearly what we are talking about, we bring to your attention a video about how a similar issue is resolved at the Renault plant.
Adjusting a door with a large gap at the top
- We lower the window completely. Depending on the configuration, we use either a mechanical handle or a window lifter for this.
- We close the door until it clicks.
- Pull the top edge of the door away from you or toward you.
Door lock adjustment
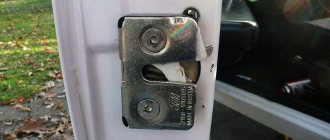
- First of all, loosen the three bolts that secure the lock in place.
Door locking mechanism (shackle adjustment)
Three door lock bolts
Repair methods
Straightening dents is carried out not only from the inside, although this seems the most logical, but also from the outside. The technology of work largely depends on the area of damage and its location.
Firecrackers
This is what tinsmiths call dents that are large (up to several square decimeters) in area, but small (no more than a centimeter) in depth, with very gentle slopes. The metal in them has hardly changed in thickness. They got their name because straightening is accompanied by a clap.
The larger the area of the cracker, the easier it is to straighten. Although this can be explained simply: the lever arm of the force - the distance from the center of the dent to the edge - is large. Sometimes it is enough to press it from the inside with your palm. Often it is a combined damage - at the point of application of force there remains a hole, which will have to be straightened separately.
Fixing from the inside is the main way to repair such dents. To do this, you will have to remove the ceiling or door trim - the usual place for firecrackers to appear. If it does not lend itself to hand force, then, for example, a volleyball chamber can be placed in the technological cavity. A pressure of a couple of atmospheres will be quite enough. Small - you can still touch the metal with your hand - heating the edges will help speed up the process.
Medium dents
It is often not possible to straighten such a problem from the inside. For example, on a wing, the cavity of which is blocked by spars. If it is flat, without a break, then heating and hammering it through a trowel will help fix it.
- Heat the edges of the dent so that your hand feels noticeably hot when touched.
- Apply the trowel, making sure that it lies flat and does not touch any part of the body's relief with its edge. Tap the dent in a circle with light blows.
- Constantly control the heating (cooling is no better than overheating), don’t rush anywhere and persistently hammer the dent in a tapering spiral.
The construction trowel successfully replaces the professional tool “trowel”. Its handle is raised up, does not move around the body and does not interfere with the work of the hammer. It should be made of stainless steel, and the lower, working surface should be polished so as not to scratch the paint. During work, you must constantly wipe it with a cloth so that not the slightest speck remains on it, and degrease it.
There is a very exotic straightening method based on the use of temperature contrast. For it you need to prepare a can of carbon dioxide. These are used, for example, to charge airsoft weapons.
- Heat the dent in a spiral from the edges to the center.
- You spray carbon dioxide using the same principle.
- As the frost disappears, the metal straightens, subject to deformation forces arising from temperature changes.
Leveling in this manner may damage the paintwork. And the older the car, the higher the likelihood of such an outcome.
Small dents
Damage with a diameter of up to 1.5 centimeters can only be pulled out, since they are smaller than the hammer head and aiming along the edge is very problematic. Pulling is carried out with a bolt or screw with a head of suitable diameter and shape. It needs to be sanded to the desired configuration and polished.
The work area is degreased (as is the bolt head), after which the glue gun is used. After gluing the bolt, add glue on top, for reliability. The thread will help secure something like a handle or eyelet. The bolt is pulled behind them with whatever is available. But this must be done carefully, in several stages, constantly monitoring the process. The bolt may come off. Remove the adhesive with a solvent and repeat the process until the dent is straightened.
For such work, there is a professional tool - a set of polymer fungi of different sizes and shapes, as well as strikers. The firing pin consists of two parts - something like a bolt, the lower part of which hooks onto the figured protrusion of the fungus, and a massive bushing that slides along the stem. At the end of the striker there is a wide protrusion against which the bushing strikes.
Straightening a car body is an art. The master must feel the material and be able to predict its behavior. The skill is formed by long hours of training. Don't be afraid to put your hands in, though. The value of having such a skill will pay for all the costs. We advise you to initially practice on some car frame.
During the operation of the car, scratches, chips and dents appear on the body. The reason for their appearance can be both negative environmental factors and careless driving. Chips and scratches are painted over. Repairing and pulling out dents on a car is carried out using various methods and devices that allow you to eliminate metal jams.
Review of spare parts prices
| Name/article | Price, rub.) |
| 00001003833121 Bolt M5x10 with serrated shoulder | From 100 |
| 00001003831801 M5 nut with serrated shoulder | From 100 |
| 00001002624101 Washer 5 mm | From 50 |
| 00001003275901 Screw M6x10 | From 50 |
| 00001002605371 Lock washer 6 mm | From 50 |
| 21230610542000 Lock cylinder | From 550 |
| 11180610515000 External front right handle | From 650 |
| 11180610515100 External front left handle | From 650 |
| 21900610518000 Inner front right handle assembly | From 950 |
| 21900610518100 Inner front left handle assembly | From 950 |
How the back door on a Lada Kalina should work correctly (video)
Many owners of Lada Kalina cars are faced with the problem of opening the rear doors. This occurs on both old and brand new cars, and this defect can be attributed to a manufacturing defect. But, apparently, no one at the factory thought of modifying the handle mechanism. Moreover, there is no such problem with the front handles, it only exists with the rear ones.
Recently, on my Kalina, due to constant excessive force when opening, the rear door handle broke off. Since repair kits for this part could not be found, I had to buy a new one assembled. Its price is 330 rubles. To replace you will need the following tool:
- 8 mm head
- Extension
- Ratchet or crank
Front door diagram. Catalog numbers of parts
Dimensions of the side glass on the Lada Grant
Lada Granta front door wiring diagram
Soundproofing front doors on Lada Granta
The pasting process is not complicated.
- 2 sheets of Visalis AL, dimensions 460x700 mm or more in reserve;
- 1 sheet of Bitoplast, size 1000x700 mm;
- half a meter of corrugation for wiring the front door;
- degreaser;
- hair dryer or any other heating device;
- gloves;
- tools, screwdrivers;
- rags.
Algorithm of actions
- After installing the structure (the process is described above), degrease the surface, clean it of dirt and corrosion.
- At the same time, we evaluate the condition of the vibration-isolating gasket and cover it with a new one.
- Cut Visalis into the required sizes.
- We lubricate all driving mechanisms and hinges.
- We isolate all possible sound sources.
- We cover the surface of the upholstery with vibration-absorbing material.
- We heat the Bitoplast and press it against the metal surface of the door.
If the algorithm is followed, the doors will close silently, as if in a foreign car.
Replacing front door seals on Lada Granta
The process of dismantling the structure is described above; we follow its points. After installation by screwing it onto the hinges, we proceed to assembly and filling the inside. Instead of worn rubber seals, we install new ones. This completes the self-replacement process.
Bottom adjustment
To adjust the gaps in the lower part, it is necessary, as in the previous case, to apply force.
- Lower the window completely until it stops.
- Close the door by lightly hitting the bottom of the door with your palm.
- Repeat the procedure until the gap reaches the recommended value.
It is very important not to overdo it when performing these steps so as not to bend the part.
This method of adjusting Grant doors is used during the final stage of car assembly. Any violation of the geometry results in the doors becoming difficult to close.
Adjusting a door with a large gap at the top
Before adjusting the lock, the gaps must be adjusted correctly. This is done by applying physical force to the door leaf, through correcting the position of the response bracket, which is located at the end of the doorway opposite the locking mechanism.
It is very important to pay attention to the gap that exists between the upper edge of the door and the rubber seal located in the upper part of the body and called the drain
- If the door fits too tightly to the drain, it will not close well and rust may form.
- If the gap is large, the geometry of the body is disrupted and an additional source of wind noise may appear. It is possible that moisture may get inside the cabin during inclement weather.
If the door fits too tightly to the drain and there is no gap, then the work algorithm is as follows:
- Lower the glass all the way down.
- Close the door with one click.
- Grasp the top edge with your hands.
- Gently, without applying too much force, pull the door until the required gap appears.
If the gap is too large, do the following:
- Lower the glass down.
- From the inside, rest your knees against the sheathing and gently pull forward.
Modification of door lock Grants
Procedure:
- Insert a stopper into the lock to prevent it from closing.
- File off, slightly rounding the sharp ends of the lock prong (without fanaticism).
Hand brake device Lada Granta
Theoretically, the Lada Granta should have replaced the outdated VAZ 2107 a long time ago, but for various reasons its release was delayed. The car was conceived as the cheapest in the VAZ model range and this idea was fully realized. The Granta's brake system differs little from the brakes of classic Lada cars, even in layout - the same disc brakes at the front with a floating caliper, the same drum brakes at the rear.
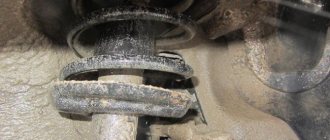
The design of the Lada Granta brake mechanism does not even provide for the simplest system of automatic adjustment of the gap between the block and the drum
The handbrake drive is also the simplest, but the brake mechanism itself does not even provide a primitive system for automatically adjusting the gaps between the block and the drum. The force from the handbrake lever is transmitted directly through a cable with an equalizer to lever 9 in the brake mechanism. Consequently, after wear of the friction lining 8 , even by 2-3 mm, the handbrake cable has to be tightened.
Brake mechanism with hand brake drive
Again, theoretically, a threaded rod with an adjusting nut (item 6 in the photo below) could easily be placed in the cabin, but this would require the use of additional parts or changes to ready-made factory stamps. Therefore, VAZ engineers decided not to worry and leave the design as is. To adjust the cable tension, the driver must approach the adjusting nut from below, which is not always convenient, especially in cold or wet weather. In addition, the threaded rod is constantly surrounded by dust and moisture, so it rusts, and it is not so easy to get to it from below.
Operations for removing the outer handle of a Lada Granta
1. Remove the door trim (see the article “Removing the door trim of a Lada Granta”)
2. Use a screwdriver to pry up the plastic end of the lock switch rod and move it out of engagement with the lock switch lever.
3. Using a screwdriver, pry and disconnect the lock drive rod from the outer handle lever.
4. Unscrew the nut that secures the front handle to the door panel.
5. Remove the rear bolt securing the outer lock drive handle to the front door.
6. Pull forward in the direction of vehicle travel and remove the outer lock drive handle from the opening in the outer door panel.
7. Remove the outer lock drive handle.
8. If it is necessary to replace the switch mechanism, use a screwdriver to press the lock cylinder latch and remove it from the handle.
9. Install the removed parts in the reverse order of removal.
Rice. 1. Location of the lock (D), lock drive rods, outer (B) and inner (8) front door handles (A): 1 - outer panel of the front door; 2 — lock switch rod; 3 — external handle of the lock drive; 4 — door glass; 5 — door lock switch button; b - door trim; 7 — rod of the lock switch button; 8 — door lock; 9 — internal handle of the lock drive; 10 — rod of the internal drive of the lock; 11 — guide of the lock switch button; 12 — rod of the external handle of the lock drive; 13 — nut securing the external handle of the lock drive to the outer panel of the door; 14 — lock fastening screw
The front door lock on a Lada Granta car is removed for its repair or complete replacement, as well as when carrying out various works in which its presence will interfere with the progress of their implementation. Prepare a standard set of tools and perform the following sequence of actions:
- Remove the decorative door trim.
- After that, use a Phillips screwdriver to unscrew the screw and remove the inner handle of the lock.
- We disconnect the drive rod from the handle and remove it from the plastic holder on the door panel.
- Disconnect the drive rod from the outside handle and the lock switch.
- Disconnect the lock lock button rod holder from the door panel.
- Pull out the plastic holder of the wiring harness and disconnect the connector from the lock.
We unscrew the screws securing the lock to the door frame and lower it into the niche.
- Having disconnected the rod of the inner handle from it, remove it.
- Make the necessary repairs, then install in the reverse order.
At this point, the repair work to remove the front door lock on the VAZ 2190 has been completed.
Sources
- https://1ladagranta.ru/obsluzhivanie/regulirovka-zamkov-dverej.html
- https://www.autosecret.net/lada-granta-vaz2190/kuzov-i-salon-lada-granta/1210-snjatie-ruchki-dverej-lada-granta
- https://remladavaz.ru/kak-snyat-zamok-perednej-dveri-lada-granta
Instructions for removing the trim from the front and rear doors of Lada Granta
Before we get started, let's collect everything we need.
Tools and materials
- flat blade screwdriver;
- Phillips screwdriver;
- a plastic spatula for removing the trim (it can be purchased at any VAZ specialized store);
- set of plastic door latches.
The process of properly removing trim from the front door of a Granta
- The hood of the car is opened and the negative terminal is removed from the battery.
- The trim on the front door handle is carefully pryed off with a plastic spatula and removed. This allows access to the top fastening screws of the casing.
The trim on the Granta front door handle can be removed manually
The screws from under the door handle of the Lada Granta are unscrewed with a Phillips screwdriver
Two self-tapping screws from the upper recess of the Grant door are unscrewed with a Phillips screwdriver
The main points about door locks are discussed in this video
As a result of performing such work, the doors should have the same gaps, not be exposed outside the body and not fall into it; if you have problems with the front doors, we adjust them in the same way.
Please note that when making adjustments yourself, the most important thing is not to overdo it and not to dent the doors or damage the paintwork. If you have any doubts about doing the work yourself, it is best to contact a dealer or a specialized auto repair shop.
Features of a cable gearbox on the Lada Granta
If you compare the 2180 and 2181 gearboxes, they are very different. In the old box, the driver made a lot of effort to shift, especially on previous generation cars. This was due to the fact that the previous manual transmission was based on rigid rods. A strong vibration emanated from them, transmitted into the cabin from the gearbox.
The transition to cables eliminated a number of design flaws. The gearbox now has a short stroke, making gear shifts faster. The gearbox itself consists of cables, a translator, a switching mechanism, jet thrust and a drive control device. The clutch disc has a larger diameter (215 versus 200 mm).
The main advantages of the new gearbox:
- The volume of oil poured into the box has been reduced (to 2.2 l).
- Different synchronizers were installed in first and second gear, making shifts quite easy.
- Due to the cables, vibrations and noise have been reduced. The switching itself is now clearer and without extraneous sounds. The gearbox gate on the Granta has also become quieter.
- The gearbox has become better behaved in winter conditions.
To change Priora handles, you should approach the matter with the right set of tools. So, to work on replacing the Euro pen you will need:
- head "8";
- flat screwdriver;
- ratchet;
- extension.