Gear shift
This position is recommended when ascending and descending very steep slopes. On the one hand, effective engine braking is ensured, on the other hand, constant gear changes are eliminated, leading to overheating of the transmission fluid.
This position is recommended when driving on mountain roads. This makes better use of engine power and increases the engine braking effect. The transmission automatically shifts between first and second gears. Third and fourth gears are locked.
Causes and solution to the problem of unstable engagement of first gear on Priora
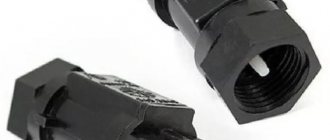
- slotted screwdriver;
a set of heads for unscrewing bolts;
A set of tools for dismantling and repairing the VAZ Priora gearbox
VAZ Priora cars replaced the flagships of the domestic manufacturer. Recently, more and more adherents of Russian cars are switching to Priora. But in these vehicles, as in any other, certain malfunctions may occur, especially when it comes to the gearbox. Today you will find out why first gear is difficult to engage in Priora and how to fix this problem.
How to turn on reverse gear on a Prior
Hello everyone, I have this problem on a Priora 2012 when I engage reverse gear, a crunching noise occurs, and not always, but it’s very annoying, where should I look? Mileage 30,000. Thank you for your attention). How to turn on reverse gear on a Prior.
if the basket is tired of the clunk on the rear you won’t get rid of it at all and if you don’t change the crunching sound when moving, the second one starts at high then at low engine speeds when switching and then after three times the third one starts crunching
Why won't reverse gear engage? Causes and solutions
So, reverse gear does not work, what should I do ? Well, for starters, it would be nice to figure out how serious the damage is. To do this, you need to remember how the box behaved in recent days. If nothing has caused concern, then there is hope that not everything is so bad: the transmission is still a complex and reliable element, with a large margin of safety - and it doesn’t just break out of the blue. If reverse gear does not engage, there may be several reasons. We will move from simple to complex.
As a rule, all these breakdowns are accompanied by extraneous noise during operation, which is difficult to ignore. Repairs will require dismantling the gearbox and the participation of specialists. Your task is not to delay your visit to the service station. This will save you money and possibly prevent irreversible damage.
Why reverse gear does not engage (or is difficult to engage) on LADA
The cause of the defect may be a defective spring of the ratchet mechanism located in the “interior” tip of the clutch cable. In this case, it should be replaced. And before replacing, you can tighten it after several presses on the clutch pedal so as not to torment the box.
Does reverse gear rarely engage the first time, and the process itself is accompanied by a crunching sound? Owners of not only Lada Priora, Kalina and Grant models, but also modern Lada Vesta and XRAY cars face similar problems. Let us tell you what is the cause of this disease.
Crunching sound when engaging reverse gear on a Priora
but don’t think (without upholstery) I know that there is no synchronization on the back, and how to turn it on. I do so as you described - the effect of such inclusion is described in my first post.
I think it’s worth reading how the gearboxes on VAZs are arranged (as well as on other cars). There is no synchronizer in reverse gear, so it should only be engaged when the car is stationary and after 2-3 seconds after turning off the “direct” gear.
Troubleshooting the Priora gearbox and the algorithm for dismantling the unit
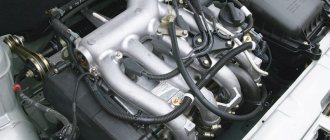
Automakers around the world do not stand still in terms of technological progress. Every year, cars appear that surprise with their innovations in equipment and characteristics. AvtoVAZ does not produce high-tech cars, but from time to time the manufacturer pleases with updates to certain components. For example, the VAZ 2170, better known as the Lada Priora, is now equipped with an updated manual transmission. Its main feature is the main gear and synchronization with the differential.
The shafts use two types of bearings: at the back - ball type, at the front - with rollers. The oil sump is designed to redirect the flow of oil into the hollow part of the shaft. The differential design is two-satellite. The main gear gear is attached to the flange of its box.
Reverse gear does not engage on Lada Kalina: reasons and solutions
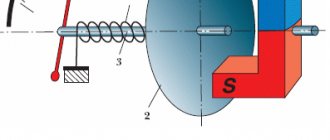
This doesn't happen often because the part is quite reliable. The solution is obvious: you need to remove it and check it. To do this, you need to remove the cover mounted on the gear shift lever. Next, you should find the connector that is connected to the lever. It is carefully disconnected, and its contacts are closed with some kind of wire (an ordinary paper clip, which can be attached to the connector with a piece of electrical tape, is also suitable).
After closing the contacts, you must try to turn on the reverse gear again. If it succeeds, then the reason was in the magnetic switch, and it needs to be changed. Another option is possible here: the plastic ring itself, to which this switch is connected, does not rise high enough (usually this is due to its wear).
So before disassembling the lever and removing the switch, it makes sense to make sure that the ring rises freely and to the required height. If the ring sticks, it must be replaced.
This is the first element that you need to pay attention to in case of breakdowns related to electronics. In the Lada Kalina car this fuse is designated F21. Its rating is 10 A, and it is located in the main fuse block of the car (there it is eighth from the left). The fuse is removed and its jumper is inspected.
If it is broken, the fuse is replaced with a new one. Then the car starts and an attempt is made again to engage reverse gear. If the new fuse blows again, this indicates that there is a short circuit in the solenoid's power supply circuit, therefore, not only the fuse will have to be changed, but also the solenoid itself.
Why are gears difficult to engage?
First, we suggest finding out what is the reason why reverse or first gear is sometimes or systematically difficult to activate.
If, when you press the clutch pedal and try to turn on the speed, a crunching sound is heard from the car’s transmission, this indicates problems in the operation of the unit.
The reasons why the gear is difficult to engage may be different, let’s consider them in detail:
- If it is difficult to switch between first and second gears, the problem may be that the clutch is not fully activated. On a VAZ Priora, the reason often lies in damage or disconnection of the cable on the pedal. This problem can be identified by diagnosing it. If the pedal is sunk into the floor, the cable must be replaced.
- Failure of the drive rod for controlling the gearbox activation mechanism.
- Damage or incorrect operation of the transmission's torque rod.
- Loosening the fixing bolts on the gear selector rod lever or on the hinge. It is necessary to determine the reason why the screws may have become loose.
- Making mistakes when adjusting the gear activation drive.
- Failure or damage to plastic components that are installed on the Lada Priora gearbox control drive.
- Mistakes made when adjusting the scenes. This unit on the VAZ Priora is designed to connect the gearbox to the selector in the car interior. As a result of long-term use, the plastic bushings on the rocker could wear out.
- Failure of synchronizer elements. These mechanisms are made in the form of brass bushings, which are used for more simplified gear shifting. Brass is a soft metal and will wear out over long periods of use. If the first and reverse gears are difficult to engage, and the reason lies in the synchronizing elements, when you try to change gear, an unpleasant crunching or grinding noise will be heard. When there are no problems with activating gears, but there is an uncharacteristic sound when the gearbox is operating, then in the future you will encounter difficulty changing gears.
- Failure of bearing elements due to damage or wear. This type of malfunction is not common, but over time the bearings wear out, so every car owner can encounter it. If a part breaks, one of the transmission pulleys is no longer able to rotate, which leads to problems when activating speeds. Usually we are talking only about the first gear.
- Failure of the box shaft. This unit is not subject to wear or critical loads during its entire service life, but it may break due to a manufacturing defect. Even minor errors made by the manufacturer when assembling the vehicle can lead to shaft failure. Because of this, the car owner will face the problem of not only difficulty engaging first gear, but also a breakdown of the transmission unit as a whole.
- The reason may lie in the car's engine mounts. The power unit hangs on them and is connected to the transmission. During long-term use of the car, the fastening fails or is unscrewed from its seat. This leads to sagging of the car engine or transmission. As a result of subsidence, damage to the backstage may occur.
- Failure of the clutch fork.
- Clutch basket malfunctions. This assembly breaks due to wear or damage to the petals. The “spider” of the basket can also fail. This element is a bearing mechanism that is fixed on several stretch marks. If they tear, they cannot fully stay on the basket, which leads to difficulties in changing gears. Due to damage to the paddles, it will be impossible to release the clutch disc. If the disk itself is worn out, this will lead to the appearance of wear. When the wear of the part is too great, it will be impossible to switch on the speed.
- Damage to the ball joint or spherical spring.
- Often such problems occur as a result of changing the transmission fluid. The main feature of the Priora gearbox is that the gear ratios in the first and second stages of the unit differ as much as possible. When the driver changes gears, it is necessary to wait for the input shaft to slow down during the process. If it takes longer than usual to slow down, it may be due to low viscosity lubricant or slight underfilling.
User Sergey Tsapyuk made a video in which he talked about the problem of poor gear engagement on a Priora.
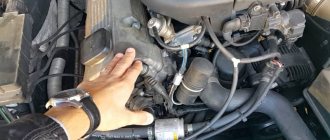
Engine mounting cushion
Oddly enough, this malfunction can significantly affect the quality of the gearbox. Moreover, due to bad airbags, gears are not engaged when the engine is running, both with a manual transmission and an automatic transmission. On some cars, separate supports for the box are installed. Check their integrity and replace if necessary. It is very simple to check - the engine should not jerk from side to side when increasing speed and idling. If the cushions “sag,” the motor will break the linkage or the input shaft will jam.
How to fix the problem
If the gearbox on a Lada Priora refuses to work normally, it is necessary to disassemble and repair the unit. Below are instructions that will prompt you to solve some problems.
How to remove manual transmission
Dismantling the transmission is carried out as follows:
- Drain the gearbox oil. Drive the car onto a flat surface, into a garage with a pit or onto an overpass. Climb under its bottom and find a plug for draining the working fluid; place a container under the hole into which the “working off” will be drained. Unscrew the bolt with a wrench and wait about one hour until the fluid is completely out of the system. After this, the transmission is dismantled.
- The next step is performed in the salon. Under the control panel there is a fastening nut of the cable housing; it is connected directly to the pedal. Unscrew the nut with a size 8 wrench. After unscrewing, you can remove the stop from the bracket.
- Remove the locking assembly, as well as the housing of the driven pulley lining wear compensation mechanism; these components are connected to the so-called pedal pin. To dismantle, use a screwdriver with a Phillips head; the tool must be used to pry off the mechanism. Remove the plastic bushing from the pedal and inspect it carefully. The presence of damage and defects indicates the need to replace the part.
- Then the seal on the cable sheath is removed; this component is located in the engine compartment. Remove the tip from the fork by moving it forward in advance as the machine moves.
- Unscrew the nut that secures the tip to the bracket in the gearbox. This nut will require a 17mm wrench. Remove the cable end from the fastening hole. After this it can be removed. Remove the plastic plug and remove the plug with wires from the speed controller.
- Unscrew the three screws securing the crankcase cover; this will require a 10mm wrench. The cover is removed. A reliable support should be placed under the power unit of the machine. Unscrew the nut that secures the rear of the engine mount to the bracket; this will require a 15mm wrench.
- Remove the upper limiter of the rear engine mount cushion. Unscrew the screws that secure this element to the car body. Remove the cushion along with the restraint device.
- Unscrew the nuts securing the rear motor mount to the transmission. To unscrew, you will need a 13mm wrench. The number of nuts depends on the year of manufacture of the car. Using a size 8 wrench, unscrew the upper fixing screw, and then remove the rear support bracket.
- Remove the plastic plug and remove the block with wiring from the reverse optics activation mechanism. Unscrew the screw that secures the gear shift device hinge on the rod; this is where the speed selection takes place. To dismantle, use a 10mm wrench.
- Unscrew the screws securing the torque rod. Also unscrew the bolts that hold the front wheel hubcaps and remove them using a flat-head screwdriver. There are rubberized seals on the removed parts; be careful not to lose them.
- Using a 30mm wrench, remove the wheel retaining screws and wheel nuts. When performing this task, the vehicle must be on the ground and not on an overpass or lift. Secure the vehicle in place by lifting the parking brake lever. Support the rear wheels.
- Using a jack, lift the front of the car and remove the wheels. Then completely unscrew the hub nuts and remove the washers installed under them. Dismantled parts (we are talking about nuts) must be replaced. Disconnect and remove the rotating devices from the suspension arms, before doing this you should unscrew the mounting screws, use a 17 key. Remove both drives by pressing them out of their seats. Place a support under the gearbox to avoid damaging the unit.
- Unscrew the screws securing the transmission to the motor; this will require a 19mm wrench. Then move the unit as far as possible. The gearbox removal procedure is complete. Assembly is carried out in reverse order.
How often do you change the clutch disc?
There are no specific regulations here. Clutch disc life is a subjective concept. It all depends on the load - whether you used a trailer, how much you overloaded the car and how often you drove off with wheel slipping. Each blow from the flywheel falls precisely on the clutch disc, because its main task is to transmit torque, and to do this as smoothly as possible. The resource can range from 30 to 200 or more thousand kilometers. The service life directly depends on the driving style and vehicle loading conditions.
Video “How to solve the problem of poor gear shifting?”
The Avto-Blogger channel made a video that describes all the nuances of poor gearing in a car when the engine is running and gives recommendations for solving such a malfunction.
I've read a lot about this in the last hour and am confused about what needs to be done. And my situation is the following, I squeeze the clutch, the speed is tight... but it turns on (but very hard) with the second one in the same way, I also remember the words of the master at 15 thousand like turn it on through the second one), so now it’s not possible to turn it on through the second one, well, if it does to overcome this tight inclusion, then the subsequent times 1st and 2nd come in so that it breaks into a smile (very easily), there used to be moments when if you switched super sharply there was a crunch, for example from 1st to 2nd, but somehow I got used to it and everything went away, oil in korobos it is replaced by semi-synthetics.
Traction and link
If you have a front-wheel drive domestic car (nine, Priora, etc.), and the gears are difficult to engage with the engine running, you should pay attention to these two details. Often, when starting from a standstill, the gearbox lever begins to rattle convulsively (this is especially true for the Lada Samara family of the first and second generation). The link flies out of its fastenings. As a result, gears are difficult to engage when the engine is running. The way out of the situation is to replace the elements with new ones. But this should only be done if you are really convinced that it is the rocker that is faulty by looking under the bottom of the car.
Why might there be such interruptions?
The gearbox of any car is one of the most important components of the vehicle. Breakdowns in it can occur both due to improper operation and due to driving on bad roads. If on your Priora the first gear does not engage well or does not engage at all, then this is due to a breakdown of the gearbox.
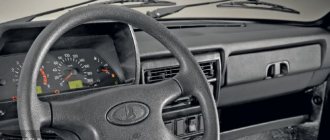
VAZ Priora car
If your car was purchased second-hand and not from a showroom, then there is nothing to be surprised about. In any car, sooner or later the problem of unstable gear shifting may arise. Moreover, if at the beginning of the problem the speed is turned on, but poorly, then in the future the gearbox lever may not respond at all to the driver’s attempts. Of course, this is not very pleasant, because not every car enthusiast can move from a stop in second gear, and the situation on the road does not always allow this.
Let's consider the main malfunctions that may occur when it is difficult to change gears in a VAZ 2170 car:
- incomplete disengagement of the clutch. On Priors, the mechanical clutch cable can fly off. This can be determined very quickly: if the cable breaks, then the clutch pedal in the car will simply be recessed into the floor;
- failure of the gear drive control rod;
- failure of jet thrust;
- the fastening screws on the hinge or lever of the speed selection rod have become loose for some reason;
- incorrect adjustment of the gearbox speed shift drive;
- The service life has expired or the plastic parts in the gearbox control drive have failed;
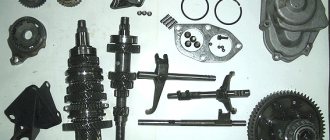
VAZ Priora gearbox disassembled
- the link is poorly adjusted. This device in the car performs the function of connecting directly the gearbox with the lever in the cabin. Also, the plastic bushings on the rocker may wear out;
- synchronizer malfunction. Synchronizers are brass bushings designed for easier gear shifting. Because brass is a soft material, it can wear away over time. To understand that it is the synchronizers that have failed, when it is difficult to switch gearbox speeds, you will regularly hear an unpleasant crunching or grinding noise. If you only hear sound from the gearbox, but the gears are switched without problems, then be prepared to soon encounter difficult gear shifting;
- bearing failure. The problem is not so common, even rare, but nevertheless occurs. If the manual bearings are jammed, then one of the gearbox shafts may stop rotating, as a result of which not all speeds can be engaged. As a rule, this problem only appears when first gear is engaged;
- gearbox shaft malfunction. This element is not subject to physical wear or heavy loads, but the problem may be a manufacturing defect. If minor errors were made during its installation at the factory, the shaft will fail. In this case, not only may it be difficult to engage the first gear, but the entire gearbox may fail. As a result, the vehicle owner is subject to expensive repairs.
It’s worth noting right away that there is no way to determine a faulty gearbox shaft or bearings at home. Only a competent technician at a service station with expensive specialized equipment will help you do this. Therefore, if you encounter problems shifting the gearshift lever, then you can only hope that the problem lies in the adjustment.
Gearbox lever of a VAZ Priora car without a casing
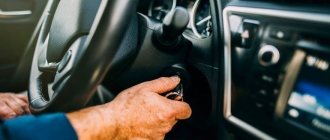
Release
The design of the clutch system includes a special release bearing. It is he who presses the petals of the basket under the influence of a hydraulic drive (when you press the pedal). This bearing disconnects the disc from the basket and flywheel. As a result, the motor operates separately from the box. If you release the pedal, the element will connect the two nodes again. Torque will be transmitted as the dry disc comes into contact with the flywheel. If the gears do not engage with the engine running, most likely the release bearing has become unusable. What are the signs of a problem? You can determine the performance of a bearing by ear. To do this, gently press the pedal and then release it. There should be no noise, whether the clutch is off or on. We also note that to replace the release valve (even on rear-wheel drive cars), you will have to completely remove the box with the bell. This element is installed as in the photo below.
After replacement, the noise should disappear. But if even after this the gears do not engage with the engine running, it is necessary to inspect the clutch basket itself.
What to do?
Next, we will look at several ways to solve the problem that can be done at home. The process of repairing a transmission is not such a simple task, so if you are not confident in your abilities, then do not try to do it yourself. It is better to contact specialists, because if you make even a small mistake, it can develop into more serious problems in the future.
Tools
Regardless of what kind of breakdown you have, prepare in advance all the necessary tools that you may need to disassemble the gearbox:
A set of tools for dismantling and repairing the VAZ Priora gearbox
Step-by-step replacement instructions
Removing the manual transmission
- First of all, before disassembling the gearbox, it is necessary to drain the transmission fluid from the gearbox. To do this, find an oil drain hole under the bottom of the vehicle, place a previously prepared container and unscrew the plug. Wait 40-60 minutes until the oil is completely drained. Now you can begin dismantling the gearbox.
- To begin, find in the cabin under the instrument panel the fastening nut of the clutch cable housing, which is connected to the pedal. It needs to be unscrewed. To do this, you will need an "8" socket or wrench. When the nut is unscrewed, remove the stop from the bracket.
- Then you need to dismantle the locking element and the housing of the wear compensation device for the driven shaft linings from the clutch pedal pin. To do this, take a slotted screwdriver and pry out the element.
- Now remove the plastic bushing from the pedal and then inspect it. If the bushing shows signs of wear or any physical damage, the bushing should be replaced. Before installing it directly, take “Litol” and lubricate the element so that it does not become dry.
- Next, dismantle the rubber seal of the clutch pedal cable sheath - it is located in the engine compartment.
- Then you need to remove the end element from the cable fork, after pulling it forward in the direction of travel of the vehicle.
Transmission shafts
This is one of the rarest reasons, but it should not be excluded.
So, the gearbox shafts themselves fail. For example, second or fifth gear refuses to engage. The degree of wear can be determined only after dismantling the transmission and completely opening the elements. The shafts are not sharpened, but replaced with new ones. That's all.