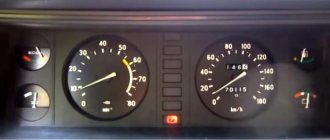
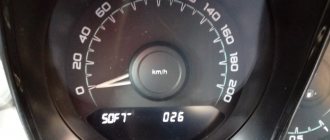
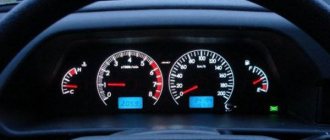
All lighting devices have light bulbs in their design. The dashboard on the VAZ 2107 is no exception. On these models, the manufacturer installed traditional incandescent lamps with tungsten filaments. The service life of such light bulbs is not long and under the influence of external factors, mainly vibration, they burn out. And at night, neither instruments nor indicators are visible on the panel, thereby causing inconvenience in operation.
There are two options to get rid of this disease. Stop by a service station where technicians will change the light bulbs, or do it yourself. The first is expensive, you don’t know what you’re paying for. A second one is proposed. There is no difficulty in this. If you have a car, it means you have the skills to hold a tool in your hands. We will consider everything regarding the procedure for performing the work of replacing damaged light indications and backlights on the domestic Lada in this presentation.
Purpose of additional lighting
The main purpose of the backlight bulbs in the dashboard of a car is a comfortable display of the main sensors, allowing the driver, regardless of the degree of illumination in the cabin, to receive reliable information about the main characteristics of the working units and systems of the car during operation. Depending on their location in the electrical circuit, backlight lamps perform the following role:
- Message about a sharp decrease in pressure in the engine lubrication system.
- Reduction below the maximum permissible level of fuel in the fuel tank.
- Displays the initiation of ignition of the turning lights.
- Illuminated dimensions.
- Turning on the high beams.
- Emergency condition of the brake system.
- Connecting emergency lights.
- Battery low display.
- Engaging the handbrake.
- Awareness of the state of the power unit.
- Opening the air supply system.
Modern dashboard lighting systems may contain several dozen bulbs. Some of them are responsible for monitoring events in the most important components of the car, others are simply illumination, and the third notifies about the operation of auxiliary systems and mechanisms. As a rule, if just one element fails, the entire “tidy” stops working partially or completely. To restore its functionality, it will require disassembly, diagnostics and repair.
Note! The color of the backlight directly depends on the importance of the signaled devices. For example, a malfunction is indicated in red, and non-emergency information is displayed in orange or green.
Advantages of LED lighting
The modern automotive market offers users a huge number of different types of lighting sources that can be used for car tuning. It must be taken into account that not every car needs this, since most manufacturers today equip cars with diode lighting during production.
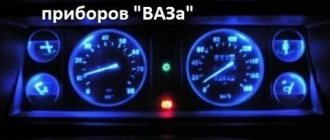
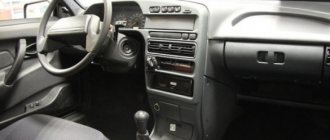
Photo gallery “Different dashboards”
However, in many cars, the backlight of the speedometer and other instrument panel elements is not as effective as we would like, so car owners decide to change it. In particular, this is especially true for older vehicles produced when LED lighting was not as common.
Why many car enthusiasts choose LEDs:
- Due to the small size of the light sources themselves. This makes it possible to install a light bulb anywhere on the control panel.
- Easy to solder diode components together for their further connection. But you need to take into account that if you are dealing specifically with a diode strip, then to perform this task you should follow some rules.
- The ability to achieve full illumination even with the use of a limited number of diode elements.
- One of the main advantages is that the car owner can organize both regular white and colored lighting. You can use yellow, red, green, blue light sources. In addition, if one of the components fails, it can be easily replaced if necessary.
- Diode lamps consume significantly less electricity. This is especially true for cars with anti-theft systems that operate on a battery (the author of the video is the MrMacyuk channel).
Why and how often to change the backlight
Dashboard lighting bulbs are replaced primarily when they burn out. Sometimes the owner may not like the color scheme. In this case, the light sources are also reinstalled. Often people try to replace them with brighter and more durable led elements. The specifics of such work require knowledge of the basics of electrical engineering and the ability to correctly calculate the characteristics of the devices used. Otherwise, you can simply damage the equipment. Therefore, if you have insufficient experience, it is better to contact a specialized car service center for help.
How to change the color of the instrument cluster illumination
1. Use SMD of the desired color. For example, use white LEDs to illuminate one part of the panel, and blue LEDs for the other.
2. Use a light filter (electrical tape or film of different colors) together with white LEDs. We stick it on the desired area, as a result of which we get the illumination of the desired color. To change the color, you do not need to use a soldering iron, just disassemble the instrument panel and stick a film of a different color.
It is worth noting that the hands have an orange coating. To change the illumination of the hands, wipe off the varnish with nail polish remover and, if necessary, apply a new varnish of a suitable color. Another option is to use LEDs for the arrows of the desired color.
You can change the backlight of the screen (display) not only by replacing its LEDs, but also by turning the film over. First, we tear off the film from the display, clean the remaining adhesive with a solvent and glue the film on the back side. This results in an inversion of the panel display:
3. Use RGB-SMD LEDs. If you want to change the backlight color at once. In this case, you will have to additionally output switching control.
Which light bulbs are suitable
In most modern cars, the following three types of light bulbs are used to illuminate the dashboard:
| Lamp type | Peculiarities |
| Flask only | This light bulb is easily inserted into a socket already located on the device. The main advantage is the possibility of constant reinstallation when the old ones burn out, which in the end will be beneficial. An example of this type is the Philips BlueVision Ultra. It is installed both in the dimensions and in the dashboard. |
| Flask with cartridge | In production, the flask with leads is inserted into the cartridge and welded. A burnt-out light bulb will have to be replaced along with the socket, which is quite expensive. |
| LED | Long-lasting LED elements are also made with removable and non-removable bases and can last about 40-50 years without burning out. However, they are more expensive than regular light bulbs and produce a strictly cold light, which is not always comfortable for visual perception. |
Organization of backlighting of stove control buttons
The second most popular situation in organizing the lighting of the dashboard in a car is the illumination of the stove control buttons.
Stove control buttons
Foil reflector
The organization of the backlight of the console buttons intended for controlling the stove is carried out as follows:
- First, remove the handles, as well as the glass from the control unit;
- We make a reflector out of foil. It will need to be secured under the removed glass;
- then carefully unscrew the lower part of the console. Under it there will be a cartridge with an old light source, which must be replaced;
- replace the old light bulb with an LED;
Ready-made console lighting
The simplest way to create backlighting involves the following manipulations:
- take the button out of the console;
- we disassemble it into its component elements;
- inside such a button there should be a light bulb that changes to an LED;
- if necessary, you can remove the light filter from the button or combine it with a new diode glow. As a result, you can get a new beautiful and unique shade.
As you can see, illuminating the console designed to control the stove in a car is quite easy.
Replacement instructions
To replace the light bulbs on the dashboard of any car model, you will need to dismantle its main parts, especially the upper decorative elements. The general instructions are as follows:
- Dismantle the instrument panel by removing the trim and unscrewing the mounting screws.
- In some models, the steering wheel must be moved to the down position.
- After removing the cover, you need to unscrew the screws securing the panel itself.
- After this, pull the instrument panel towards you and disconnect the power cable connector.
- The instrument panel itself must be carefully placed face down, not forgetting to place a soft lining so as not to disturb the instrument needles.
- Use a tester to identify burned out light bulbs and replace them with new ones.
In order to unscrew the light bulb from the socket, you need to turn it counterclockwise a quarter turn. After installing the new one, you need to reassemble the panel in the reverse order and check its serviceability.
Deep revision
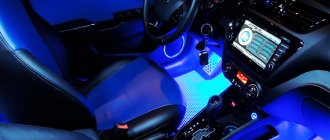
It is also advisable to add lighting - using an LED strip. You can take a white one, or a colored one. Preferably something that is not too harsh on the eyes – perhaps blue or green, depending on the owner’s taste.
Today, blue light is the most popular - it gives good visibility of readings on all instruments, but does not interfere with the driver’s ability to see the road clearly.
Another good idea is to make the arrows glow a different color. To do this, they need to be cleaned of old, red paint, and then painted white.
It could be nitro enamel or, even simpler, white nail polish. A color LED must be installed next to the needle on the instrument scale. The arrow, changing its position, will be colored differently.
Additionally, when using only white light, a colored overlay will help. That is, even without electrical intervention, the colored film overlay will change its appearance.
If possible, the light filter is removed, and the backing is decorated with an overlay, and here you can get creative with different materials and colors (electrical tape, colored tape, colored vinyl film). Such an overlay will significantly transform the panel and make it exclusive.
Main conclusions
Light bulbs in the dashboard of a car are intended both for its general illumination and improving the perception of information at any time of the day, and for the following specific tasks:
- Notification of emergency situations in the operation of particularly critical units.
- Signaling for turning on and off elements of the optical system.
- Display of the operation of additional mechanisms (handbrake, emergency lights).
Bulbs are most often replaced when they burn out, as well as when it is necessary to install brighter and more reliable backlight sources for the dashboard. Lamps can be with a base, socket or without it. LEDs are often installed in the dashboard. Despite the fact that they are expensive, they work an order of magnitude longer than usual. To reinstall them, you will need to remove the decorative trim, unscrew and remove the panel itself. In this case, you need to follow the instructions and recommendations specified in the passport of a specific car brand.
Why LED lighting is preferable
At the moment, there are a variety of products on the lighting market that can be used to illuminate any brand of car.
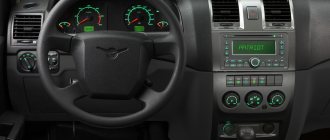
Industrial dashboard lighting
But in most vehicles such additional lighting is absent or incomplete. This situation is especially relevant for older models that were manufactured at a time when LED backlighting had not yet been heard of. When choosing an LED type of lighting, car owners are guided by the following positive aspects of such lighting:
- diodes of this type have small dimensions, which allows them to be installed anywhere on the dashboard. At the same time, they are easily massaged;
- simple soldering of LEDs for different connections between them. Moreover, if the LED strip is re-soldered, then this procedure is carried out according to certain rules, which are also typical for working with individual diodes;
- even a small number of diodes installed on the panel can create a full-fledged type of lighting, sufficient for comfortable driving;
LED glow
This type of lighting consumes a minimal amount of electricity, which is very important for a battery-powered car and its alarm system. At the same time, installing diodes is not very difficult
Here you only need to correctly connect the elements of the lighting system to each other. Almost anyone can do this kind of work with their own hands.
At the same time, installing diodes is not very difficult. Here you only need to correctly connect the elements of the lighting system to each other. Almost anyone can do this kind of work with their own hands.
Removing the instrument panel and preparing for replacement
As mentioned above, when performing any work on electrical equipment, it is necessary to disconnect the power supply from the battery. Including when removing the dashboard and performing manipulations with it.
To remove the panel you will need a minimum of tools:
- Phillips screwdriver;
- flat screwdriver;
- pliers.
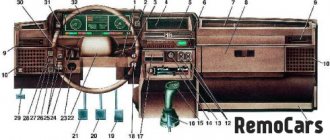
First, remove the plastic tips from the interior heater control levers using a flat-end screwdriver.
Using pliers, unscrew the nut from the trip odometer reset handle.
On the front part of the panel near the interior heater control levers, open the plug using a flat-head screwdriver.
Similar articles
How to remove the instrument panel on a Lada Priora with your own hands: instructions
Using a Phillips screwdriver, unscrew the screw that secures the decorative panel to the car frame.
We move the right side of the panel to the side and towards ourselves. Inside you can see the flexible speedometer drive.
Unscrew the nut by hand and remove the end of the drive cable. Remove the pipe connected to the econometer. Disconnect the electrical wires going to the instrument panel and the three wires going to the interior heater electrical switch.
We turn the panel over together with the decorative trim, turn it over, and unscrew the four screws that secure it to the trim. After this, the panel can be removed and the bulbs that have burned out can be replaced.
Similar articles
- Removing and installing a torpedo on a VAZ 2110 with your own hands
Determining what doesn't work
Before you begin work on removing the instrument panel and changing light bulbs, you need to visually determine which of them are out of order. If the panel is not illuminated at all, there are several options for where to start checking.
Circuit breakers
First, check the fuses; they are located in the mounting block under the hood on the right side (in the photo under No. 5).
Fuse F10 is responsible for the instrument panel.
Brightness control
This is a variable resistor, located to the right of the steering wheel, near the clock. With its help, the intensity of illumination of instruments and control lamps is changed. It rarely fails, but sometimes it fails.
Similar articles
We replace the brake light bulb ourselves
To check the regulator, you need to remove the plastic insert where it is located along with the clock and cigarette lighter. Pry it off with a flathead screwdriver. After this, disconnect the power supply and remove the plastic round handle by pulling it towards you. Using a socket wrench, unscrew the nut securing the regulator to the liner and remove it.
The functionality of the regulator can be checked using a multimeter. If the resistor is faulty, replace it with a new one.
It should be borne in mind that when working with electrical equipment, it is necessary to disconnect the power supply from the battery.
Faulty incandescent lamps
If everything you did above did not produce results, you need to remove the panel and check all the light bulbs.
Failure of incandescent lamps involves burnout of the tungsten filament. In another case, there may be physical impact on the lighting device, after which it will not be able to function.
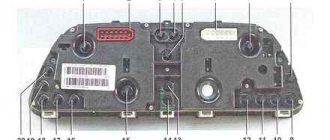
You can check it visually, one by one removing the electronic board from the sockets and inspecting the integrity of the tungsten filament. Or using a multimeter.
To eliminate all the reasons why lighting and signaling devices may not work, it is worth checking the integrity of the conductive paths printed on the electronic board.
Due to environmental influences, they oxidize and break down. It's not difficult to fix. It is necessary to find, clean and solder. It is also worth checking the terminals connecting the wires.
Simple and fast upgrade
In principle, with your own hands you can either completely replace the instrument panel of a VAZ 2110 or tuning the existing one.
One of the quite popular options is replacing light bulbs with LEDs. Moreover, there is no difficulty in this - you need to remove the light bulbs and insert LEDs in their place.
However, there is one small trick: they work well only if the polarity is observed! If the LED does not light up immediately when connected, you need to remove it, turn it 180 degrees, then reinsert it into the socket.
Even such a simple replacement will increase the brightness of the dashboard, but this is not enough, it is hardly worth completing the tuning with your own hands.
Which lamps are best to install in the dashboard?
First of all, when choosing lamps for your tidy, the optimal solution would be to use LEDs. This solution is the most effective, since the diodes shine brightly and evenly, and also have a long service life.
- LEDs are small in size but still shine brightly. Thanks to this feature, they can be installed almost anywhere (in the dashboard area, used for hanging buttons, regulators and other elements).
- Diodes are not difficult to solder, and even a small number of them allows you to obtain uniform and effective illumination.
Using diodes, you can implement both single-color and combined lighting of the instrument panel. To do this, use red, green, blue or white LEDs for the dashboard, and also use them in various combinations.
- Diode lamps have low power consumption, which means less battery discharge when the backlight is turned on, ease of starting the engine when the backlight is on, etc.
LED lighting of the instrument panel can be done as follows:
- Using separate LED elements. This method allows you to organize high-quality lighting; if necessary, you can make tuning (diodes of different colors are installed).
- Using diode strip. In this case, you can change the overall color scheme more easily and quickly (the tape has a self-adhesive base), however, in terms of originality, the tape is inferior to individual diodes. Another disadvantage is the frequent need to replace the entire tape if the diodes in the circuit burn out.
Functionality check
After completing the replacement, install the panel inside the car, connect the connectors, but do not rush into final fixation - you still need to make sure that everything works properly.
To do this, turn on the ignition and see if the backlight turns on. Then check whether the indicator lights responsible for:
- hand brake;
- oil pressure;
- fault signal, etc.
Then test the turn signals, headlights and side lights. If everything is in order, then complete the panel assembly.