In January, AVTOVAZ announced the start of sales of the updated LADA 4×4. The new SUV received a completely new instrument panel with a new climate system, more comfortable seats, the Era-GLONASS system, a number of styling and technical improvements, as well as an improved noise and vibration insulation package on the body panels. Let's find out how much quieter and more comfortable it has become in the interior of the updated Lada 4×4.
An expert from the magazine “Behind the Wheel” compared the noise level inside the cabin of the new Lada 4×4 2021 and the Lada 4×4 of the previous generation (generation).
Basic moments
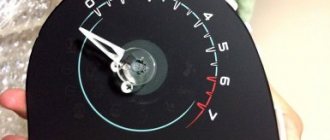
Niva is very noisy
Do-it-yourself soundproofing of the Niva is carried out using special materials:
- foamed noise-insulating open-cell material with a protective aluminized film, the thickness of which is 12 mm - this material reduces the noise of the Niva from the outside and has a low thermal conductivity coefficient. The noise absorption coefficient can reach 95% in the range of 1000 Hz - 2000 Hz,
- vibration-damping bitumen material with protective aluminum foil, the thickness of which is 2 mm. This material is resistant to aggressive environments,
- vibration-damping bitumen laminate - this is the most effective material from the Noisebuster range, the thickness of which is 4 mm,
- bituminized cardboard with a special vibration-damping layer, 1.5 mm thick,
- vibration-damping bitumen laminate, 2 mm thick.
Do-it-yourself soundproofing of the Niva 21213 interior is done using some tools: scissors, ruler, level, marker or chalk, glue, hand gloves and others.
It should be noted that during the operation of the Niva 2121, 21213 and 21214, the issue of sound insulation quality is transformed into the problem of thermal insulation of the interior of these models. This is explained by the long heating of the interior in the winter and poor air conditioning in the summer.
Sound insulation of the roof of Lada Niva (Lada Niva)
1st Layer.
The entire roof surface between the stiffening ribs is covered with
Shumoff M2 vibration insulation.
2nd Layer.
A thick noise and heat insulator
Practik Base 8 . 3rd Layer.
Plastic parts are covered with anti-squeak material.
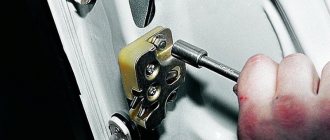
We put on new gloves, take a clean tool and start disassembling the roof.
The roof is guaranteed to remain in its original, clean form and without any traces of disassembly.
We dismantle the standard sound insulation
We degrease the entire surface of the roof and begin installing the first layer.
For the first layer we use Shumoff M2 vibration isolation.
We glue it between the stiffening ribs and roll it carefully to avoid moisture or air getting into the poorly rolled areas, which can cause corrosion.
This layer will completely eliminate noise from rain and hail inside the car.
We degrease the surface, after which we glue a thick noise and heat insulator Practik Base 8 on top of the vibration insulation as a second layer.
Carefully roll the material with a plastic roller.
This layer will significantly improve the thermal insulation of the entire cabin.
Luggage compartment
Trunk noise insulation
Almost the entire floor of the trunk, including the back of the rear seat of the Niva 21213, is covered with finishing material in the form of carpet. This material is durable, attractive in appearance and easy to clean. If you dismantle it, you can see a soundproofing mat, the thickness of which is 15 mm. The car's noise insulation is presented in the form of this material, and the manufacturer used mastic as vibration insulation. It covers the floor of the luggage compartment, while its thickness does not exceed 1.5 mm.
The standard sound insulation of the Niva 21213 car is of high quality, but despite the presence of a three-layer cake (mastic, felt and carpet), the manufacturer did not take care of vibration and noise insulation of the arches. As for efficiency, mastic, which is more considered actikor, was used to vibration-proof the luggage compartment floor. The factory-installed sound insulation only covers most of the floor area of this vehicle. Similar noise protection is used in the Niva 2121 model.
To carry out additional sound insulation, the following materials will be required:
- Vibroplast Gold (StP)
- Vizomat MP (StP)
- Accent 15 LM KS (StP)
- Splen 3004 (StP)
- Stroyizol SD 90
- Adgilin.
The tools you will need are: a hair dryer, a square, a ruler, a tape measure, a knife, scissors, screwdrivers, an awl and others.
Do-it-yourself soundproofing of Niva
To begin with, you will need to prepare suitable material. You should not chase the cheapness of batting or linoleum. Their quality characteristics are low, and their toxicity is off the charts.
It is better to pay attention to the following components:
- A special vibration absorber with a plastic structure that transforms vibrational energy into heat. Such materials are made on the basis of bitumen (not to be confused with a construction analogue).
- Vibration reflector – “mirrors” all noise in the opposite direction. If you do not plan to install high-quality acoustics, this component is optimal.
- A noise absorber is an analogue of a reflector; it is installed instead of it if good acoustics are provided in the cabin. Felt is used as this material.
- Decoline, viek, madeline are components responsible for finishing doors, decorating, and absorbing squeaks from friction.
Work performed
The initial soundproofing of a Niva 21213 car with your own hands involves laying vibration-absorbing material Vizomat MP over the entire area of the trunk floor. To do this you will need a hair dryer. This material must be heated until it becomes elastic and flexible. The adjustment of the material to the topography of the protected surface should be carried out quickly and efficiently. Otherwise, the material will become hard again and will not be able to adhere tightly to the surface. When carrying out such work, it should be taken into account that technical holes that allow maintenance and repair of Niva 21213 cannot be sealed.
Insulation under the rear passenger seat involves the use of MP vibroplast. Accent sound insulation with a thickness of 15 mm is attached to it. Since there is no sound insulation of the car on the wheel arches on the passenger compartment side, therefore, “Liquid Locker” anticorrosive agent will need to be installed on the outside of the arches.
Vibroplast Gold sheets are used to soundproof and protect the side walls of the body from noise. Due to the presence of unclosed technological holes on the side members, this material is installed quickly and easily. For do-it-yourself sound insulation, “Accent” sheets with a thickness of 15 mm are used. This material is laminated with foil on the outside, and has an adhesive layer on the inside, which is protected by paper.
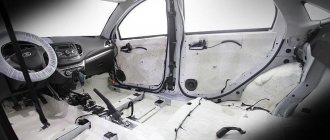
Interior noise insulation
If everything turned out nice and neat with the hood, it’s time to move on to more serious things - soundproofing the interior. To do this, we completely disassemble it. For convenience, we remove all the seats and then the carpet and rear trim. After that, we remove the ceiling, disassemble the door trim, and now the longest process is a thorough wash.
You need to wash everything, or even better, vacuum it. The less dirt the better. Otherwise, there will be bubbles under which moisture will begin to accumulate. And this is a direct path to corrosion of the body under that same sound insulation. Try to make everything very high quality. It is better to wash the ceiling first. Then you can glue it.
Sheets need to be glued in pieces. We apply, mark, cut and then glue the desired area. After this, warm it up with a hairdryer and roll it out with a roller. The bubbles won't last long. The sheet should fit tightly to the metal. A lot depends on this.
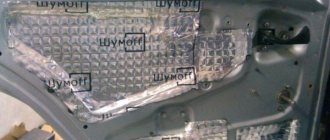
Soundproofing material sticker
If you use NOISEBUSTER, you do not have to measure and cut out the contours for the sticker - the Niva kit includes ready-made self-adhesive panels that exactly follow the shape of the cells between the stiffeners; you just need to remove the protective film and stick them on the prepared surface, rolling them with a paint roller.
When using other materials, you can use a little trick to get precise contours - take a wide sheet of thin paper and, placing it on the cell, run your finger along the edges, pressing the paper so that the outline of the contour appears on it, then trace this line with a pencil and cut out the contour with scissors . In this way, precise patterns are made for each cell, pieces of the vibration damper are cut out from them (in this case it is Penofol or Guerlain) and, after removing the protective film, they are glued to the cleaned surface.
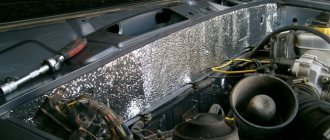
Then Splen is glued in a continuous layer along the entire contour of the hood, rolling it with a paint roller. On top of it we put the factory insulation in place (if there was any), but if it was not there or it has become unusable, these two layers of sound insulation are quite enough. Fastening materials (clips, etc.) need to be purchased new, since the old ones will most likely be unusable.
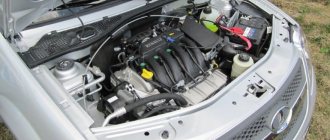
To achieve the greatest effect, it is necessary to soundproof the entire engine compartment: the wings on the inside of the engine compartment, the partition separating the space under the hood and the passenger compartment on the engine side. High-quality sound insulation of the Niva allows you to achieve silence in the cabin no worse than that of the most prestigious foreign brands.
What to do outside?
Noise insulation of the Chevy Niva or other modifications will be incomplete if you ignore the treatment of the outer part of the bottom. This is due to the fact that various sounds and noises pass through this element, including vibration of the transmission unit, operation of the muffler, and the ingress of road stones.
The specified part of the machine is processed by standard application of layers of material or by applying liquid noise insulation. In any case, you will need an overpass or a garage pit.
- The surface of the bottom of the car is washed with a directed stream of water under pressure.
- After drying, degreasing is carried out.
- Next, glue the prepared pieces of materials according to the instructions, or spray liquid “Shumka”.
- The second option is preferable because it is easier to apply to hard-to-reach places and has a longer service life.
- In addition, the liquid composition is significantly lighter than the sheet components, although more expensive. At the same time, the price will definitely pay off in the final quality.
After proper treatment of all parts of the car, the audibility of the rustling of tires, the knocking of stones, and the operation of the transmission and engine will disappear. Plastic fender liners, if available, are glued along the internal contour with a noise reflector of the “Spleen” type.
Source: newniva.ru