↑ Sound insulation assessment
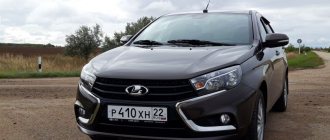
For several years now, AvtoVAZ has been delighting with its new products, which, according to the automaker, can compete with foreign models in the same price segment in terms of noise insulation characteristics. The sound insulation of the Lada Vesta is a clear example of this approach. But how do drivers evaluate the audibility characteristics of extraneous sounds?
Judging by numerous test drives and online discussions, most owners of the new Lada believe that its sound insulation meets expectations. Measurements carried out by specialists showed that Vesta is even quieter than models such as the Nissan Almera. In particular, at speeds of 60 and 100 km/h, the AvtoVAZ model showed the following noise levels:
- 66.7 dB;
- 68.7 dB.
While cars from a Japanese manufacturer:
- 68.6 dB;
- 70.8 dB.
The domestic car turned out to be quieter in comparison with such a popular model as Logan. At the same time, it was surpassed in terms of performance by Kia Rio and Ford Fiesta.
Most drivers agree that the most problematic element is the wheel arches, due to which this vehicle is particularly noisy on the highway.
But not all consumers find Vesta’s noise level comfortable, so the service to enhance sound insulation is quite popular. Fortunately, it is not particularly expensive.
Is it worth it to soundproof Vesta yourself?
By independently enhancing the original sound insulation, Vesta owners will receive a number of advantages. First of all, get rid of the creaking of all plastic elements. Besides:
- the noise level will decrease under any operating mode;
- it will be possible to drive the car in complete silence and talk to passengers without straining your voice;
- when traveling long distances, fatigue will decrease;
- the sound of the speakers will improve;
- drafts will disappear even at high speeds, due to this the temperature in the cabin will become stable.
The body will also receive additional benefits, since it will be less susceptible to corrosion.
With high-quality insulation, the surfaces are first cleaned, then degreased, and the insulation is properly rolled and a reliable adhesion is achieved that prevents the penetration of air and moisture.
However, self-made shvi also has its disadvantages. Interior elements may be damaged during dismantling and reinstallation. If there is an error with the thickness of the material, some parts will be installed offset. There will be places for condensation to accumulate. Due to moisture, corrosion will quickly begin to develop.
Soundproofing Vesta's interior
High-quality insulation can only be done with experience. It is recommended that the first layer of ShMI—vibration isolation—be ordered from a service center, where the material will be rolled tightly without bubbles or unevenness. It is easier to install the next 2 layers yourself: the soundproofing material is covered with glue. It is enough to clean and degrease the surface, remove the protective layer and press the sheet.
↑ Recommendations from manufacturers
Today there are many manufacturers of sound insulation systems for cars. Their products differ in quality and price. But, despite all the differences, they give general recommendations for improving protection from unnecessary sounds. They look like this:
- for the ceiling it is worth using modern felt absorbers;
- metal parts should always be degreased;
- external metal is covered with a vibration damper;
- car doors require at least three layers of sound insulation
- wheel arches, trunk and floor are insulated last.
By following these recommendations, the owner of the Lada Vesta will significantly improve the comfort of travel.
What else can be improved when disassembling cards?
Most often, this process is performed to repair electrical wiring, and not to improve the car. But gradually various recommendations appear on how to improve the car and make it more enjoyable to drive. And this is worth using, because otherwise you will face troubles with a gradual deterioration in comfort. Experience in operating a car is gradually accumulating, and you can already find many interesting recommendations.
Some tips for disassembling the card include the following:
- improving the acoustics of the car to get better sounding music - it is under the maps that the main speakers of the car are located, which are not the best from the factory;
- lubricating or modifying the window lift system in the rear, if you have mechanical means installed, this is a rather important point for lovers of the general comfort of car operation;
- improving sound insulation is the most necessary and useful advice, but to complete this task you need to buy high-quality and proven materials, so it’s worth reading reviews;
- tinting - it is much easier to perform high-quality pasting of the film by dismantling the card, this will allow you to gain access to the entire glass in order to evenly stick the lower part;
- sizing with anti-creaking and vibration-proof materials - this will significantly increase comfort in the car; various unpleasant sounds will no longer be heard from the doors.
As you can see, there are quite a few options for improving the car, and each of them deserves attention. But it is worth paying close attention to the question of the appropriateness of using funds. Since you can spend several thousand rubles on one door just to replace the speakers. So the investment in upgrading your car can be quite large. It is worth immediately considering how much such changes are worth the investment.
We invite you to watch a video with the process of dismantling the door card on Vesta:
↑ Creak and rattle of dashboard
Various creaks and crickets in the area of the dashboard, which is also called topedo, are a fairly typical phenomenon for cars of most brands. This also applies to the Lada Vesta.
The most problematic area of the panel for this brand is the steering wheel area. Also, extraneous sounds are often observed in the area of the cockpit glass pillar lining. Creaks are also common in the radio area.
To eliminate these shortcomings, problem areas must be glued with anti-squeak.
What materials are used to reduce noise
To carry out the work yourself, you will need an impressive list of materials. Moreover, the complete set varies according to the purpose - to ensure complete sound insulation of Vesta or only for doors.
Shvi set for doors:
| Material | Specifications | Number of pieces/sheets |
| Super light vibrosheet 0.2 cm thick | 0.5x0.6 m | 10 |
| Sealing anti-creaking polyurethane material with wavy relief and adhesive layer | 0.75x1 m | 4 |
| Anti-creaking material glued tape | 2.5 cm | 5 linear meters |
| Anti-creaking class Velor, glued | 0.2x1.4 m | 1 |
| Degreasing agent Khimik | 0.5 liters | 1 |
| Caprolon roller | D 3.2 cm, width 4 cm | 1 |
| Sheet cutter | At 18 mm | 1 |
| Cotton gloves | with PVC coating | 1 |
For a full ShVI you will additionally need:
- Vibrating sheet with a thickness of 2 and 3 mm, dimensions 0.5x0.76 m - 20 and 6 sheets, respectively.
- Glued sheet material with a thickness of 6 and 10 mm, size 0.75x1 m - 6 and 2 sheets, respectively.
- Glued isolon P8 0.56 x 0.75 m - 5 sheets.
- Dismantling tool.
Strictly speaking, depending on the goals of the car owner, the set of materials both on the door and for the entire car can be complete or minimal. If the driver drives alone, minimal modifications are sufficient. If the machine is used as a service vehicle, it makes sense to equip it to the maximum.
↑ Necessary tools and materials
In order to soundproof any car with your own hands, you need a set of certain tools and materials. The tools that the owner will need mostly include what the average car enthusiast already has.
Before work, the owner of Lada Vesta needs to prepare:
- stationery knife for cutting membrane;
- scissors;
- roulette;
- construction hair dryer;
- stitching roller;
- marker of any color;
- any solvent or degreaser.
As can be seen from this list, improving sound insulation yourself does not require any professional equipment. But the correct choice of materials that make up both the sound and vibration-absorbing layers plays a big role.
Today, there are several largest manufacturers of all kinds of membranes on the market:
- Noise Control - belongs to the middle price segment and is of quite strong quality.
- Deloud is the most expensive manufacturer of sound insulation, whose products for the right price can make a car almost silent.
- Standard-Profi is a fairly common option for inexpensive and high-quality sound insulation.
- Shumoff is the most budget-friendly manufacturer.
- STP is a very common brand of high-quality insulation, costing slightly above average.
The choice between different manufacturers depends on what effect you plan to achieve and what your budget for the work is.
Materials and tools
The sound insulation of a car is usually made up of a vibration and sound-absorbing layer. You may also need material to prevent squeaks. Among the best manufacturers the following will be highlighted:
- STP is one of the market leaders. It has a good assortment and acceptable quality; one drawback is that sometimes you have to overpay for the brand.
- STANDARD-Profi – the quality is no worse than STP, but the prices are more affordable.
- Noise Control – produces inexpensive products with quite satisfactory quality.
- Noise – sound insulation does not always live up to expectations, but the cost is appropriate. We can say that this is the best budget option.
- Deloud is a manufacturer of premium sound-absorbing materials that have the highest performance. But this pleasure does not come cheap.
New Lada: The cost of a Lada Vesta with an automatic transmission has become known
To carry out the work you will need:
- construction hair dryer;
- stitching roller;
- scissors;
- stationery knife;
- marker;
- roulette;
- degreaser or solvent (you can use regular White Spirit).
↑ Procedure
Any work on installing automotive sound and vibration insulation on a car such as the Lada Vesta will include a number of actions that must be performed in a specific order. Usually the work takes no more than two or three days, although auto repairmen sometimes reduce the period to one and a half days.
In order to make sound insulation, you need:
- remove the vehicle trim, providing free access to the metal body;
- metal surfaces are thoroughly degreased using the liquid mentioned above;
- noise and vibration insulation membranes are cut;
- vibration-absorbing material is placed directly on the metal;
- on top of the previous one - a layer of sound insulation;
- for sound insulation - an anti-creaking layer;
- the casing is returned to its place.
Important! The insulation area must be at least 70% of the area of the metal structure of the vehicle.
When laying vibration insulation, it must be warmed up well with a hairdryer and the sheets are rolled with a roller so that there are no air pockets and the texture is no longer foil-like. If bubbles still form, they are carefully pierced.
Unlike vibration isolation, it is important to maintain the integrity of the sound insulation layer. The roll is carefully cut in accordance with the measurements taken. Then the material is sequentially glued, finishing the work by rolling with a roller.
↑ Hood
A special feature of soundproofing work on the hood is that this part of the vehicle does not require large layers of insulators. Just a thin layer of vibration insulation and insulation is enough. Accent material is usually used as the latter.
↑ Roof
Insulating the roof will require first removing the interior sheathing. To do this, you need to unscrew all the parts that are attached to it - these are all kinds of handles and lampshades. Once this is done, the sheathing material can be easily removed.
The main feature of roof sound insulation is the need to use sufficiently dense sound absorbers. The reason for this is that a sound wave “walks” directly under this structural element of the car.
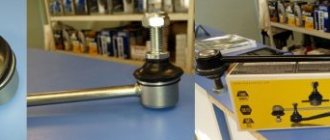
↑ Doors
Doors are one of the noisiest places in any car and Lada Vesta is no exception. Therefore, when soundproofing them, you will have to apply all three layers: protection from vibration, sounds and creaks.
In order to get to the metal frame, the first thing you need to do is unscrew all the handles. As with the ceiling, the interior lining material can then be easily removed. It is worth considering that the door frame is insulated not only by the external metal, but also by the internal rigidity frame.
When gluing insulating material, it is worth considering the need to use solid sheets in places where there are technological holes. The rods, places where the casing is attached and the wires are covered with anti-creaking material. Holes for fasteners are cut out in the sound insulation.
Soundproofing doors
Doors must always be insulated, because this is one of the “noisiest” places not only on Vesta, but also on other cars. Therefore, everything needs to be done with the utmost quality.
New Lada: LADA Vesta CNG – Photo gallery – LADA VOSTOK Yekaterinburg: LADA dealer in Yekaterinburg (Sverdlovsk region)
Two layers of insulation (vibration, sound) are glued to both the outer metal and the inner frame. Technological openings must be covered with a single sheet. Holes are cut out for tie rods, clamps, etc.
It is recommended to cover all wires, rods and places of contact between the door trim and anti-squeak.
↑ Wheel arches
As noted above, wheel arches are considered the noisiest element of the Lada Vesta design. Therefore, when installing additional sound insulation, they often concentrate on eliminating this shortcoming.
Here the work begins with the removal of the wheels and lockers. All working surfaces are cleaned of dirt and then degreased.
Vibration insulation on a bitumen basis is cut into pieces and glued in this form. It is important to coat all joints well with special mastic. The best material is made from bitumen. The same rubber-bitumen mastic is used to treat all insulation to complete the work. Lockers also need to be insulated.
Removing the rear door card on Lada Vesta
In the rear of the car, everything is a little simpler, since manual windows are most often installed here, and there is also no mirror control unit. Up to and total number of fastenings is significantly less. This allows you to spend half as much time on doing the same work. However, you will have to be careful, otherwise you may damage one of the elements and incur additional costs. It is best to also use a plastic interior disassembly kit to avoid scratching or damaging anything.
The instructions will be somewhat shorter than for the front door:
- First you need to remove the window handle or button if you have an electric control option. To do this, use a plastic spatula to pry up the retaining ring and then pull it out with your hands. The rest of the device can be easily removed by hand.
- The door handle trim is also secured with latches. It is enough to snap them off using the same spatula and then remove them with your hands.
- Here you will need a socket wrench of 10, since two mounting bolts are waiting for you under the handle lining. Unscrew them first so as not to violate the card removal technology.
- At the bottom of the card there is a hole with a fastening screw for a Torx 20 - asterisk. This fastener is easy to unscrew; you just need to choose the right tool.
- Next, you just have to snap off the clips one by one, starting from the bottom. It's very simple and don't be afraid to break them, this is a normal process. Then you need to buy and replace them with original fasteners.
The process of removing the Lada Vesta rear door card is quite simple, it will take about 15 minutes. All four car cards can be removed in 1 hour, even if you do not have much experience in doing this work. However, a car service center will charge you a lot of money for such work, so it makes sense to do the work yourself and save your budget. Whatever the purpose of disassembling this element, it makes sense to perform additional sound insulation of the doors. To do this, buy the necessary materials in advance.
↑ Trunk and floor
Soundproofing the trunk and floor is a single process, which begins after the seats, console and inner trim underneath are removed from the car's interior.
Since the floor of the car is in contact with the ground and wheels, for its complete insulation it is necessary to lay three layers.
- The first layer is a standard vibration-isolating material.
- The second layer is regular sound insulation.
- The third layer is additional noise absorption using NoiseBlock.
Attention! Details of the sound insulation device in the interior of a Lada Vesta car can be found out using a special video.
The layer thickness is usually up to 10 mm.
Do-it-yourself soundproofing of the Lada Vesta trunk
Soundproofing the trunk is carried out in two stages - processing the trunk lid and processing the inner surface. The sequence doesn't matter. You can start with the simplest thing - soundproofing the trunk lid of the Lada Vesta. This stage of work is the simplest. We simply remove the decorative trim, degrease the metal and treat the inside with StP Aero material in one layer. We put everything back together in reverse order.
But you will have to tinker with the inside of the trunk.
First you need to remove all the decorative panels and trunk carpet. We degrease the metal and treat everything with StP Aero+ material. We try to cover everything as tightly as possible and cover the largest area. The wings are covered with StP Aero material. And the rear arches are StP Bimast Bomb Premium.
Next, apply the second layer. StP Barrier 4KS is placed on the floor, StP Accent Premium 10 mm is placed on the wings, and StP Biplast Premium 15A is placed on the arches.
Phew. That's all for this stage.