Print this article Font size 16
If you install fog lights on a VAZ 2110, you can kill two birds with one stone. Namely, to transform the appearance of the car, and increase the level of your own safety, and add comfort to driving at night.
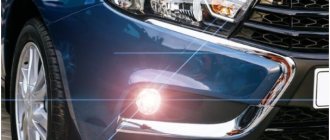
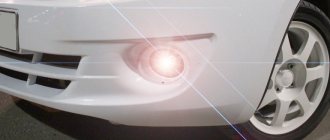
Kirzhach with lamp H1
Therefore, today we will talk about how to connect fog lights on a VAZ 2110, what is required for this and what result you will ultimately be able to achieve.
Adjusting the front optics of Almera Classic
The front optics of Almera Classic are adjusted according to the drawn diagram. The cut-off line should coincide with the broken lines. If alignment is not observed, each headlight is adjusted using two screws. One is responsible for the horizontal plane, the other for the vertical.
The high beam is adjusted so that the resulting light beam hits the center of the marking. It is difficult to achieve this in the field without special equipment. For this reason, a number of car owners prefer to entrust the work of adjustment to service workers.
PTF connection diagram for VAZ-2107, 2105 and 2104 via a standard fuse box
Today we will tell you how to connect fog lights on VAZ-2107, 2104 and 2105, using the standard fuse block, and protecting each PTF with a separate fuse in this block. This PTF connection diagram is interesting because there is no need to drill or pull anything from the interior under the hood; we use standard unused tracks in the block, the so-called reserve ones. It is reliable, practical and convenient. In our diagram, the PTF switch is shown in yellow and it will be supplied with power from connector Ш2, terminal number 3 (pink wire). That is, 12V will appear on it when the dimensions are turned on. The orange wire must be connected to the Ш4 connector, pin number 5. It should be noted that if terminal 5 in the Ш4 connector is not used in the classic, i.e. It is enough to have a terminal on the wire and insert it into the connector, then terminal 3 in connector Ш2 is activated. Therefore, in this situation, you need to have an adapter connector on the wire or connect two wires to each other using a connector. This completes the connection from the car interior to the unit.
Connections in the engine compartment are also made by inserting prepared wires with a terminal at the end into standard wiring connectors. Connectors Ш9, Ш11, Ш6 and Ш7 are used. I describe them in order, and if connected correctly, all connection points are not used by standard wiring. Remove connector Ш9 from the block and insert the wire from the headlight (they are shown in black in the diagram) into contact 1 and the wire from relay terminal 30 into contact 3. Insert connector Ш9 into place. The figure shows the removed connector Ш9. In it, the yellow wire from the headlight is inserted into pin 1, and the green wire from the relay is inserted into pin 3.
Next, remove connector Ш11 and insert the wire from the relay into pin 8 - terminal 85. Terminal 86 of the relay is connected to ground using a wire at the end of which there is a round terminal for a self-tapping screw. I placed the relay along the stem of the washer fluid barrel. Fundamentally, it does not matter if you confuse legs 85 and 86 with each other. After returning connector Ш11 to the block, it is necessary to remove connector Ш6 from the block. Insert the remaining wire from terminal 67 from the relay block into pin 8. We connect the Ш6 connector back into the block and all that remains is to insert the last wire from the second headlight into the Ш7 connector, pin 1. The figure shows the Ш7 connector (green) and the yellow wire from the second headlight in it .
The wiring of the block is made in such a way that this circuit uses fuses
number F3 and F4 for each headlight separately. In the event of a short circuit on the lamps in the headlights, the corresponding fuses must operate. Their rating is 7.5A with a 55W headlight bulb, or 8A if an old type fuse box is used. It should be remembered that power is supplied to the relay from fuse F1, which has a rating of 10A. It is advisable to change it to a nominal value of 15A, and for the old-style block 16A. That's all the description, I hope our article helped you!
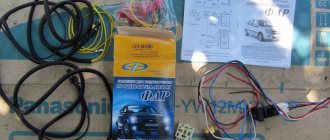
Connecting PTF and control keys
Diagram for connecting PTF
How to connect the device and the power button? As we have already reported, the kit should include a diagram that can be understood without any problems. First of all, it is necessary to install the wiring into a block with fuses located in the engine compartment. Unscrew the block fixing screws and find the pads Ш7 and Ш8.
It is necessary to connect the wiring and the relay that comes with the kit to these blocks, the diagram is as follows:
- The cable from connector 87 is a ground that is connected to the body.
- Exit 85 should go directly to Sh7.
- Pins 30 (to 1) and 86 (to 1) are connected to connector Ш8.
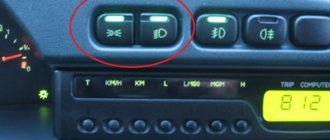
Not far from the block it is necessary to select a place where the relay will be mounted. The PTF connection diagram is not particularly complicated - to turn them on, a special button must be used, which is mounted in the cabin. There is a special place for mounting this button on the center console. Under the panel there is a special block that must be connected to the key, then the panel is mounted back.
To check the functionality of the optics, you need to turn on the dimensions, after which the fog lights are activated. When the side lights turn off, the PTFs should also turn off automatically. If the lights do not light up after connection, this may be due to either an incorrect connection, an inoperative relay, or faulty lamps.
Who determines the level of responsibility?
The traffic police officer decides on the spot whether to issue a fine or limit himself to a warning. He looks at the situation, how the driver behaves, how often he had violations, and other mitigating or aggravating circumstances.
It's more of a human factor. But for the first such violation, you can count on a written warning.
If a car gets into an accident with the exterior lights not turned on, it automatically becomes the culprit of the accident! Even if he complied with all other traffic rules and was not actually at fault.
Driving without running lights or daytime running lights on automatically creates an emergency situation on the road, because the car becomes less noticeable to other road users.
If a traffic police officer is going to issue a fine, but the driver does not agree, then a protocol is first written, and then a decision is made.
The driver has the right to challenge the decision of the traffic police officer in the traffic police department or in court if he has arguments in his defense. To do this, the protocol must describe as accurately as possible what the driver disagrees with and what the road conditions were.
It is advisable to provide a photo or video confirming the absence of a violation. In special cases, even a voice recorder recording of a conversation with a traffic police officer can help the driver! The driver is given only 10 days to challenge.
Penalties for not turning on running lights are small - this is the minimum fine for violating traffic rules
But the importance of switched on, and most importantly, correctly switched on lights is very often underestimated by road users
If a car does not have illumination, it can simply not be noticed or mislead other drivers.
Such carelessness can lead to serious accidents. Therefore, for your own safety, never forget to turn on your daytime running lights or low beams - make your presence known on the road!
Therefore, for your own safety, never forget to turn on your daytime running lights or low beams - make your presence known on the road!
Using devices during daylight hours
Paragraph 19 of the traffic rules determines that it is necessary to turn on the lights on the car both during the day and at night. If lighting devices are used incorrectly, the responsible person may be fined in the following cases:
- High beams are turned on in areas where the rules for built-up areas apply. This situation is especially common in the dark, when after driving along a country road the driver forgets to switch the headlights to low.
- Using fog lights instead of low beam headlights. The traffic regulations recommend using fog lights when road visibility is not particularly good, if traffic occurs during heavy rain, in fog, or during a snowstorm.
- Cars driving at night with running lights on. Many distracted drivers make mistakes. With daytime running lights used throughout the day, sometimes when it gets dark, drivers forget to switch to the correct light.
When can you do without it?
- During the daytime, you can drive without low beams by turning on the daytime running lights or fog lights. This can be done provided that the movement does not occur in poor visibility, which is not enough for a correct assessment of the road situation. Otherwise, the chosen approach is considered a violation.
- At night, turn on either low or high beam headlights.
It is not always possible to use high beams - if there is lighting in a populated area, it is prohibited, and you should not turn it on if there is a possibility of blinding oncoming drivers. If visibility is insufficient during daylight hours, you can also drive using high beams, except in prohibited situations.
Cases in which to include
- Lighting devices must be available on any mechanical vehicle; this list also includes horse-drawn carts and bicycles, which are not required, but it is recommended to use devices with bright light when driving.
- For trailers and towed vehicles, it must be possible to equip them with side lights.
- It is necessary to keep the lights on at all times - for example, during daylight hours when driving in the city, low beams should be turned on to prevent accidental blinding of other persons driving oncoming vehicles. When the driver uses running lights, there is no need to turn on the low beam in addition.
- At night, after sunset, if visibility is poor, the driver can use high beams if he is sure that he will not blind the driver driving oncoming traffic.
Adjusting the fog lights
Fog lights (PTF is an abbreviated designation) on a car perform an important task. They help the driver to see oncoming traffic even in situations where thick fog reflects the light beams of the head optics. The rays coming from the fog lights should go below the main light and be parallel to the road.
With prolonged use, the factory settings are lost, so adjustment is required. On Almera Classic, the fog lights are adjusted as follows:
- The distance from the center of the fog lights to the surface on which the machine is installed is measured. The corresponding distance is measured on the wall and a horizontal line is drawn.
- The second line is drawn above the first at the same distance.
- Vertical segments are drawn on the diagram taking into account the position of the centers of the car and PTF.
- The car is driven 10 m away from the wall, the fog lights turn on.
- Use the adjustment screws to ensure that the centers of the light spots coincide with the points of intersection of the horizontal and vertical lines (for the right and left PTF).
- The rays descend until the upper boundary of the light spot is 10 cm from the drawn horizontal line.
Requirements for installing fog lights
It is permissible to locate fog lamps directly in the headlights.
The rules for installing headlights are regulated by two regulations:
- GOST 8769-75 or SEV standard 4122-83;
- state standard of the Russian Federation GOST R 41.48-2004, corresponding to UNECE Rules No. 48.
Location of fog lights on a car
The general requirements are as follows:
- The installation location is located at a distance of no more than 400 mm from the side surface of the vehicle body. The distance is measured between the side plane and the outside of the headlight.
- It is permissible to install only two fog lights. The standards separately stipulate the mandatory installation of fog lights on tourist buses, as well as on vehicles operated on mountain roads.
- The lower edge of the fog lighting device is located at a distance of at least 250 mm from the road surface.
- Fog lights should have a horizontal viewing angle ranging from +15º to -10º, and a vertical viewing angle from +45º to -10º. It is unacceptable to block the headlights with vehicle parts within the specified angles.
- Fog lights must be connected in parallel with side lights.
- The lenses of the fog lamps must produce a beam of light located below the flow given by the low beam lamps.
- It is acceptable to use transparent filters or selective yellow color. It is unacceptable to use glass of different colors on the same car.
The standards do not have special requirements for installing fog lights on a car, so the owner can install the kit himself.
Connection diagram
All that remains is to connect our fog lights to the car’s on-board network. In the VAZ 2107 this is not difficult to do, since the mounting block has places for installing fuses, and all the wiring from them is routed to the blocks. But, of course, you will have to buy something in addition. Additionally we will need:
- Relay with a block for it.
- Fog light switch with a socket for it.
- Female terminals for knife blocks.
- Special automotive wires (for example, PGVA brand).
- Three fuses: one 15 and two 7.5 A.
- Two 55 W halogen lamps with H3 socket (not included with headlights).
Installation kit for connecting fog lights in a VAZ 2107 We won’t bother with the electrical circuit diagram. Let’s just assume that we don’t know how to read them and limit ourselves to the wiring diagram.
Wiring diagram for connecting fog lights in a VAZ 2107
In the diagram, the markings Ш4, Ш6, Ш7, Ш11, Ш9 indicate the blocks of the mounting block, below them, from left to right: the side light switch, fog lights (we will install it ourselves) and the head light switch.
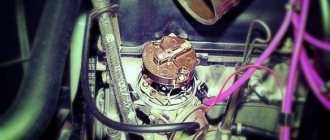
First of all, we are looking for the installation location of the fog light relay. The author of the photo decided to install it on the mudguard of the engine compartment.
Installed fog light relay (left)
Now we pull the wiring from the mounting block to the fog lights. Since our bumper is plastic, we will also pull the ground wire along with the power wire.
We install and connect fog lights on a VAZ-2114 with our own hands (video inside)
Power harness for fog lights in the engine compartment
For greater reliability, the wires can be inserted into a corrugated cable (preferably heat-resistant). We bring the wires out into the holes in the apron, crimp the ends of the wires with female-type terminals - we will put them on the contacts of the lamps.
Power wires for fog lights, routed through the apron
Now we open the mounting block (located in the engine compartment under the windshield opposite the passenger). In the photo below it is indicated by the number 5.
Location of the mounting block in the VAZ 2107 (position 5)
We dismantle it by unscrewing 2 nuts and get to the pads. We measure the wires of the required length, crimp the knife blocks onto them using pliers and assemble the diagram presented above. To do this, we turn off the pads one by one and insert the blade contacts into the required sockets - they must be empty. We extend the wire from block Ш4 into the interior to the installation site of the fog light switch. We will place it next to the side and head light switches in a free space covered with a plug.
Installing blade contacts into the mounting block blocks on a VAZ 2107
All is ready? We install the mounting block in place. Now let's take a look at the fuses. We are interested in those marked with arrows in the photo below. The green arrow marks a fuse common to both PTFs. It is installed initially because it also powers other circuits in the car. Its rating is 10 A, but we will replace it with fifteen amps, since the load on it will increase when installing fog lights. The red arrows indicate the fuses responsible for the left and right fog lights. Initially, they may not stand - there were no headlights on the car. We install 7.5 A fuses there.
Mounting block with installed fog light fuses
All that remains is to install and connect the fog light control button. We remove the decorative trim at the rear of the console for the gear shift knob and push out the plug from the inside, the side light button and the head light button. We assemble the circuit by cutting directly into the wires coming from the switches, connect to the wire passed from the mounting block, and install the buttons, including the new one, in place.
Fog light control button installed instead of a plug
At this point the work can be considered complete, turn it on and check it. Yes, we spent quite a lot of time tinkering with the bumper and wiring, but we got a real, high-quality fog light that won’t let us down and will keep us safe in any bad weather.
Bright headlights are the motorist's main assistants in the fight against bad weather and evening twilight. They should illuminate the road well so that you can be confident while driving even in the thickest fog. But if the light provided by standard headlights is not enough for you, we recommend installing fog lights on the VAZ 2107 for better visibility. You can do this yourself without resorting to the help of specialists. We will describe in detail below how to install correctly and how to choose “lanterns”.
Checking the functionality of the PTF
After the work has been carried out to connect the fog lights on the VAZ 2114, it is worth checking their functionality. If everything is done correctly, then when you turn on the side lights and press the button, voltage will begin to flow to the relay, after which the lights should light up. If you turn off the headlights, the fog lights should also go off, regardless of the position of the button. If everything is done correctly, then the next step is to adjust the light beam so as not to blind oncoming drivers. Having done this by eye, the light from the fog lights should be 10-15 meters ahead of the car, but no more. It is best to contact a service station with special equipment to adjust the headlights, or read more detailed instructions on how to do it yourself. Useful: How to adjust headlights and PTF on a VAZ 2114? Correct adjustment is the key to safety on the road, not only for you, but also for other road users. By installing fog lights, car enthusiasts want to get not only direct functionality, but also improve the appearance of the car. Since public roads require driving with the optics always on, fog lights can take over this function. Thus, you can install high-quality lamps in them and spend less on constantly replacing burnt-out light elements in the headlights. As described earlier, at the most unexpected moment, PTF can help you out when visibility deteriorates when driving along the highway during fog.
Light and sound devices of the car and their location
We should start with the basics, or rather with what types of headlights and lanterns modern cars are equipped with.
Low beam headlights - designed to illuminate the road and surrounding area in a relatively small area.
High beam headlights are powerful lighting devices that illuminate the roadway over a fairly large area. Due to its high brightness, high beams can blind oncoming drivers.
Front fog lights - installed lower than conventional headlights, create a wide beam of light that well illuminates the road and the surrounding area in conditions of fog, snowfall and rain.
Daytime running lights are a separate type of headlights that are turned on during the day, regardless of weather or visibility, and are designed to increase the visibility of vehicles. Most models turn on immediately when the engine starts.
Tail lights - designed to identify the vehicle at night or in poor visibility conditions. The color of the lamps is red.
Brake lights are red lights that come on when a vehicle slows down. They burn much brighter than the side lights. Some cars are additionally equipped with a central brake light.
Rear fog lights - indicate the vehicle in fog, rain or snowstorm conditions. Not to be confused with brake lights.
Reversing lights are white and are designed to inform pedestrians and other motorists that the vehicle will be moving (or is already moving) in reverse.
Rear reflectors - used for the same purpose as side lights, they reflect the light falling on them from the headlights of passing cars. May also be known as retroreflectors.
License plate lighting – several white bulbs designed to illuminate the rear license plate of a vehicle.
Turn signals, or “turn signals,” are amber lights that are used to inform you that the vehicle is turning or otherwise maneuvering. Installed in the corners and on the sides of the car.
How to choose the right fog lights
However, fog lights are not always used only for such conditions. They can be perfectly used to illuminate those areas that are not illuminated by standard optics. This may be the right edge of the curb, the distance directly in front of the hood of the car. Naturally, this does not affect the range of light in any way, but fog lights will be useful to get a complete picture of the condition of the road surface.
The power of fog lamps is the tenth thing. That is why, whenever possible, it is better to use low-power light sources, and here, more than anywhere else, LED lamps look best. They can also be used as daytime running lights, the main thing is strict compliance with traffic regulations, otherwise they will only bring problems instead of benefit.
These norms are clearly described in the Rules, so we will not dwell on them. Therefore, the following arguments can be counted in favor of fog lights:
- improved visibility in difficult weather conditions - rain, fog, snowfall;
- improved viewing angles in normal night conditions;
- fog lights can be used as daytime running lights;
- The dimensions of the car in difficult conditions are better visible even from afar;
- Lens foglights will allow you to accurately focus the beam of light on unlit areas of the route.
In a word, if we decide to install fog lights of any type, not counting xenon ones, they need to be connected according to a completely different scheme, all that remains is to look at the diagram and, before connecting the fog lights via a relay, select the necessary components.
We recommend: Cleaning and adapting the throttle valve on a car
Which fog lights are better for the VAZ-2110
Outwardly, you may not notice much difference between high-quality headlights and “analogs” of unknown origin.
We recommend: The process of replacing the water pump on a VAZ 2109 in the garage
Making the right choice in this case is very difficult, since a huge number of headlights have appeared on sale, different in shape, light source and color spectrum.
It is also important what material the diffuser is made of - glass or polycarbonate. Since PTFs are installed low, puny plastic cases do not last long
And if we take into account that in the rain we will often have to wipe the diffuser with improvised means, then the low-quality material will rub off and all the work of the lamps will go down the drain.
On the glass: the center of the headlight and the type of lamp.
Wires in a protective tube.
Strong mustache and lamp screen.
Adjustment screw with fine thread and spring.
Regular and similar PTFs
Rectangular fog lights with standard mounts fit into the VAZ-2110 bumper in a standard place without additional modifications. They are produced by a lot of manufacturers, but, again, all these headlights are different both in the quality of the optics and in the light source.
The most common are two types of domestically produced PTFs OSVAR and headlights from the Avtosvet plant from Kirzhach. The latter have two modifications - for a lamp with H3 and H1 sockets. According to user reviews, headlights with H1 lamps provide a denser and more concentrated luminous flux over the entire illumination range. Their price is about 900 rubles apiece. But they are sold without a lamp. Fog lamp Kirzhach.
Domestic headlights - OSVAR 2212.3743-04. They are assembled rather roughly and this spoils the appearance. The lampshade is non-removable and is glued in with sealant, which if damaged will affect the cost of replacement. However, with a price of about 700 rubles (with a lamp), they look pretty decent. The illumination is even, but if installed correctly, the near zone is illuminated worse. Farah Osvar.
Another relatively domestic manufacturer is the Ryazan Bosch plant
The headlights are designed for H3 lamps, the light doesn’t matter, but they also cost about 650 rubles. The most budget option for infrequent use
They are sold without a lamp. PTF from Ryazan Bosch.
Which PTFs shine better?
High-quality fog lights should have an almost horizontal beam of light. If you have “China” at your disposal, then you will immediately notice the difference.
The best PTFs in our case are optics produced by Kirzhach (Avtosvet), but there are many fakes, so it is important and necessary to distinguish a fake from the original, because sellers will sell you the first product they come across.
Hella products have also proven themselves quite well, but due to their high cost they are in little demand.
Installation of fog lights (PTF) on a VAZ 2107
Fog lights have long won the sympathy of car enthusiasts. First of all, thanks to a significant (several orders of magnitude) improvement in visibility in difficult road conditions.
In the autumn-winter period, when daylight hours are short and unfavorable weather conditions become almost the climatic norm, fog lights help you move safely and be seen even at a great distance.
Fog lights for VAZ are both an increase in the safety of your car and, at the same time, tuning. In poor visibility, a VAZ with fog lights looks quite like a representative foreign car. Fog lights are two additional headlights that are placed close to the ground clearance.
Tools required for work:
- drill (electric or battery);
- a screwdriver and a hammer - just in case.
What else is useful in the work is wiring (at least a couple of meters), a female connector, an on/off button; four-stroke relay. And - of course - hands growing from the right place.
Tip: It is most convenient to install fog lights if you first remove the bumper. It’s easier (especially for novice car enthusiasts) to use for installing PTFs in places where the standard ones are installed.
The work on installing fog lights (FTL) on a VAZ 2107 takes place in several stages:
- We are preparing the field for installing fog lights. Using a drill, we drill a hole into which the mount for the fog light could be placed. You can step back approximately 15 centimeters from the opening for the number to ensure that nothing interferes with the implementation of the idea.
Depending on the location of the lamp power relay, it is necessary to consider the location of the wiring. If the relay is located under the hood on the right, power can be continued near the battery under the mudguard, then through the pipe and bumper mount.Using the same drill, we create three holes for the wires that will connect the left and right fog lights. We secure the wiring using copper wire (copper is not subject to corrosion and is more durable than, for example, steel, and it is more convenient to work with it, due to its greater flexibility.
- Installing fog lights. We install the mounts for our new headlights, and we can put the bumper back in place.
After installing the bumper, we disassemble the PTF and install the lamps in the right places. The rear parts of the lights are placed on the mounts, and new wiring is connected to them.We clean and crimp the connectors, then connect the light bulbs and reassemble the headlight. The process is carried out in reverse order.
Work with another fog lamp is carried out in a similar way.
- Connecting fog lights.
The connection diagram is quite standard and detailed descriptions are hardly needed in this case.We check the functionality, and if everything is in order, we rejoice at the new successful experience. If necessary, you can also adjust the headlights.
Installation
The PTF installation process can be divided into three main stages:
- Installation of headlights;
- Network connection;
- Functionality check.
We recommend: Double clutch: the combination of advantages of manual and automatic
So now we will talk about each stage separately.
Installing headlights
We will consider the option of installing PTF on a standard bumper. Therefore, it does not have holes for new optics. You will have to do them yourself.
To work you will need a certain set of tools and materials:
- File;
- Drill and drill bits;
- Electric jigsaw;
- Roulette;
- Marker.
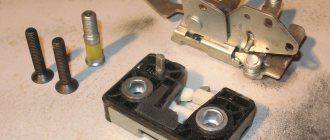
Connection elements
Now directly about work.
- First of all, remove the bumper. Work is performed only if it is disconnected from the seat.
- Remove all dirt from the bumper.
- Make markings for the installation of future fog optics.
- It is best to mount the headlights slightly to the side of the lower air intake. Try to place the PTF strictly under the main optics of your car.
- For decorative glasses that have outer and inner halves, make markings. The outer half is decorative, and the inner half is designed to fix the outer part and headlights.
- The outer part of the glasses has a protrusion on the inside. With this mounting protrusion, the element should fit into the hole made in the bumper.
- To determine the optimal dimensions, you should measure the landing protrusion. This way you can make the appropriate markings on your bumper.
- Using an electric jigsaw, holes of the required size and location are cut.
- Use a file to file the cut areas.
- The outer part of the glasses should eventually fit tightly into the hole.
- Fog lights are mounted in the resulting holes. For this purpose, the kit includes special mounting bolts.
- Attach decorative glasses to the top of the headlights. The bumper can then be returned to its place.
Connection
Together with the PTF, a diagram for connecting the devices must be attached. It is not complicated, so even a beginner will be able to understand all the nuances of connecting the components to each other.
You will need to embed the wiring from the foglights into the mounting block, which is located in the engine compartment to the right of the windshield. To do this, just unscrew the bolts from the block, lift it and find the pads marked Ш7 and Ш8.
These blocks are used to connect fog lights, although these lighting devices are not installed standard at the factory. Wiring from the headlights and from the fog lamp relay, which is provided in the purchased PTF kit, is connected to these blocks.
Your job is to make the correct connection. This is done according to the following scheme:
- The output wire from pin 87 is ground, so you need to connect it to the car body;
- Pin number 85 goes to the block marked Ш7 and is connected to connector number 17;
- Pins numbered 30 and 86 go to block Ш8. In this case, connect pin 30 to connector 8, and lead 86 to connector number 1;
- Having installed the headlights, stretch the positive wire through the engine compartment, as they are connected to the Ш8 block. But these wires need to be inserted into connectors numbered 2 and 3;
- Now connect the block to the mounting block, and return the block to its place;
- Select an area near the block where the fog light relay will be installed.
Connection result
Button
Now all you have to do is connect the control system for your PTFs. Included with the fog lights is a corresponding button, which will stand on the panel in the seat provided by the manufacturer.
PTF button
The manufacturer, that is, AvtoVAZ, provided for this. Therefore, under the panel you will find a control block. The panel is removed, the corresponding block is located and the button is connected to it. That's it, the controls are ready.
Examination
The last stage is to check the functionality of your PTFs.
To check the efficiency of the lighting devices, turn on the headlights on your VAZ 2114, then press the button to turn on the fog lights. When the lights are turned off, even if the fog lights button is pressed, they should still go out.
The importance of PTF is difficult to overestimate. They help you see the road better during fog, rain, and snow. Moreover, fog lights are designed to improve the visibility of your car to oncoming and behind vehicles. Therefore, we strongly recommend installing PTF not only in front, but also in the rear.
Connecting fog lights VAZ 2107
1. In principle, there is nothing special to describe, the circuit is quite standard, the only thing is that in my car 12V is supplied to the button only when the dimensions are turned on.
2. I have a torpedo from the “five” and a beard from a VAZ 2107, so there is more than free space... If you want, you can come up with something of your own.
So the exciting moment is the performance check. If you, like me, have everything working, you can rejoice and safely assemble the instrument. You may need to adjust the headlights upon completion.
This experience demonstrates once again that you shouldn’t be afraid, you need to boldly take it and do it, so installing fog lights on a VAZ 2107 is not as scary as it might seem at first glance. The result will pleasantly surprise you, in the evening everything looks quite beautiful, everything is clearly visible in the fog, visibility is good, so time and money were not wasted
Thank you for your attention, I hope the article is useful to you. See you again on the VAZ Repair website
Connecting fogs
All necessary actions should be carried out strictly according to this scheme.
At the end, we install the power button on the dashboard inside the car, and also check how everything works.
As you can now see, the installation did not take much time, and the result exceeded all expectations.
Adjustment process
This work can be divided into two stages - preparing everything necessary and directly adjusting the light flux. Let's look at each of them in more detail.
Preparatory work
At this stage you need to do the following:
First of all, make sure that your equipment is working correctly and is turned on separately, and not together with the low beam headlights. If you have done everything in a homemade way, redo the design as it should be; the diagram below will tell you the correct connection procedure.
- Next, you need to check the reliability of the fastening of your PTFs; if they are loose, the adjustment will be useless. Another important nuance is the tire pressure; it must be the same so that the car stands without tilting.
- To set up, you should find a flat area with a wall or a smooth, solid fence in front of it. After this, the distance from the ground to the axis of position of the fog lights is measured, and a horizontal line is drawn on the wall at this height.
- Then the car is placed at a distance of 5 meters from the surface, at this point the preparation can be considered complete, as you can see, there is nothing complicated here, you will do all the steps with your own hands in literally 10 minutes.
Settings
Now let’s directly look at how to adjust the fog lights of a VAZ 2110; the instructions for carrying out the work are as follows:
Once the distance is set, you can begin adjusting the height. Again, it is better to adjust each headlight separately; the center of the light flux should be on the axis of the light elements; adjustment is made using a special screw located on the side; for this purpose, there is a hole for a screwdriver in the frame.
Once the work is completed, you will receive a light that meets the standards, which will provide excellent visibility even in the most difficult conditions. The photo shows an example of a PTF with xenon light; the brightness of this option is much higher than standard modifications with incandescent lamps. Do not forget about the correction if, for example, you have a towbar installed and you are towing a trailer.
How to install and connect with your own hands?
Installing fog lights on your own begins with developing a connection diagram. A properly designed circuit avoids unnecessary wires and ensures reliable operation of the electrical circuit. It is recommended to carry out installation work in the garage, although many owners install it outdoors.
Installing PTF in the front bumper and setting it up
There are three installation methods:
- into standard openings;
- on the outer bracket;
- into a blank bumper not intended for installing headlights.
The setup is done using the homemade template presented below. The template is installed perpendicularly at a distance of 5 m from the car headlights. The adjustment is made until the top edge of the light spot coincides. The matching line is located 100 mm below the height of the center of the lamps.
Approximate view of the template for customization
Adjusting your fog lights increases driver visibility and reduces the risk of blinding oncoming drivers.
Installing PTF in a blind bumper
The most difficult and time-consuming option is to install fog lights in a solid bumper (i.e., one that does not have factory holes for this):
- Remove the bumper from the vehicle in accordance with the repair and operating instructions.
- Determine the optimal location for installing headlights in terms of housing shape and compliance with regulations.
- Make a hole for the headlights. The best way is to drill holes around the perimeter and saw through the gaps with a file. The hole must be adjusted to ensure proper fit between the body and the decorative frame. Small fragments of the bumper are carefully cut off with a construction or stationery knife.
- Drill holes for the fog lamp housing, which is secured with suitable bolts.
- Install the headlight into the housing and mount the protective cover. It clings to the plastic of the bumper.
- You can adjust the headlight using a special key included in the kit.
View of the bumper without fog lights
Bumper removed for work
The method of obtaining the window is clearly visible
Frame installation and adjustment
Beginning of reinstallation and connection
The car is assembled
Installing PTF on the external bracket
Option for mounting foglights on a steel bracket:
- Mark the mounting points of the bracket on the bumper in accordance with the requirements for installing fog lights. As a rule, additional headlights are installed on the bracket.
- Screw the bracket to the bumper with self-tapping screws or bolts.
- Install the fog lights on the mounting points and connect the wiring.
Example of installing headlights on a bracket
Installation of PTF in standard openings
In order to install headlights in a bumper that has standard plugs, you must:
- Raise the front of the car by placing a wooden block 150-200 mm high under the wheels. For greater convenience, you can place the car on a lift.
- Remove the protective shields covering the lower part of the bumper.
- Unscrew the clips of the standard bumper plugs.
- Insert the fog lamp into the guides and secure with standard screws. When using non-original headlights, there may be discrepancies in dimensions and mounting points. In this case, you have to adjust the parts to each other. Below is a photo gallery of installing Chinese fog lights in the Hyundai Elantra HD bumper.
Raising the front of the car
Headlights and plugs
Plug removed
Hole plug
Removing the mudguard
Reinstalled headlight
Wiring
When pulling and installing wiring, you must follow the following safety rules:
- disconnect the battery;
- the cross-section of the wire must correspond to the current carried;
- connection points must have reliable contact;
- Only wires of the same material can be connected (to reduce electrochemical corrosion);
- It is advisable to shed the twists with solder;
- the junctions of the wires are insulated with heat-shrinkable tubing or electrical tape;
- Avoid placing wiring connections in areas prone to flooding;
- to protect them from bending and chafing, it is recommended to protect them with a split corrugated tube;
- the wires are laid parallel to the standard harnesses and fixed to them with plastic ties;
- The power supply circuit for the fog lights must be protected by an individual fuse;
- When laying the wire, you should ensure that there are no hot or moving elements in the path, as well as sharp edges.
Neglecting the rules for safe installation of electrical wiring leads to overheating of the circuits and a fire, which can destroy the car.
Before starting installation, it is recommended to assemble the future electrical circuit and test the operation. This event allows you to find and eliminate errors made during development.
Wiring and headlight testing
Approximate wiring sequence:
- Carry out preliminary installation of wires to the fog lamp connectors.
- Pass the wires inside the bumper through the corrugated tube.
- Remove the negative leads from the fog lights and attach them to the body. It is advisable to use the standard weight bolts found on the front side members.
- Remove the front wheel and fender liner (one at a time).
- Decide on the location of the relay. A relay must be used without fail, since direct switching of lamps with a switch will lead to rapid burnout of the contacts. The relay can be placed in free space in the standard mounting block or anywhere on the instrument panel.
- Since the fog lights must work together with the side lights, the connection is made from the side marker block. Below are photographs of the wiring process on a Volkswagen Polo Sedan.
Relay installation location
Connecting wiring under the hood
Entering wires into the interior
Light switch
Installation of PTF switch
The most common method of turning on the fog lights is a button installed in a regular place or at any other point within the driver’s reach. The regular places for the buttons are covered with removable plugs, and occasionally they are covered with instrument panel material. In this case, it is necessary to cut a hole corresponding to the dimensions of the button body.
A separate item worth considering is the installation of a steering column switch unit equipped with a rotary switch for fog lights. To perform the work, you may need a special tool - screwdrivers with Torx heads and a special wrench for the central bolt of the steering wheel.
To connect the steering column switch follow these steps:
- Unscrew the fastenings of the two halves of the decorative steering column cover.
- Separate the parts, overcoming the resistance of the clamps. When disassembling, you need to be careful not to break the plastic latches.
- Next, you need to remove the steering column switch, which can be removed without removing the steering wheel or with removal. In the first case, it is enough to bend the spring clip, remove the lever and disconnect the connector. After this, another switch is installed and the removed parts are replaced. In the second case, the steering wheel and airbag (if equipped) must be removed. The method for removing the cushion is different for each model. The part being removed must be held, as it can jump off the fasteners and break the wiring harness.
- After removing the airbag, you need to unscrew the central bolt securing the steering wheel.
- Remove the steering wheel, disconnect the connectors from the steering column switch.
- Unscrew several screws securing the switch and remove it from the column.
- Install a new unit and reassemble. When installing the steering wheel, you must ensure that the steering wheel spokes and front wheels are in the correct position. The center bolt must be tightened to the recommended torque.
- Connect power and check the operation of the switch block.
An example of installing a new steering column switch on a Hyundai Solaris.
Removing the cover
The lower part of the casing has been removed
The switch mount is clearly visible
Old and new switches
On some European cars, fog lights are switched using a rotary switch located on the instrument panel. When installing headlights on such a car, you need to connect the wires from the lamps to the plug and install a light switch with the function of controlling the fog lights.
We recommend: How and where to fill the brake fluid
The working process
We select the desired location and use a drill to drill holes for the bolts on which the foglights will be attached. Place the relay on the right side of the engine compartment. It should be connected to the wire located next to the splash guard. Now connect the relay to the new headlights.
We form a bundle from two wires coming from the left and right fog lights so that the wires do not dangle and interfere. Then we drill three holes in the bumper and secure the flagellum with wire.
We screw the headlight mounts to the bumper, then put it in place. We disassemble the lanterns and insert pre-purchased light bulbs into them.
Now let's hang the back parts of the foglights. First, we thread the connected wires into the left headlight, strip them, and crimp the connectors. Now you can connect a light bulb to them and assemble it completely. We perform the same actions with the right one, but in addition we additionally crimp the parallel power supply and the harness onto the left fog lamp.
Instructions for installing fog lights on a car via a relay
- It is necessary to remove the main panel, under which the light bulbs for the backlight of the furnace regulator are located. The light bulbs can be put aside; they will no longer be needed.
- Now you need to find the two-pin connector. It is located at the end of the wire from the backlight. You will need to run your hand over it to find the part you need.
- We connect the first wire from the relay to the two-pin connector, and attach the second to the PTF power button.
- To establish a 12-volt network from the dimensions and 84 contacts in the system, you will need to connect a wire to the relay. The relay can be removed to any place convenient for the driver - behind or under the instrument panel, under the body trim, in the fuse box, etc.
If you connected the radio yourself, there should be no problems. The connection principle, although not identical, is similar.
- Now you need to extend contact number 87 to the battery under the pedals or along the wiring into the engine compartment.
It is recommended to install a fuse at this stage. It is better to place the element as close to the battery as possible.
- We extend contact number 86 to ground to the body.
- Fog lights have two wires - minus and plus. The latter (“positive”) will need to be connected to each other and sent to the battery.
- Then you need to direct them to the relay and connect to connector number 30.
- “Minus” is directed to the body.
- It is necessary to wrap all exposed wires with electrical tape and check the reliability of the connections.
If the fog lights do not work, check that the relay connectors are connected correctly. When installed correctly, clicks will be heard.
Here we looked at the option of connecting fog lights powered by the interior heater. You can also connect from the rear window heating block. To do this, you will need to use wires from the rear window heating button for power. The connection principle is the same as described above, only using a different power source
In the first version, the fog lights will work together with the headlights, and “recharge” from the rear window heating button assumes that these headlights operate from the ignition switch. The second option is better suited for daytime driving, since fog lights can be used instead of running lights, without turning on the headlights.
The working process
We select the desired location and use a drill to drill holes for the bolts on which the foglights will be attached. Place the relay on the right side of the engine compartment. It should be connected to the wire located next to the splash guard. Now connect the relay to the new headlights.
We form a bundle from two wires coming from the left and right fog lights so that the wires do not dangle and interfere. Then we drill three holes in the bumper and secure the flagellum with wire.
We screw the headlight mounts to the bumper, then put it in place. We disassemble the lanterns and insert pre-purchased light bulbs into them.
Now let's hang the back parts of the foglights. First, we thread the connected wires into the left headlight, strip them, and crimp the connectors. Now you can connect a light bulb to them and assemble it completely. We perform the same actions with the right one, but in addition we additionally crimp the parallel power supply and the harness onto the left fog lamp.
What it is?
Already from the name it becomes clear that these headlights were invented specifically so that motorists could clearly see the road in fog or, for example, snowfall. The fact is that they are located very close to the road surface, where the fog is not very thick. Thus, they can easily penetrate it with their light and improve visibility around. They are not afraid of the most unexpected vagaries of nature, so those who often drive a car simply need them.
It is worth noting that such headlights will not only improve your car, but will also make it look different from other VAZ 2107, since fog lights were not intended by the manufacturer as standard elements on this car. Such tuning greatly decorates the car and makes it noticeable.
Which ones to choose?
As we have already said, fog lights are not only an important part of the car, but also its decoration. Thus, their choice must be approached responsibly.
First decide on the design and color of the light. You can choose round or square, yellow light or white. A wide range is offered by such companies as Osvar, Wesem, Hella, Catz and Osram.
The pricing policies of these brands are different, but you should assume that the more expensive the headlights, the better they are. Please note that the larger its surface, the brighter it will shine. That is why it is best to choose the largest size models from all those presented in the store.
In addition, we advise you to immediately purchase bulbs for them of the required category (H1, H2, H3, H7 or others) with a power of no more than 55 watts, so as not to blind drivers of oncoming cars and not to overheat the relay.