Once upon a time I found this “List of Priora lamps”. Because The recording has become popular and is often used; I designed it beautifully in Photoshop so that it would be pleasant to look at. Well, I’ll leave it in text format for copying.
Lamp installation location - [Lamp type] (Power, W)
Headlight block:
Side light - [W5W] (5) Low beam - [H7] (55) High beam - [H1 / H15] (55) Turn signal - [PY21W] (21) Turn signal - [W5W] (5) PTF - [ H3/H11] (55)
Back light:
Signal brake/gab. light - [P21W / W5W] (21/5) Add. Brake Light - [P21W] (21) Turn Signal - [P21W] (21) Reverse - [P21W] (21) Fog Light - [P21W] (21) License Lamp - [C5W] (5)
Interior lighting:
Ceiling light interior — [C5W / T4W] (5/4) Ceiling light. thing drawer - [C5W] (5) Illumination of the cigarette lighter. — [AMN13-3-1] (3) Clock backlight — [W1,2W] (1,2) Lamp lighting. trunk — [C5W] (5) Instrument lighting — [W3W] (3) Center lighting. consoles - [W1,2W] (1,2) Engine compartment lamp - [R10W] (10) Indicator lamp - [W1,2W] (1,2) Push-button switches - [W1,2W] (1,2) Switch blocks - [LEDs] Advanced brake light - [LEDs]
If you liked the article, click >> “Like”. Thank you all for your attention and good luck on the roads =)
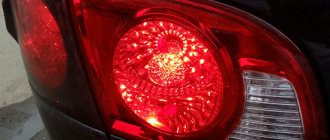
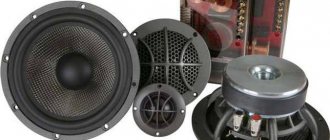
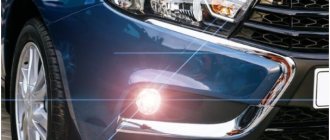
Lamps in foglights
The effectiveness of PTF in foggy conditions is determined by several factors. Their low placement, different range, and direction of the light flux make it possible to illuminate only the road surface itself, without affecting the surrounding area, like high-beam headlights. This allows you to see the road even in heavy fog, which completely scatters the light of the headlights, creating a snow-white wall in front of the car.
Description of the scheme
The relay must be connected according to this diagram. The relay has only 4 contacts, which are assigned numbers: 85, 86, 87 and 30.
- We connect contact number 86 to the negative of the battery;
- We connect contact number 30 to the “plus” of the battery;
- Contact number 87 is connected to the power wire (plus) of the PTF;
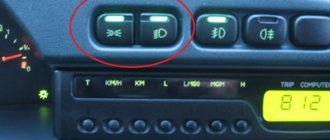
- We connect contact number 85 to the PTF ON/OFF button with a blue wire through a fuse;
We hope our article was useful to you.
Fog lights are simply necessary on a car, because they help you drive in the fog with confidence that oncoming cars will see you, in the dark, and in general they help improve the standard light. Fog lights on the popular Lada Priora are installed only in the “Luxury” configuration. PTFs are sold for Priora, and you can install them yourself, instead of plugs, when they are not included in the package, but they have a different article number for the model before restyling and after restyling.
Fog lights for the domestic Lada Priora are not expensive, starting from 800 Russian. rub. Connecting the fogs occurs quickly and without significant effort. We will talk about this in our material. When car owners decide to install PTF, they are faced with the question of choosing between LED and lens headlights.
Installation
The car must be driven onto an overpass or pit, and the following kit must be prepared:
- PTF and installation kit;
- keys for 10, 13;
- crosshead screwdriver;
- pliers.
- Disconnect the ground from the battery to prevent a short circuit.
- We unscrew the bumper fastenings (several screws on the side, bottom and top), and remove it.
- Using a screwdriver, unscrew the screws holding the plugs. It is advisable to use a short Phillips screwdriver.
- We insert the headlights into the places where the plugs were. We fasten with the same self-tapping screws.
- We take a long wire from the kit, insert it into the right headlight, then into the left one and pull it into the engine compartment from the battery side.
- Remove the washer tank using a 10mm wrench, then the expansion tank.
- Using the key to 13, we eliminate the wipers.
- We unscrew the protective plastic to gain access to the left edge of the upholstery.
- Loosen the clamp and remove the hose.
- We remove the upholstery.
- We stretch the wires along the standard wiring through the plug into the car interior and fasten them with clamps included in the kit.
- We assemble all the parts in reverse order. Don't forget to connect the two black wires to the outermost bolts of the crankcase guard.
- Let's go to the car interior. Remove the protective cover under the steering column. To do this, turn 3 locks 90 degrees.
- Using a screwdriver, unscrew the self-tapping screw, which is located under the fuse block. We take out the block.
- From the center console, remove the rear window heating button and the plug. They are located to the left of the clock.
- From the set we take out the button with wires. We stretch the long blue wire to the fuse block, and connect the remaining three to the heated rear window button using the clips included in the kit. We connect everything according to the color scheme.
- We insert the relay for the fog lights included in the kit into the fuse box. We connect the wires according to the diagram:
- long blue to A85;
- red and black to 30 and 86;
- yellow wire from 87 with two outputs to F17, F18;
- we take the previously passed wires from under the engine compartment and connect them to F17, F18;
- We insert two fuses from the kit into sockets F17, F18.
Collecting elements. We connect the ground to the battery, turn on the ignition and check the serviceability of the fog lights (the fog lamps will only work when the ignition is on).
Adjustment (setting) of PTF according to GOST
It’s not enough to just install PTFs, they also need to be configured, otherwise they will just be spotlights freely shining at an incomprehensible point - without fulfilling their functions. As in the case of other light devices, adjusting PTF on 2170 begins with checking the tire pressure (it should be equal), placing the car on a flat surface opposite a smooth wall at a distance of 5 m from the extreme point of the bumper.
On the wall, mark the distance from the floor to the center of the headlight, then a point 5 cm below. The PTF base on the Priora must be placed so that when the PTF is turned on, the upper limit of the light passes through the lower point marked on the wall. Fog lights, as statistics show, are rarely installed even after purchase, but with the correct settings they will serve as a good assistant.
DS111
Attention!
The fog lamp is halogen. You should not touch its glass flask with your fingers, as traces from them will lead to darkening of the lamp when heated. You can remove dirt from the flask with a clean rag soaked in alcohol.
We install the new H11 lamp in the reverse order.
If you have a Chinese car with burned out fog light bulbs and you don’t know how to replace them, then this instruction is especially for you. After all, replacing a fog light bulb is necessary for safety reasons, unless of course you want to get into a dangerous situation on the road. In principle, there is nothing complicated about this, but you still have to be patient and demonstrate your skills. I want to warn you right away that replacing the right headlight bulb will seem more difficult to you than the left one. You will ask why? Yes, because on this side the spring latches are located out of sight and you have to act by touch.
Here's a list of the tools and accessories you'll need:
- short screwdrivers (phillips and flathead);
- wrench 7;
- mirror;
- flashlight;
- a new bulb that matches your car;
This is not a difficult matter at all, and it’s not worth going to a service station for such a small thing. Any car owner can do this. And, if you have never done this, you have an excellent reason to learn something new. Replacing a fog lamp (after mandatory car washing) is carried out in several stages.
To gain access to the PTF, the first step is to free up space in the work area. To do this, turn the steering wheel all the way to the right for the right fog lamp, for the left one, respectively, to the left, while the engine must be started. Also, in order to facilitate access, you can raise the front of the car using auxiliary materials - bricks, boards, a jack, or simply drive the appropriate front wheel onto the curb. In this case, you need to be especially careful and make sure that the wheel does not jump off the ledge.
Next, you need to remove the protective plastic material located on the wing. We equip ourselves with a 7 key and unscrew the screws around the wheel. It is also necessary to unscrew the plastic bolt located on the bottom of the machine. Use a flat screwdriver to pry up the tip into which the plastic bolt was screwed. We bend the freed wing plastic until the wheel allows it. Don't be afraid to break this plastic - it's very flexible and durable.
How to adjust the light flow
In order to prepare for testing and debugging fog lights, the Priora should be placed in conditions as close as possible to real ones. You need to place a load weighing approximately 200 kilograms in the cabin, a spare tire in the trunk, and completely fill the tank with fuel.
After this, the car is installed five meters from a flat wall. The tester measures the distance from the ground to the center of the fog, and draws a horizontal line on the wall five centimeters lower. If the headlights have been adjusted correctly, the light spot will be approximately at the level of this line. You can also test and debug each of the headlights separately (to do this, you need to repeat the procedure, closing each of the headlights in turn).
Fog lamp models
Kirzhach and Bosch are not a death sentence, and if the light of these models does not suit you, there is a good choice from other manufacturers:
- Automotive lighting (Ryazan);
- Beam (Ryazan);
- DAAZ;
- Orion-7 (diode);
Made in China (lensed or diode). The Chinese also sell frames for the restyled version, which are installed instead of a plug and leave a hole exactly for the old-style foglights - on the pre-restyled Priora. A non-diode or non-lensed analogue of fog lights costs much less, but you shouldn’t rush into purchasing - bright white light does not always come with a long service life.
Step-by-step instructions for installing PTF on Priora
Now let’s try to install fog lights on the Priora ourselves - after all, they do not come with all car trim levels. First of all, you need to buy the lanterns themselves: they can be either lensed or with regular glass. Which ones to take? There are 4 most common and available options:
- Bosch (Germany-Russia).
- Luch (Russia).
- Kirzhach (Russia).
- "Noname" (China).
Which one to give preference to is a purely personal matter. Everything will depend on financial capabilities, although the PTFs of the first three companies are almost equal in both quality and cost. The Chinese nonname, sold literally “in bulk”, of course, is, to put it mildly, not up to par with the others, and even does not always have the appropriate certification.
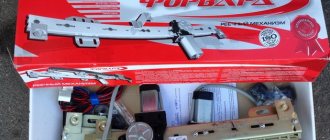
What is included in the kit for installing fog lights
In addition to the headlights, you need to purchase a special kit for connecting fog lights. It includes:
- PTF power button;
- set of installation wires;
- fuses (optional);
- PTF control relay;
- connecting blocks.
Installation process
If everything is purchased, then you can start installing. Let's start with the PTFs and put them in their regular place. To do this, remove the bumper from the Priora by unscrewing all the screws around its perimeter.
Connection diagram
How to connect PTF to the on-board network? Let's not reinvent the wheel, but connect it the way the manufacturer intended. Let's look at the standard connection diagram:
Law and GOST
It is necessary to take into account one of the important points when installing PTF is subsequent adjustment and LAW. According to traffic rules, lighting equipment should not blind cars moving in the opposite direction. To do this, it is imperative to adjust the headlights.
It is prohibited to install lamps not specified by the manufacturer, such as xenon and LED. PTF priors must have H11 type halogen lamps installed.
Standard fog lights on Priora: cost, article number
The automotive company AvtoVAZ connects fog lights to its Lada Priora, if provided for in the package, manufactured by Avtosvet (Kirzhach) and Bosch. They have a difference. The installation depth of Bosch fogs is as much as 40 percent greater than that of similar products produced by the company from Kirzhach. In the “Lux” package, fog lights from Bosch are required, and from “Avtosvet” they are installed as standard. There are 2 options for the kit - for the pre-restyling Priora and for the post-restyling model. What is the difference? The installation point and the shape of the headlights themselves. Among other things, headlights can be purchased separately or as a set.
For Lada Priora:
- The Bosch headlight set has the article number 21700-3743010-54. The cost of the kit varies in the range of 1.6-1.9 thousand Russian. rub. The cost of one headlight will be about 900 rubles.
- A set of fog lights “Avtosvet” costs 700-800 Russian. rub. Article 21700-3743010-52. One headlight will cost the buyer approximately 500 rubles.
For Lada Priora 2:
- A set of Bosch fog lights costs 1-1.2 thousand Russian. rub. Article: 21700-3743010-50. One headlight will cost buyers approximately 600 rubles.
- The set of headlights "Avtosvet" has the article number: 21700-3743010-53. The cost of the kit varies in the range of 800-900 Russian. rub. The cost of one headlight will be about 500 rubles.
Plus, you will need to buy a special set of wires or a so-called installation kit, without which installation of the PTF is impossible. This kit includes a relay and a button. The cost of the set is about 600 Russian. rub.
Replacing Prior fog lamps
In the list we have given the most common models of the selected car brand. (Abbreviation PTF - fog lights)
| Brand | Lamp type | Base |
| 1113 Oka | Near | H4 |
| Further | H4 | |
| PTF | — | |
| 1117 Kalina | Near | H7 |
| Further | H1 | |
| PTF | H11 | |
| 1118 Kalina | Near | H7 |
| Further | H1 | |
| PTF | H11 | |
| 1119 Kalina | Near | H7 |
| Further | H1 | |
| PTF | H11 | |
| 2105 Zhiguli | Near | H4 |
| Further | H4 | |
| PTF | — | |
| 2106 Zhiguli | Near | H4 |
| Further | H4 | |
| PTF | — | |
| 2107 Zhiguli | Near | H4 |
| Further | H4 | |
| PTF | — | |
| 2108 Samara | Near | H4 |
| Further | H4 | |
| PTF | — | |
| 2109 Samara | Near | H4 |
| Further | H4 | |
| PTF | — | |
| 21099 Samara | Near | H4 |
| Further | H4 | |
| PTF | — | |
| 2110 | Near | H1 |
| Further | H1 | |
| PTF | H1/H3 | |
| 2111 | Near | H1 |
| Further | H1 | |
| PTF | H1/H3 | |
| 2112 | Near | H1 |
| Further | H1 | |
| PTF | H1/H3 | |
| 2113 Samara-2 | Near | H4 |
| Further | H4 | |
| PTF | H1/H3 | |
| 2114 Samara-2 | Near | H4 |
| Further | H4 | |
| PTF | H1/H3 | |
| 2115 Samara-2 | Near | H4 |
| Further | H4 | |
| PTF | H3 | |
| 21213 Niva | Near | H4 |
| Further | H4 | |
| PTF | — | |
| 21214 Niva | Near | H4 |
| Further | H4 | |
| PTF | — | |
| 2123 Chevrolet Niva in one low/high beam | Near | H4 |
| Further | H4 | |
| PTF | H3 | |
| 2123 Chevrolet Niva split low/high beam | Near | H7 |
| Further | H1 | |
| PTF | H3 | |
| 2131 Niva | Near | H4 |
| Further | H4 | |
| PTF | — | |
| 2170 Priora | Near | H7 |
| Further | H1 | |
| PTF | H11/H3 | |
| Granta | Near | H4 |
| Further | H4 | |
| PTF | H11 |
ATTENTION. This information is for informational purposes only. There may be differences between the installed lamps in your car and in the table. To more accurately determine the lamp base, we recommend that you check in more detail in the manual for your car, or look at the lamp markings by directly pulling it out of the headlight. Some types of headlights have a marking (or sticker) on the housing of the headlight itself.
On many cars you will notice fog lights with very bright discharge lamps. These are xenon lamps. How to install these lamps, is there any practical benefit from them, and can xenon be legally used in PTF? Let's figure it out.
Here each driver must decide for himself, especially if the headlights are not suitable. After all, these lamps are often installed for beauty. Only some drivers install xenon for convenience and safety.
If the decision has been made, then let's see how the installation goes and what is needed for this.
Today, xenon is installed quite often on cars from AvtoVAZ.
This operation can be attributed to tuning and modification of optics. These lamps require certain precautions. So, you need to keep the glass clean.
It is important to know the desired effect of the installation in advance. It is worth warning owners that if it is necessary to replace both the high beam and the low beam, the bi-xenon lamp simply will not fit into the housing, and then some alternative solution will be required.
The design of the lensed headlight is equipped with a special cap that covers direct light. It is he who often interferes with the installation process.
Xenon elements are selected after measuring the parameters of the fog lamp. More precisely, the possibility of installing an H3 lamp. You also need to check whether the cap, if any, can be removed.
This lamp has a long base and bulb. After installation, it happens that it will rest against the rear surface of the headlight after assembly. This may create some problems.
Good day, ladies and gentlemen. This time the Priora pleased me with the fact that its left fog light stopped working. Seeing such garbage, I immediately thought that my PTF light bulb had burned out and went looking for it. Having stopped on the way to the store, I was very surprised by the prices for PTF lamps on a Priora, and I was also surprised how much the prices for them differ side than on other cars of our AvtoVAZ, and I was also surprised how much the light bulb base increases its price (I remember on the top ten there was an H1 base and the price of light bulbs started from 50 rubles)
After that I headed to the garage to replace it.
Arriving at the garage, I thought I’d change it in five minutes, like I did on the 10-tank, but never mind, it turns out that on a Prior with an SE bumper, in order to replace the lamp, you need to remove the bumper itself, otherwise you’ll never get close to the fog light, and even more so to the light bulb itself.
After removing the bumper, I was in for a small shock, which I found in it, namely a huge dragonfly, which made me go crazy for several minutes.
As it turned out, the wire that went to the fog light was slightly oxidized (let me remind you that when I replaced a regular old-style bumper with an SE one, I had to lengthen the wiring a little, since the fog lights on the old bumper are located differently than on the new one, which is why this manipulation was performed) .I got rid of the old wire and ran a new one.
Good luck to all the guys, and your cars are in a good mood, and don’t let them down.
Price: Lamp Starvolt H11 - 163 rubles