Removal and installation of sensors of the VAZ-21214 engine control system
Page 1 of 3
The sensor provides the controller with information about the rotation speed and angular position of the crankshaft. The sensor is of the inductive type and reacts to the passage of the teeth of the drive disk, combined with the generator drive pulley, near its core.
The teeth are located on the disk at 6˚ intervals. To synchronize with TDC of the pistons of cylinders 1 and 4, two teeth out of 60 are cut off, forming a cavity. When a depression passes by the sensor, a so-called synchronization reference pulse is generated in it. The installation gap between the core and the tops of the teeth should be within 1±0.4 mm. When the master disk rotates, the magnetic flux in the magnetic circuit of the sensor changes - alternating current voltage pulses are induced in its winding. Based on the number and frequency of these pulses, the controller calculates the phase and duration of the pulses to control the injectors and ignition coil.
Removing and checking the sensor
Install the sensor in reverse order.
Removing the coolant temperature sensor
The sensor is a negative temperature coefficient thermistor, meaning its resistance decreases as the temperature rises. The controller supplies the sensor with a stabilized voltage of +5 V through a resistor (about 2 kOhm) and, based on the voltage drop across the sensor, calculates the coolant temperature, the values of which are used in most engine control functions. If a malfunction occurs in the DTOZh circuits, the engine control system malfunction indicator lights up, the controller turns on the cooling system fan to constant operation and calculates the temperature value using a bypass algorithm.
We carry out the work on a cold engine.
Partially drain the coolant.
Install the sensor in reverse order. Sensor tightening torque 9–15 N.m. Add coolant to normal level.
Checking and replacing the crankshaft position sensor VAZ-2107-20
The crankshaft position sensor is installed in the boss hole of the camshaft drive cover bracket. The sensor provides the controller with information about the angular position and speed of the crankshaft. The sensor is an inductor; it reacts to the passage of the teeth of the crankshaft pulley near the sensor core.
Two adjacent teeth on the disc are cut off and form a cavity. When it passes, the sensor generates a so-called synchronization reference pulse at each crankshaft revolution. The installation gap between the sensor core and the pulley teeth is 1.0±0.2 mm. If the sensor or its circuits fail, the engine stops working and the “CHECK ENGINE” lamp lights up.
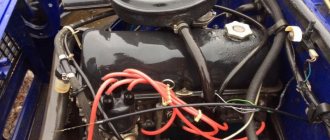
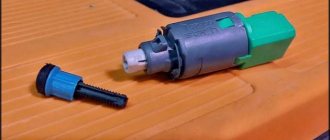
Before removing the sensor, turn off the ignition. Disconnect the negative terminal of the battery
| rice. 1 |
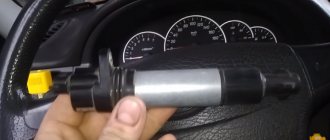
Disconnect the wire block from the sensor.
| rice. 2 |
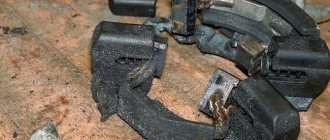
Use a Phillips screwdriver to unscrew the sensor mounting screw.
| rice. 3 |
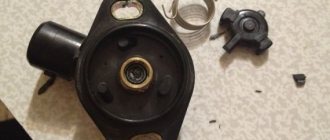
We remove the sensor from the hole in the boss of the camshaft drive cover.
| rice. 4 |
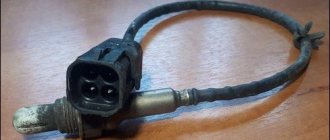
Crankshaft position sensor
| rice. 5 |
The resistance of a working sensor should be in the range of 550–750 Ohms.
Install the sensor in reverse order.
Removing the crankshaft position sensor Lada Granta
- Ratchet wrench
- 10 mm head
- Tester
Parts and consumables:
- Crankshaft Position Sensor (if required)
If the crankshaft position sensor or its circuits are faulty, the engine will not start or operate. We remove the sensor to check or replace it, as well as when dismantling the generator drive pulley and oil pump.
1. With the ignition off, press the clamp of the wiring harness block and disconnect the block from the sensor connector.
2. To check the serviceability of the sensor circuits, connect the tester probes to one of the two terminals of the wiring harness block and the engine ground. With the ignition on and the crankshaft stationary, the tester should record a voltage of about 2.5 V.
A similar voltage should be between the other terminal of the wiring harness block and the engine ground. If the voltage values do not correspond to the norm, check the serviceability of the circuits (open and short to ground) between terminal “1” of the sensor wiring harness block and terminal “B1” of the block (brown) of the controller wiring harness, as well as between terminal “2” of the block sensor wiring harness and terminal “A1” of the controller wiring harness block. If the voltage values do not match and the circuits are working, the controller is faulty.
3. To check the sensor, it must be removed. To do this, use a 10 mm socket to unscrew the sensor mounting bolt and remove it from the oil pump cover boss hole.
4. Having connected the tester probes to the sensor terminals, measure the resistance of its winding. It should be equal to 650-750 Ohms.
5. Switch the tester to voltage measurement mode and bring a steel rod to the end of the sensor several times. If the crankshaft position sensor is working properly, the device should detect voltage surges.
6. Install the crankshaft position sensor in reverse order.
test window call with login registration
Replacing the crankshaft sensor Lada 21074 (VAZ 21074)
The VAZ 2107 crankshaft position sensor is necessary to determine the position of the crankshaft connecting rods and synchronize the fuel injection nozzles. The sensor is electromagnetic and is used in electronic injection systems. After the sensor is removed from the car, it must be checked and only after that, making sure that it is not working, replace it with a new one. To check, you will need a multimeter with voltmeter mode, and a standard set of tools.
To remove the crankshaft position sensor:
- We disconnect the block with power wires from the sensor, having first released the plastic clamp of the block.
- Unscrew the screw securing it using a Phillips screwdriver.
- We remove the sensor from the mounting bracket in the camshaft drive cover.
In this simple way, after removing the crankshaft sensor from the car, it needs to be checked. To check, take a regular voltmeter. The sequence of actions is as follows:
- We connect the terminals of the voltmeter to the sensor terminals.
- Next, with an intensive movement, we draw the screwdriver blade near the end of the sensor and at the moment when the screwdriver is against the sensitive element, the voltmeter will record a small voltage surge, which will indicate the serviceability of the sensor. If the voltmeter does not react in any way to the movements of the screwdriver, then the sensor needs to be replaced.
At this point, the repair work on removing and checking the crankshaft position sensor of the VAZ 2107 is completed. Reassemble in the reverse order of removal.
- https://remont-vaz2106.ru/datchik-polozheniya-kolenvala-vaz-2107
No comments yet
Replacing the crankshaft position sensor on a VAZ 2108, VAZ 2109, VAZ 21099
When do you need to change the crankshaft position sensor on a VAZ 2108-VAZ 21099? 1) If the engine speed of your car begins to float.
Note! Floating engine speeds should be especially noticeable within 15-30 seconds after starting the engine!
2) And also with a significant increase in fuel consumption.
How to replace the crankshaft position sensor on a VAZ 2108-VAZ 21099?
Removal: 1) First, de-energize the battery by disconnecting the “-” terminal from the battery itself. (Do you want to know in detail how to remove the “-” terminal? Then, in this case, for all the information on this matter, see the article: “Replacing the battery on a VAZ”, point “1”)
2) Next, holding the wire block with your hand, disconnect it from the crankshaft position sensor.
3) Then remove the single bolt that secures the crankshaft sensor to the bracket on the engine.
4) After you unscrew one single bolt, remove the crankshaft position sensor from the bracket.
Installation: 1) Installation occurs in the reverse order of removal.
Checking the functionality of the crankshaft position sensor:
1) First you will need to connect a “multi-meter” to the removed crankshaft position sensor. 2) And then check the crankshaft position sensor for resistance.
Note! If the crankshaft position sensor is fully operational, the “ohmmeter” should show you a result of “550-750” Ohms!
Types of sensors
After it has become clear what the crankshaft sensor on the VAZ-2107 and other cars is responsible for, it is worth highlighting the main types of DCPV. At the moment there are several varieties. The table shows modern types of crankshaft position sensors with a description of their operating principle.
| Sensor type | Principle of operation |
| Induction | Its action is based on the use of a magnetized core wrapped in copper wire. The ends of the wire are brought out in order to measure voltage changes. The sensor is mainly used in modern cars. |
| Optic | It works using an LED that emits a beam of light and a receiving device. When a control tooth passes, the beam of light is interrupted, which is recorded by the monitoring device. The collected information is sent to the ECU. |
| Hall Sensor | It works due to a magnet that is installed on the crankshaft and which is fixed. When DC movement begins in the sensor, it is immediately recorded on the synchronizing disk. |
Removing and installing the crankshaft position sensor Daewoo Nexia N150
- Hex key 5 mm
- Screw jack
- Wheel key
- Medium flat screwdriver
- Ratchet wrench
- Extension
- Head 4 mm
- Head 10 mm
- Open-end wrench 7 mm
- Open-end wrench 10 mm
- Hammer medium
- Beard
Parts and consumables:
- Crankshaft position sensor (96253542 - for F16D3 engine or 96183235 - for A15SMS engine, if necessary)
- Crankshaft position sensor O-ring (if required, F16D3 engines only)
- Wheel chock
Remove the sensor for inspection or replacement, or when repairing the engine. Carry out the work on an inspection ditch or overpass.
Removing and installing the crankshaft position sensor of the F16D3 engine
1. Disconnect the wire from the negative terminal of the battery.
2. On a car with an F16D3 engine, with the ignition off, press the spring clamp of the engine management system wiring harness block and disconnect the wiring harness block from the sensor wiring block.
3. Remove the right mudguard as described here.
4. From the bottom of the car, use a 5 mm hex key to unscrew the screw securing the sensor to the cylinder block.
5. Remove the sensor from the socket in the cylinder block.
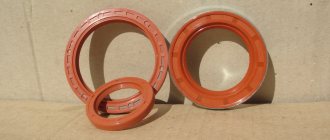
6. The connection is sealed with a rubber ring. Before installing the sensor, check the condition of the ring.
If it is damaged (cracks, tears, jams) or the rubber loses its elastic properties, replace the ring with a new one.
7. Install the crankshaft position sensor in reverse order.
How to check and replace the crankshaft sensor VAZ-2107-20
The crankshaft position sensor is installed in the boss hole of the camshaft drive cover bracket.
The sensor provides the controller with information about the angular position and speed of the crankshaft.
The sensor is an inductor; it reacts to the passage of the teeth of the crankshaft pulley near the sensor core.
Two adjacent teeth on the disc are cut off and form a cavity. When it passes, the sensor generates a so-called synchronization reference pulse at each crankshaft revolution.
The installation gap between the sensor core and the pulley teeth is 1.0±0.2 mm.
If the sensor or its circuits fail, the engine stops working and the “CHECK ENGINE” lamp lights up.
With the ignition turned off, disconnect the wire block from the sensor.
Use a Phillips screwdriver to unscrew the sensor mounting screw.
We remove the sensor from the hole in the boss of the camshaft drive cover
The resistance of a working sensor should be in the range of 550–750 Ohms
Install the sensor in reverse order.
avtomechanic.ru
Removing the crankshaft position sensor VAZ-2110
The crankshaft position sensor is designed to generate signals by which the ECU synchronizes its operation with the engine operating cycles. Therefore, this sensor is often called a synchronization sensor. The operation of the sensor is based on the principle of induction - when the teeth of the crankshaft pulley pass past the sensor core, AC voltage pulses appear in the sensor circuit. The frequency of occurrence of pulses corresponds to the speed of rotation of the crankshaft. The teeth are located around the circumference of the pulley (every 6°).
Two of them are separated from each other at an angular distance of 18°.
This was done to form reference signals in the sensor circuit - unique reference points relative to which the ECU determines the position of the crankshaft - top dead centers in the first - fourth and second - third cylinders. It is impossible to operate an engine with a faulty crankshaft position sensor. The crankshaft position sensor cannot be repaired; in the event of a malfunction, it is replaced as an assembly.
Removing and installing the crankshaft position sensor
1. Use a screwdriver or finger to press out the plastic latch securing the wiring harness block and disconnect the block from the sensor.
2. Unscrew the sensor mounting bolt with a 10mm wrench
3. Remove the sensor from the cover boss hole.
4. Check the sensor resistance. For a working sensor it should be 0.55 - 0.75 kOhm.
5. Install the crankshaft position sensor in the reverse order of removal. Using a set of feeler gauges, we check the gap between the end of the sensor and the teeth of the crankshaft pulley. The gap should be 1 ± 0.41 mm; it is specified by the design of the sensor and is not adjustable.
With the ignition off, disconnect the engine management system wiring harness block from the crankshaft position sensor. We connect the tester probes to terminal “B” of the wiring harness block and engine ground. With the ignition on and the crankshaft stationary, the tester should record a voltage of about 2.5 V. A similar voltage should be between terminal “A” of the wiring harness block and engine ground. If the voltage values do not correspond to the norm, check the serviceability of the circuits (open and short to ground) between terminal “B” of the wiring harness block and terminal “34” of the controller, as well as between terminal “A” of the block and terminal “15” of the controller. If the voltage values do not match and the circuits are working, the controller is faulty.
You can also check this way:
1. Connect a multimeter to the sensor terminals (in voltmeter mode with a measurement limit of up to 200 mV).
2. We quickly move the screwdriver blade close to the end of the sensor, while we observe voltage surges on the voltmeter.
The sensor can be checked more accurately by taking readings from it while it is installed on the engine and the crankshaft pulley is rotating. For a working sensor, the voltage at the terminals reaches 0.3 V; we replace the faulty sensor.
Checking and replacing the crankshaft position sensor of a VAZ-2107-20 car
The crankshaft position sensor is installed in the boss hole of the camshaft drive cover bracket.
The sensor provides the controller with information about the angular position and speed of the crankshaft.
The sensor is an inductor; it reacts to the passage of the teeth of the crankshaft pulley near the sensor core.
Two adjacent teeth on the disc are cut off and form a cavity. When it passes, the sensor generates a so-called synchronization reference pulse at each crankshaft revolution.
The installation gap between the sensor core and the pulley teeth is 1.0±0.2 mm.
If the sensor or its circuits fail, the engine stops working and the “CHECK ENGINE” lamp lights up.
With the ignition turned off, disconnect the wire block from the sensor.
Use a Phillips screwdriver to unscrew the sensor mounting screw.
We remove the sensor from the hole in the boss of the camshaft drive cover
The resistance of a working sensor should be in the range of 550–750 Ohms
Install the sensor in reverse order.
Diagnostics and replacement of the crankshaft position sensor VAZ 2107
What is a crankshaft sensor? In order to synchronize the ignition operation and fuel supply to the cylinder blocks on an injection engine, it is necessary to determine the crankshaft speed. This is precisely why you need a crankshaft position sensor, which is installed opposite a special synchronization disk mounted on the crankshaft.
Signs of a malfunction of the VAZ 2107 crankshaft position sensor
- The first thing that may indicate the imminent death of the crankshaft sensor is an arbitrary decrease or increase in engine idle speed.
- Severe reduction in engine power
- Unable to start the engine
Removing the crankshaft position sensor
- Disconnect the contact chip from the sensor by first releasing the latch
- Using a Phillips screwdriver, unscrew the sensor mounting screw.
- After removing the crankshaft position sensor, we check its operation using a multimeterDiagnostics and replacement of the crankshaft position sensor VAZ 2107
Checking the crankshaft position sensor VAZ 2107
- Connect a multimeter to the sensor contacts (in voltmeter mode)
- Using a screwdriver, we quickly move it close to the end of the sensor several times. If a voltage surge occurs when the screwdriver blade is near the sensitive element, then the sensor is working. If the jump does not occur, or it is very weak, in this case the VAZ 2107 crankshaft sensor must be replaced.
Signs of a malfunction of the VAZ 2107 crankshaft position sensor
- The first thing that may indicate the imminent death of the crankshaft sensor is an arbitrary decrease or increase in engine idle speed.
- Severe reduction in engine power
- Unable to start the engine
Removing the crankshaft position sensor
- Disconnect the contact chip from the sensor by first releasing the latch
- Using a Phillips screwdriver, unscrew the sensor mounting screw.
- After removing the crankshaft position sensor, check its operation using a multimeter
Diagnostics and replacement of the crankshaft position sensor VAZ 2107
Checking the crankshaft position sensor VAZ 2107
- Connect a multimeter to the sensor contacts (in voltmeter mode)
- Using a screwdriver, we quickly move it close to the end of the sensor several times. If a voltage surge occurs when the screwdriver blade is near the sensitive element, then the sensor is working. If the jump does not occur, or it is very weak, in this case the VAZ 2107 crankshaft sensor must be replaced.
The crankshaft position sensor of the VAZ-2107 car, as well as other injection vehicles, is designed to synchronize the operation of the engine ignition system, as well as fuel injectors. Failure of this part will lead to one of three situations: unstable engine operation, incomplete combustion of fuel, or complete engine failure.
The most common types of crankshaft sensors are induction. This is exactly the sensor installed on VAZ-2107 injector cars. They have their own characteristics, advantages and disadvantages, as well as diagnostic and repair methods. This information will be briefly presented below.
see also
The article will talk about the VAZ 2107 hall sensor, the advantages of using it, and most importantly, diagnostic and replacement methods. This is an electronic component that is used in the ignition systems of modern cars. Of course, they can be called modern rather conditionally, since Hall effect sensors in the ignition system are used only on carburetor engines. If we are talking about injection systems, then you will find a similar design in them only in revolution and speed sensors, or in alarm systems.
Factors affecting the cost of spare parts
Crankshaft sensors for VAZ 2107, 2109, 2114 are sold at different prices. The cost is determined by the following factors:
- Part condition.
- Type of spare part by design and operating principle.
- Originality.
- Car model.
- Reputation of the manufacturer.
- Spare part quality.
- Place of purchase.
- Delivery required.
- Implementer's pricing policy.
Crankshaft sensor StartVolt
Slot Hall sensors
The principle of operation is based on the fact that during operation the voltage at the signal output of the sensor changes. It is worth noting that the Hall effect is used for many purposes:
- Signal contact switching.
- In positioning tools.
- In speed and revolution sensors.
- Signal transmission.
Essentially, a Hall sensor is an analog device that converts voltage in the VAZ 2107 contactless ignition system. The design includes a sensing element, a housing, a permanent magnet and three wires. These devices are actively used not only in automotive technology. They can be found in computers and pneumatic equipment. In other words, where reliability and accuracy are required.
Advantages of Hall effect sensors
If you compare electronic and classical ignition systems, you can see one feature - the former are more reliable, more durable, more stable, and more efficient. This is achieved due to the fact that there is no ill-fated contact group, which tends to deteriorate very quickly. After all, it is affected not only by the destructive force of the spark, but also by mechanical friction. In addition, in cars with electronic ignition, it is possible to connect the tachometer directly to the signal wire of the sensor.
Design features
To check and replace the sensor, you need to know what it looks like. It wouldn’t hurt to talk a little about its internal structure at the same time. The design of this device is very simple. But it varies somewhat depending on the purpose of the sensor and the installation location. For example, digital ones turn out to be more complicated; they have a semiconductor crystal built into the sensitive part. Between the semiconductor crystal and the small circuit (responsible for switching) there are short sections of connecting conductors.
The semiconductor crystal in the VAZ 2107 Hall sensor must occupy a special position. The magnet is positioned so that its field lines are perpendicular to the plane of the crystal. It is due to this that induction (magnetic) occurs. In this case, some current passes through the crystal. Under the influence of a magnetic field, an electromotive force is generated and supplied to the switching circuit.
Replacement and diagnostics
But is all this theory necessary for the average motorist? Hardly. Therefore, let's jump straight to the point - how to check this sensor and replace it?
It is worth mentioning that it is installed inside the ignition distributor (distributor) of the VAZ 2107. When diagnosing, there is no need to remove the sensor, just disconnect the connection plug. So, here are the two main diagnostic methods:
- Measuring the voltage at the signal pin. Connect the voltmeter, turn on the ignition. When rotating the crankshaft (using a ratchet wrench) of the VAZ 2107, a change in the voltage value will be observed in the range of 0.4..3 V.
- The most expensive way is to install a new Hall sensor that is known to be good. If the problems have disappeared, then we can safely say that the old device had obvious problems.
To replace the device, you will need to complete a simple chain of operations:
- Use a screwdriver to open the latches on the cover.
- Remove the top cover of the ignition distributor of the VAZ 2107.
- Unscrew the nut and remove the clamping device.
- Remove the distributor housing.
- Knock out the pin (fixing the oil slinger) with a hammer.
- Take out the coupling, washer, and remove the distributor shaft.
- Remove the brass screws, steel fasteners and regulator.
- Pull the lever of the vacuum ignition angle regulator to the side.
- After removing the curtains, you can remove the VAZ 2107 Hall sensor and install a new one in its place.
That's all, now all work can be considered completed. Assembly is carried out in reverse order. And don’t forget to install all the elements so that there is nothing left over.
The crankshaft position sensor of the VAZ-2107 car, as well as other injection vehicles, is designed to synchronize the operation of the engine ignition system, as well as fuel injectors. Failure of this part will lead to one of three situations: unstable engine operation, incomplete combustion of fuel, or complete engine failure.
The most common types of crankshaft sensors are induction. This is exactly the sensor installed on VAZ-2107 injector cars. They have their own characteristics, advantages and disadvantages, as well as diagnostic and repair methods. This information will be briefly presented below.
Crankshaft sensor VAZ-2107-20
The crankshaft position sensor is installed in the boss hole of the camshaft drive cover bracket.
The sensor provides the controller with information about the angular position and speed of the crankshaft
The sensor is an inductor; it reacts to the passage of the teeth of the crankshaft pulley near the sensor core.
Two adjacent teeth on the disc are cut off and form a cavity. When it passes, the sensor generates a so-called synchronization reference pulse at each crankshaft revolution.
The installation gap between the sensor core and the pulley teeth is 1.0±0.2 mm.
If the sensor or its circuits fail, the engine stops working and the “CHECK ENGINE” lamp lights up.
Before removing the sensor, turn off the ignition.
Disconnect the negative terminal of the battery
Disconnect the wire block from the sensor.
Use a Phillips screwdriver to unscrew the sensor mounting screw.
We remove the sensor from the hole in the boss of the camshaft drive cover.
Crankshaft position sensor
The resistance of a working sensor should be in the range of 550–750 Ohms.
Install the sensor in reverse order.
autoruk.ru
Signs of sensor malfunction
The malfunctions described below may be signs of breakdowns in other components or mechanisms. However, if at least one of them appears, it is necessary, among other things, to check the functionality of the crankshaft position sensor; fortunately, this is not difficult to do.
So, signs of DPKV failure include :
- a decrease in the dynamic characteristics of the car (this is expressed in poor acceleration and acceleration, this is most noticeable in low gears);
- “floating” engine speeds, including idle (although this factor can also occur while driving, which is unfavorable when the car is moving evenly);
- increased fuel consumption;
- there is a risk of detonation during the development of significant dynamic loads;
- If the crankshaft position sensor is completely out of order, it is impossible to start the engine.
The described reasons, among others, are consequences of the special design of the DPKV, which is described below.
Replacing the sensor
The crankshaft sensor may become unusable and then it needs to be changed. But first, you should pay close attention to the signs of malfunction to be sure that the sensor really needs to be replaced. These signs are:
- Reduced motor performance of the vehicle.
- Unstable engine idle speed, especially when the car is moving evenly.
- Increased fuel consumption.
- When driving fast, there is a risk of detonation.
- The engine does not start.
If the crankshaft sensor on a VAZ 2107 fails, then it must be checked for functionality. To do this, you need to prepare a screwdriver and a multimeter.
Set the position on the multimeter, which corresponds to 200 MV. The outputs from the DCPV must be connected to a multimeter. Bring an object, maybe a screwdriver, in close proximity to the core. Voltage surges should appear on the multimeter. If this does not happen, then the sensor is broken and needs to be replaced.
To install a new crankshaft sensor on a VAZ 2107 with your own hands, you will need:
- Tools: 10 mm wrench for hard-to-reach places, several probes of different sizes.
- New crankshaft sensor.
First of all, it is necessary to de-energize the sensor. To do this, you will need to remove the block with wires from it.
Unscrew the mounting screw with a 10 mm socket wrench and remove the DPKV.
Install a new one in place of the broken sensor.
After installing a new DCPV, you should check the distance between the sensor core and the pulley teeth. It should be within: 1 mm +/- 0.41 mm.
If the numbers are different, this indicates that there is dirt under the device. The sensor may be pushed out or pushed back too far. You cannot reduce the distance, you can only expand it. After installing the sensor, start the engine and check its operation.
Thus, the crankshaft sensor on the VAZ-2107 is a rather important device. If the faults mentioned above occur, first of all you need to check the crankshaft sensor. It does not have a complicated device, and you can check it in the simplest way - measure the resistance of the coil. If there are no diagnostic devices, then you need to contact a professional at a service station.
Crankshaft position sensor design
The design of the DPKV is simple and consists of a small number of elements. In particular, its main element is a magnetized steel core on which a thin copper wire is wound. On top they are covered by a plastic (plastic) case. Naturally, in a copper winding, all the wires are insulated from each other (this can be implemented in different ways, for example, through compound resin or conventional insulation made of PVC or other material).
The operating principle of the device is as follows. In the immediate vicinity of the sensor, a “monitoring” disk with teeth around the perimeter rotates. Two of them are missing, creating a kind of emptiness. The main task of the sensor is to record the passage of this section and send appropriate signals to the ECU. If it does this late or with a weak signal, the electronic unit will provide incorrect information to the fuel system, and a mixture of suboptimal composition will be formed.
Methods for checking DPKV
There are three main ways in which you can check the performance of the crankshaft position sensor. This can be done without complex instruments (accuracy in this case is not guaranteed), but the device must be dismantled before testing. At the same time, marking its position with marks. This is necessary so that during subsequent installation you will not have problems starting the engine.
So, the first test method is to measure the resistance of the inductor. The method is the simplest, but it does not give complete confidence in the accuracy of the result. To perform this procedure, you need a standard electronic multimeter turned on in insulation resistance measurement mode.
The test is carried out in pairs at the wire terminals. If everything is in order with the insulation, then the corresponding value will be in the range from 500 to 700 Ohms. If this value is lower, then there is a high probability of an interturn short circuit. As a result, the sensor will produce incorrect values.
The second method is to check the inductance of the coil. As for instruments, in this case you can directly use a digital multimeter that has an inductance measurement mode. Otherwise, additional equipment with the corresponding function must be used. The inductance value is usually between 200 and 400 H.
Finally, the third method is to use an oscilloscope. This is the most difficult test method, however, it gives the most accurate result. In particular, with its help you can not only ascertain the serviceability or malfunction of the coil, but also assess its general condition. This becomes possible by recording the formation of signals on it.
Crankshaft sensor for VAZ 2107 - design and principle of operation
The crankshaft position sensor or DPKV on the VAZ 2107 ensures engine operation (not stable, but overall). With its help, the ECU knows what position the crankshaft is in. From this, the control unit knows the location of the pistons in the cylinders, which directly affects fuel injection through the injectors, and the occurrence of a spark to ignite the fuel assembly.
The device in question has a simple design. The sensors installed on the seven work on the principle of inductance. The part consists of a metal cylindrical base with a wire wound on the surface (coil). The top of the coil is covered with a permanent magnet. The operation of the device is associated with a ring gear, which is attached to the crankshaft. It is with the help of this ring gear that the sensor records signals and transmits them to the computer. The principle of operation of the device is as follows: when the crown tooth is located at a level with the steel core of the DPKV, an electromotive force is induced in the winding. A voltage appears at the ends of the winding, which is detected by the ECU.
The gear wheel consists of 58 teeth. Two teeth on the wheel have been removed to determine the starting position of the crankshaft. If the DPKV fails, which is extremely rare, then starting the engine and its operation is simply impossible. The marking of the sensor, which is installed on the VAZ 2107, is as follows - 2112-3847010-03/04.
Signs of sensor failure
The main sign of a DPKV failure is the impossibility of starting the engine. Such a breakdown occurs due to a complete malfunction of the device. If the surface of the DPKV is dirty or the contacts are oxidized, the following malfunctions can be detected:
- Deterioration in car dynamics - poor acceleration, decreased power, jerks when changing gears.
- The revolutions begin to fluctuate, not only at idle, but also when driving.
- Fuel consumption increases. If the ECU receives a distorted signal, this will negatively affect the operation of the injectors.
- The appearance of engine detonation.
If the above symptoms are detected, then DPKV should be checked. To do this, you need to know where the crankshaft sensor is located. On the VAZ 2107, the DPKV is located on the front engine cover, where it is fixed to a bracket. On other car models, this element may be located on the other side of the crankshaft near the flywheel. If you suspect a breakdown of the DPKV, it must be checked.
Methods for checking DPKV
You can check the suitability of the crankshaft sensor on the seven in three different ways. To begin with, it should immediately be noted that the malfunction of the device can be determined visually. To do this, you should inspect the part, and if there is contamination, as well as microcracks on the magnet body, you can judge that it is broken. Contaminants are easily removed, but if there are microcracks, the part must be replaced.
The crankshaft sensor on the VAZ 2107 injector is checked in three ways:
- Checking resistance. Use a multimeter set to resistance measurement mode. We touch the probes to the terminals of the device. If the device shows a value from 550 to 750 Ohms, then the element is suitable for use. If the value is higher or lower than normal, then the part needs to be replaced.
- Inductance check. Connect an LED or multimeter probes to the device terminals. At the same time, set the device to constant voltage measurement mode. Bring a metal object to the end of the part and quickly remove it. In this case, the voltage should increase (the LED will light up). This indicates that the DPKV is working properly.
- Checking with an oscilloscope. The most accurate and reliable way to check with an oscilloscope. To do this, the DPKV is connected to the device, and then you need to bring the metal part to it. The diagram determines the serviceability of the DPKV.
The inductive crankshaft position sensor, which is used on the seven, creates sinusoidal pulses. They arrive at the ECU, where they are rectified into rectangular pulses. Based on these pulses, the control unit makes a decision about sending a pulse to the injectors and spark plugs at the right time. If during the inspection it turns out that the DPKV is faulty, it should be replaced.
How to replace the crankshaft sensor on the seven
Knowing where the DPKV is located on the VAZ 2107, it will not be difficult to dismantle the device. This procedure is not difficult and does not take much time. Detailed instructions on how to replace the crankshaft sensor on a VAZ 2107 look like this:
- The work is carried out under the hood of the car, but it can also be done from below.
- Disconnect the clamp with wires from the DPKV.
- Using a Phillips screwdriver, unscrew the fastening element that secures the sensor.
- Remove the device and install a new one in its place. Assembly is performed in the reverse order of dismantling.
After replacing the device, you can check the performance of the engine. Despite the fact that the part rarely fails, it is recommended to always have a spare sensor in the car. If an element fails, it can always be quickly replaced to continue moving.
As a result, it should be noted that DPKV is the most important sensor. It has a simple design and rarely fails. The estimated cost of the device for the seven is about 1000 rubles. It is recommended to check the part not only when the first signs of a malfunction appear, but also periodically to clean the working surface from contamination.
Crankshaft sensor VAZ-2107-20
The crankshaft position sensor is installed in the boss hole of the camshaft drive cover bracket.
The sensor provides the controller with information about the angular position and speed of the crankshaft
The sensor is an inductor; it reacts to the passage of the teeth of the crankshaft pulley near the sensor core.
Two adjacent teeth on the disc are cut off and form a cavity. When it passes, the sensor generates a so-called synchronization reference pulse at each crankshaft revolution.
The installation gap between the sensor core and the pulley teeth is 1.0±0.2 mm.
If the sensor or its circuits fail, the engine stops working and the “CHECK ENGINE” lamp lights up.
Before removing the sensor, turn off the ignition.
Disconnect the negative terminal of the battery
Disconnect the wire block from the sensor.
Use a Phillips screwdriver to unscrew the sensor mounting screw.
We remove the sensor from the hole in the boss of the camshaft drive cover.
Crankshaft position sensor
The resistance of a working sensor should be in the range of 550–750 Ohms.
Install the sensor in reverse order.
autoruk.ru