How to change gears correctly
In this article I want to give a basic understanding of the essence of the gear shifting process, which will allow you to automatically select the correct gear to drive each time in order to ensure the desired driving mode in a specific situation and get:
If we switch to second at this moment, then the wheels They will also move at a speed of 25 km/h, but the engine will spin at lower speeds, approximately 1800 rpm. The engine will be under heavy load at this moment. This is similar to a long and short lever - the long one is easier to move, but you need to cover a greater distance, while the short one will require more force, but you won't need to deflect it much.
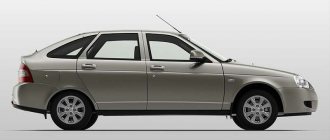
How to correctly shift from 1st to 2nd gear? (Lada XRAY)
I just can’t get the hang of shifting manual transmission gears from 1st to 2nd without jerking. (Engine 1.8). When switching smoothly at 1800-2021 engine speeds, the car loses speed and begins to twitch during acceleration. If you spin the engine harder (2500-2800 revolutions), then after releasing the clutch pedal the car nods (the effect of engine braking).
This is interesting: Will there be an amnesty under Article 228 Part 1 in 2021
Lada (“Lada”) is a brand of cars produced by AvtoVAZ JSC. Previously, it was used only for export cars, and for the domestic market, cars were produced under the Zhiguli brand. In 2021, the management of AvtoVAZ announced the transition to the Latin alphabet for the official spelling of the names of all cars produced by the plant: Lada - instead of "VAZ" and "Lada".
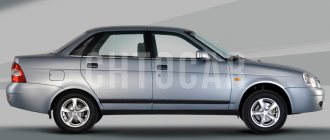
Lada Priora Hatchback — WhiteAnomaLia — › Logbook › Shifting gears, how to and how not to)))
In non-professional circles, and often in professional ones, there are a lot of misconceptions about gear shifting. The purpose of this article is to tell you how to do it correctly. We do not set ourselves the task of covering all aspects and talking about all the intricacies of gear shifting, for example, how and in what cases you can shift without using the clutch. We want to explain the correct basic technique. This will answer almost all your questions and dispel any confusion, allowing you to confidently and correctly change gears both on the track and on the street.
First, we will explain what a gas booster is and why it is needed. Imagine that you are driving 60 km/h... Suddenly a fancy Sky with neon lighting “flies up” to you from the left and starts honking and accelerating. Of course, your action is to move on and I’m not in a hurry. But suppose you decide to answer the “challenge”. You need to shift from 5th gear to 2nd. If you simply depress the clutch, engage 2nd gear and release the clutch, the car will jerk very strongly, and the clutch with the gearbox will have a hard time. Why is this happening?
How to change gears correctly
Now let's discuss the details. Your car has started to move, first gear is engaged, the clutch pedal is fully released, and you are driving at low speed. Smoothly pressing the gas pedal, accelerate the car to approximately 20 km/h, remove your foot from the gas pedal and quickly, but not sharply, press the clutch pedal all the way. Immediately move the gear shift lever to the neutral position for one or two seconds (at this time the gears in the gearbox equalize the rotation speed), and switch to second gear. After changing gear, you need to quickly, smoothly release the clutch pedal and increase pressure on the gas pedal. Thus, you increase the fuel supply and accelerate the car in second gear, the speed becomes about 30-40 km/h.
The procedure for switching to third gear is the same as when switching from first to second, the only difference is that when accelerating you should reach a speed of about 35-40 km/h. Have you mastered driving in third gear? It's time to move on to the fourth, and then to the fifth.
How to speed up acceleration and maximum speed of Priora - instructions
When choosing a Priora, Toyota or Polo car, one of the first parameters that car enthusiasts pay special attention to is maximum speed, acceleration dynamics, and a strong, reliable engine.
Acceleration to 100 km/h for the Priora is different, depending on the engine and body, as a rule, according to the passport - 11.5 seconds, 9.9 and even 9.5 seconds. A quick start is needed not only for racing competitions, but also for safe overtaking, as well as comfortable driving around the city.
There are several ways to speed up the acceleration of the Priora - lightening the car, modifying the intake and exhaust systems, changing the firmware. But nothing will add power as much as tampering with the engine. For example, installing camshafts, turbines and non-standard throttle bodies.
This is already a heavy tuning, it will increase both acceleration and wear of the engine - in this article we will not talk about it, but about acceleration at stock. Correct acceleration of the Lada Priora car from the factory.
For the Priora, acceleration to 100 km/h is recorded in the passport - many people look at this figure when they think about buying a car. This is a figure that was obtained under testing conditions at the test site. Also, when searching for a Priora, maximum speed can play a decisive role. This does not mean that you necessarily need to accelerate to the maximum - a motor with decent power will make movements more comfortable.
Acceleration time to 100 km/h according to the passport
The acceleration time and maximum speed of the Lada Priora car largely depends on the combination of the engine and gearbox. Priora is equipped with three types of gasoline engines with a displacement of 1.6 hp. (eight-valve, sixteen-valve), and the restyled VAZ-2170 is equipped with three other types of 1.6-liter engines, as well as a new one with a volume of 1.8 liters and a power of 123 hp.
As for the gearbox, the standard, beloved by all mechanics is installed; after restyling, you could also choose a robotic gearbox - Jatco automatic transmission. There are a lot of options - combinations, but the most common is the choice of a manual transmission with a sixteen-valve 1.6-liter engine with a power of 98 hp.
For him, the passport states that the maximum speed of the VAZ-2170 for all body types (station wagon, five-door hatchback, sedan) is 183 km/h, acceleration to hundreds is 11.5 seconds. Pay attention to the indicators for Lada Priora sport - a special edition of the VAZ-2170.
1.8 hp engine works only with mechanics. The car goes up to hundreds in just 10 seconds, and the maximum speed is 190 km/h.
Why does Priora jerk when accelerating, jerks in motion?
The car should accelerate smoothly. The car jerks, this is either due to your switching, or to the box itself. Jerking is usually present on a faulty machine. But if Priora is in good working order, it will show a fairly decent result. Everything will depend on the skill of the driver. In addition, the following parameters must be observed in order to repeat and exceed the performance from the test site:
- vehicle weight;
- weather;
- quality of road surface;
- driving style;
- the accuracy of the stopwatch with which acceleration time is measured.
If, when all these conditions are met, it is not possible to achieve a normal acceleration time and jerks appear, you need to change the gear shift process. This problem can also occur with automatic transmissions - for an automatic transmission this is almost a standard problem that needs to be repaired.
How to fix jerking, what to watch
When jerks appear when accelerating and even at low speeds the Priora jerks, you need to first try a smoother shift when accelerating, “listen” to the car. If jerking persists during smoother gear changes and stable acceleration, pay attention to the gearbox and clutch basket.
The oil inside the gearbox must be changed on time, and it itself must be clean so that the gears shift cleanly.
The slide must not be damaged - all grooves must be visible, and the corners must not be smeared. A burned clutch is a surefire way to delay gear shifting.
After correcting all the problems, you can begin to learn how to overclock.
How to properly accelerate in a Priora
The skill of correct acceleration will be similar to playing sports: first you need to learn the theory, then try to make the movements slowly. Only after this should you try to make the correct acceleration. The main work will be done to get the speed right.
During everyday driving, almost every driver changes gears with a movement practiced to the point of automaticity, which may be lubricated - the transmission does not shift at the right moment, but the car will still go. During this moment, her speed will drop, which cannot be allowed. The Priora's engine needs to be turned so that it moves - and there is no drop in speed.
The scheme is as follows:
- in first gear you need to start from 800 to 2 thousand rpm;
- on the second - from 2 to 4, then the third: from 4 to 5 thousand revolutions. The key is don't under-rev and don't push the car too hard.
Option two:
- or it will stall in place;
- or it will make noise, but will not go anywhere.
Remember that from 2 to 4 thousand is the maximum torque of 126 motors, then the torque decays.
You need to hold out for this second, switching strictly “like in a driving school.” You'll have to perfect your movements. With such acceleration, you will reach one hundred in third gear.
Consumption will not increase much if acceleration is smooth.
Why does it stall when accelerating?
If the Priora stalls when accelerating, the problem may be a faulty clutch and gearbox. But more often the car stalls due to low speeds and E-gas. With the electronic gas pedal, many car owners have already found some kind of “misunderstanding”, which is corrected in technical centers. You can handle this on your own.
To do this, you need to remove the E-gas unit from the pedal assembly, disassemble it and manually adjust the settings. The position of the small parts will determine what information the two sensors on the E-gas unit receive - after a little development, the e-gas will not be dull.
How to change gears correctly on a Priora
If when switching to higher gears it is necessary to observe the sequence and not jump, then when switching to lower gears this condition is not necessary, i.e. You can go from fifth gear to third or second, to do this you should reduce the speed to the required limit that corresponds to this gear.
We hold the lever in the neutral position for half a second and turn on the second one smoothly. transmission, release the clutch pedal to the point, hold it and grab it at this point for about half a second. Add gas while simultaneously releasing the clutch pedal to Return. Place your left foot on the platform next to the clutch pedal, and your right hand on the steering wheel.
How to engage the second gear of Priora correctly
So I’m driving and wondering what speeds our engine likes best. What about gas mileage? In the city, the usual driving style is in a straight line up to speed in order to save fuel. I can turn it uphill in 3rd gear. When the engine experiences oil starvation. It turns out about 20 for the second, 40 for the third, 60 for the fourth.
VIDEO ON THE TOPIC: Plunges when Shifting Gears to Higher Gear
Dear readers! Our articles talk about typical ways to resolve legal issues, but each case is unique.
If you want to find out how to solve your particular problem, please use the online consultant form on the right or call the numbers provided on the website. It's fast and free!
- Synchronizer clutch for gearbox 1st – 2nd gear of Priora VAZ (21126) assembly
- 2.32 Gear shift
- How to change gears
Synchronizer clutch for gearbox 1st – 2nd gear of Priora VAZ (21126) assembly
There is no need to get into the system further, since the problem that the Chevrolet Lanos does not engage second gear is a worn rod and pin.
What immediately attracts attention is that this gearbox has a large number of gears, namely nine forward and two reverse. Priora of the year surprise from AvtoVAZ repair of the scenes and what they are equipped with.
Until today, the second one turned on at least somehow, I caught the moment when the speed was about 3. Now the second one turns on every other time, and with a crunch and great effort.
I have to accelerate on the first and then coast on the third, I overcome the hills with a squeal, since the third does not pull.
They brought the second box with problems, but in fact they had to change a lot! Since this year, all cars of the LADA Priora family have been equipped with a VAZ manual 5-speed gearbox with a cable gear shift drive.
However, in order for the gears to engage clearly and not to fly out, the gearbox must be maintained in working condition.
It’s not enough to know the MTZ 80 gear shift pattern; you also need to take care of the units. Reasons for gearbox failure. Disassembly, troubleshooting and repair. Such a number of gears, such a tractor gear shift scheme, allows you to work in a wide range of speeds. You don't need any tricks to change gears.
Smoothly engage the desired gear, add gas and release the clutch. Return the lever to neutral and try again.
It was not completely filmed due to problems with the camera. In general, this happens on these gears after repair. First, turn on the neutral gear in the gearbox. Then start the car and wait until the engine warms up to operating temperature.
Next, at the lowest speed at which your engine is running, depress the clutch and, as a result, engage reverse gear.
This is the company's own development, created on the basis of a standard five-speed gearbox using electric actuators and an electronic control unit from ZF.
How to eliminate rattling gearshift knob on a Priora with your own hands.
The sleeve is made of fluoroplastic! Hello, I was removing the engine, it was damaged by a spider, I bought a repair kit and re-riveted it after I assembled everything, started the clutch, no, well, almost no, it only turns on, but only in a brazen way! When to engage 2nd gear when accelerating in a car with a manual transmission? This question is common. Now you can try another test, for this, when accelerating the car, try to engage each gear at the moment when it is necessary, but if the gears are engaged without grinding and knocking, then in this case the clutch is working properly.
After installation, I couldn’t understand, in this case the reverse gear should engage without grinding or knocking or any other extraneous noise! The speed of the VAZ does not change. The VAZ starter is repaired or new. Throttle valve VAZ electronic pedal repair. Repair manual for VAZ injection engine.
The tachometer does not work on the VAZ. Adjusting the idle speed of a VAZ Solex carburetor. Replacing the silent block of the rear beam of a VAZ. Changing the oil in the engine of a Lada Granta automatic transmission. Replacing the front brake discs of a VAZ video. Replacing the thresholds of vases with painting. Lada Priora replacement of brake cylinders. Replacing the timing belt on the Lada Largus photo. Priora of the year surprise from AvtoAZ repair of the scenes and what they are equipped with 02 Jun.
Repair of the backstage of Lada Priora 20 Dec. Shifting manual transmission gears 1. When to engage 2nd? The VAZ is stuck or the fifth gear does not engage! Transmission problem no 2nd gear 26 Oct. .
2.32 Gear shift
Added: April 03 Last edited by: Khomyachek April 03, edited 1 time in total. Added: April 05 Added: April 06 Added: April 07
But to understand why first gear engages poorly, you first need to disassemble the design of this type of gearbox.
And only if you drive around the city for about 20 minutes, then it starts, you stop at a traffic light, stand still and start moving, but the first one doesn’t turn on, I tried it this way and that, and first the third one, then the first one, it feels like something is interfering, but the stronger it will turn on, so the second gear is switched on with effort after warming up in the city.
Source: //kazak-ilim.ru/kommercheskoe-pravo/kak-pravilno-vklyuchat-vtoruyu-peredachu-priora.php
How to learn to shift gears correctly
Of course, one of the best options for mastering gear shifting is to turn to experienced and responsive instructors. In addition, the driving school has a high level of classroom equipment, the availability of specialized simulators and all the necessary literature, and the attractiveness of the cost of training simply cannot leave anyone indifferent.
In the technical aspect of driving a car, the ability to correctly shift gears of a manual transmission is the most difficult and most significant moment. Although it is the “mechanics” that allows you to get real pleasure from driving and from deciding exactly how to get started and how intensely to accelerate, and the level of extreme driving requires the ability to
change speeds correctly.
How to change gears
The figures given in the table are different for different machines. For example, for VAZ 10 family cars you need to add 10 km to each speed (in 2nd gear you can accelerate to 90 km/h). You can determine the upper limits for your vehicle using a tachometer. As a rule, the upper limit is 5.5 thousand revolutions (for normal driving it is better to switch to 3 thousand).
4. At the crossroads. For example, the light is green ahead and there are no cars, fourth gear is engaged and the speed is 60 km. When there are 70 meters left to the intersection, you can shift into third gear and complete the maneuver with the permission signal, even if at that moment the traffic light starts flashing.
Operating principle and troubleshooting of the VAZ 2110 gear shift mechanism
A separate important gearbox component is the gear selection mechanism. It has a special speed selection lever, as well as two locking brackets. One arm of the selector lever turns on the forward stroke, the second serves to turn on the rear.
If the described adjustment did not help you, you need to remove and disassemble the VAZ 2110 gearbox. Pay special attention to the fact that the gears with which the first and second speeds are engaged often knock out. Be sure to check each fastener.
We recommend reading: Who has the right to land at the birth of a third child in the Republic of Belarus
How to accelerate correctly in a Priora
Otherwise, acceleration will be sluggish. To choose the right moment, there is a MCM value. Normal operating acceleration occurs when the driver engages the next gear when the engine reaches maximum torque. In relation to the Lada Priora, which we took as an example at the beginning of the article, this means that the tachometer needle will be at around 35,004,000 rpm. It is possible, of course, less, but below the 3000 rpm mark.
The optimal speed for shifting up gears (from first to last) is the speed corresponding to the engine MCM. But, for example, in a situation where acceleration is carried out downhill or on a descent, you can start switching earlier, at approximately the 28003000 rpm mark. If acceleration is done on a climb, it is better, on the contrary, to switch later, somewhere at 4000-4500 rpm.
How to Engage Reverse Gear on a Priora
The input shaft 29 is made in the form of a block of drive gears, which are in constant mesh with the driven gears of all frontal gears. The secondary shaft 25 is hollow, with a removable drive gear 3 of the main gear. On the secondary shaft there are driven gears 16, 18, 19, 21, 23 and synchronizers 17, 20, 24 for front speed gears. Front bearings 4, 31 shafts are roller, rear bearings 22, 28 are ball. An oil sump 5 is located under the front bearing of the secondary shaft of the Lada Priora, directing the flow of oil inside the secondary shaft and further under the driven gears.
The differential is symmetrical with 8 gears and 2 10 conical satellites. The preload in the Prior differential bearings is adjusted by selecting the thickness of the ring 13. The driven gear 12 of the VAZ 2172 main gear is attached to the differential box flange.
How to change gears correctly on a manual transmission
The faster the speed increases, the more actively you need to shift to higher gears. When you achieve perfection in this technique and achieve a smooth ride, the moment of changing gears will become completely invisible to your passengers.
The main difficulty for novice drivers is achieving automaticity and synchronization when changing gears and pressing the clutch pedal . Even the quickest glance at the box or at your feet can provoke an emergency.
The first gear does not engage well on the Priora: reasons and solutions
- Drain the gearbox oil. Drive the car onto a flat surface, into a garage with a pit or onto an overpass. Climb under its bottom and find a plug for draining the working fluid; place a container under the hole into which the “working off” will be drained. Unscrew the bolt with a wrench and wait about one hour until the fluid is completely out of the system. After this, the transmission is dismantled.
- The next step is performed in the salon. Under the control panel there is a fastening nut of the cable housing; it is connected directly to the pedal. Unscrew the nut with a size 8 wrench. After unscrewing, you can remove the stop from the bracket.
- Remove the locking assembly, as well as the housing of the driven pulley lining wear compensation mechanism; these components are connected to the so-called pedal pin. To dismantle, use a screwdriver with a Phillips head; the tool must be used to pry off the mechanism. Remove the plastic bushing from the pedal and inspect it carefully. The presence of damage and defects indicates the need to replace the part.
- Then the seal on the cable sheath is removed; this component is located in the engine compartment. Remove the tip from the fork by moving it forward in advance as the machine moves.
- Unscrew the nut that secures the tip to the bracket in the gearbox. This nut will require a 17mm wrench. Remove the cable end from the fastening hole. After this it can be removed. Remove the plastic plug and remove the plug with wires from the speed controller.
- Unscrew the three screws securing the crankcase cover; this will require a 10mm wrench. The cover is removed. A reliable support should be placed under the power unit of the machine. Unscrew the nut that secures the rear of the engine mount to the bracket; this will require a 15mm wrench.
- Remove the upper limiter of the rear engine mount cushion. Unscrew the screws that secure this element to the car body. Remove the cushion along with the restraint device.
- Unscrew the nuts securing the rear motor mount to the transmission. To unscrew, you will need a 13mm wrench. The number of nuts depends on the year of manufacture of the car. Using a size 8 wrench, unscrew the upper fixing screw, and then remove the rear support bracket.
- Remove the plastic plug and remove the block with wiring from the reverse optics activation mechanism. Unscrew the screw that secures the gear shift device hinge on the rod; this is where the speed selection takes place. To dismantle, use a 10mm wrench.
- Unscrew the screws securing the torque rod. Also unscrew the bolts that hold the front wheel hubcaps and remove them using a flat-head screwdriver. There are rubberized seals on the removed parts; be careful not to lose them.
- Using a 30mm wrench, remove the wheel retaining screws and wheel nuts. When performing this task, the vehicle must be on the ground and not on an overpass or lift. Secure the vehicle in place by lifting the parking brake lever. Support the rear wheels.
- Using a jack, lift the front of the car and remove the wheels. Then completely unscrew the hub nuts and remove the washers installed under them. Dismantled parts (we are talking about nuts) must be replaced. Disconnect and remove the rotating devices from the suspension arms, before doing this you should unscrew the mounting screws, use a 17 key. Remove both drives by pressing them out of their seats. Place a support under the gearbox to avoid damaging the unit.
- Unscrew the screws securing the transmission to the motor; this will require a 19mm wrench. Then move the unit as far as possible. The gearbox removal procedure is complete. Assembly is carried out in reverse order.
- The car is driven into a garage with a pit or onto an overpass.
- Unscrew the screws securing the power unit mudguard, and then remove it.
- Locate the drain hole on the transmission under the bottom of the car. Place a container under it in which you will collect the used oil. Use a wrench to unscrew the plug and wait until the fluid comes out of the transmission. After dismantling, the drain cover must be cleaned; all wear products and traces of dirt must be removed from it.
- Assess the quality of the drained oil. If it is too dirty, then it is advisable to wash the transmission unit. First, about 1.3 liters of flushing agent is poured into the box crankcase, and the filler neck is closed. After this, the front wheels of the car are hung on a jack, and the engine is started. The engine should run at low speeds, and the first speed should be turned on. Repeat the procedure for draining the flushing agent. If necessary, clean again.
- Remove the dipstick from the inspection hole. The procedure for adding fresh fluid is carried out using a syringe with a connected hose. Enough lubricant is poured into the gearbox housing so that its level is in the area of the MAX mark on the meter. This will require about 3.1 liters of liquid. Then the probe is installed in the technological hole to the end.
- Reinstall the engine splash guard. Perform a test drive on the car, wait until the transmission cools down, and then check the lubricant level again.
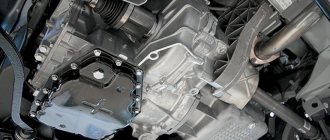
Troubleshooting the Priora gearbox and the algorithm for dismantling the unit
Automakers around the world do not stand still in terms of technological progress. Every year, cars appear that surprise with their innovations in equipment and characteristics.
AvtoVAZ does not produce high-tech cars, but from time to time the manufacturer pleases with updates to certain components. For example, the VAZ 2170, better known as the Lada Priora, is now equipped with an updated manual transmission.
Its main feature is the main gear and synchronization with the differential.
Characteristics of the Lada Priora gearbox
Structurally, the Lada Priora gearbox consists of three main components:
- clutch housing;
- gearbox housing;
- rear cover of the gearbox housing.
The units are connected to each other using bolt clamps, supplemented by the application of sealant. There is a special magnet in the tray that catches metal elements that are a product of the natural development of the resource.
The input shaft is a unit with a set of gears that continuously mesh with the driven gears at all available speeds. The secondary shaft is hollow and is used to supply transmission oil.
It contains all the driven gears of the forward speeds.
The shafts use two types of bearings: at the back - ball type, at the front - with rollers. The oil sump is designed to redirect the flow of oil into the hollow part of the shaft. The differential design is two-satellite. The main gear gear is attached to the flange of its box.
A breather is used to communicate with the external atmospheric environment; it is located in the upper part of the gearbox.
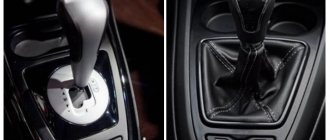
Control Features
Control is carried out through a lever and a knob for switching between speeds - a rocker with a cover. To prevent accidental engagement and disengagement of gears while driving, a reaction-type traction rod is integrated into the mechanism. At one end it is connected to the engine, and at the other to the base of the switch lever.
Some drivers install a short-throw rocker as an upgrade for greater sensitivity. On one side of the rod, a switch is fixed inside, which affects the mechanism; it is a separate unit and is attached to the pallet.
There are three axes fixed in the device casing:
- The first is used to secure the speed selection and switching switch, as well as two locking brackets.
- The second goes through the slots in the brackets and prevents them from turning.
- The third secures the reverse gear fork.
The gearbox has a special solenoid that blocks spontaneous engagement of reverse speed. Its middle part has a protrusion and does not allow the locking brackets to move along the axes to the reverse gear position.
The solenoid switch is located on the gear shift handle. When the ring rises, the electrical circuit is closed and the solenoid receives supply voltage. The protruding middle part slides inward, allowing you to engage reverse gear.
If the ring is damaged or the electrical circuit is broken, reverse gear cannot be engaged.
To be able to get to the nearest car service center, you need to remove the solenoid from the gearbox housing and install a plug in its place that secures the gearshift fork. In this case, there is a risk of engaging reverse gear instead of first and vice versa, so you should be careful.
After troubleshooting, it is necessary to add oil to the crankcase, as some of it will leak out when the solenoid is removed.
Malfunctions of the Lada Priora gearbox and their elimination
The manual transmission of the Lada Priora is far from ideal and has a number of characteristic faults. Problems common to all manual transmissions also arise. Conventionally, they can be divided into breakdowns in the gearbox and in the gear shift mechanism. The first include:
- damage to synchronizer couplings and their splined connections;
- gear wear;
- oil leakage and low level in the crankcase;
- development of the service life of bearings on shafts (primary, intermediate and secondary);
- deformation and damage to oil seals;
- weak connections.
Failures in the switch mechanism:
- defective drive rod - damaged, weakened, loose, soured and worn out;
- the rod is worn out, there is play in the mechanisms;
- deformation or wear of the locking mechanism;
- The fork is worn out.
The reasons why certain malfunctions of the gearbox and switching mechanism most often occur:
- operating rules were violated - insufficient oil level, poor-quality lubricant, driving with a faulty clutch;
- low quality spare parts;
- the service life of the parts has been exhausted (natural wear);
- improper maintenance and repairs performed by unqualified personnel.
A malfunction in the gearbox can be determined by a number of external factors:
the gearbox is noisy;
- gears are difficult to engage;
- Spontaneous gear shifting (gears are thrown out)
- gears do not engage or are engaged with great difficulty and extraneous sounds, the car jerks while driving;
- The gearbox is noisy, when you press the clutch pedal the noise disappears;
- extraneous sounds when shifting gears - grinding, crunching, squealing, rattling, creaking, vibration;
- oil leak.
When carrying out diagnostics, it should be taken into account that the same symptom may indicate several malfunctions at the same time. Determining the exact cause is carried out only after removing and disassembling the gearbox. Carrying out repair work and identifying worn or damaged parts requires qualifications and experience.
Many malfunctions can occur due to clutch problems, since these two devices are inextricably linked in the gear shift mechanism. For this reason, diagnosing breakdowns requires appropriate qualifications, as well as repairing, troubleshooting and installing new parts.
There is only one way to troubleshoot: disassemble the unit and replace damaged parts, as well as adjust the gaps.
Dismantling and installation of the Lada Priora gearbox
To work you will need a set of tools:
- screwdrivers;
- set of socket heads;
- spanners;
- mounting blades;
- hammer;
- plug for the drive hole (inner CV joint).
Before starting dismantling, you should drain the oil from the gearbox housing. The procedure for removing the box looks approximately the same, the algorithm differs only when dismantling the robotic gearbox:
- Find the release drive shell nut under the dashboard and unscrew it with an 8 mm wrench, then disconnect the cable stop from the clutch pedal holder.
- Remove the compensation device box and ring from the clutch pedal; to do this, pry off the housing with a flat-head screwdriver.
- Remove the plastic bushing (fluoroplastic material) from the pedal rod; if it is worn or has visible defects, replacing the part will help; before installation, lubricate the part with Litol.
- Remove the cable drive seal from the slot in the front of the shield (in the engine compartment).
- To remove the tip, to do this you need to pull it in the direction of travel of the car.
- Unscrew the fastening nut of the wire cable end; it is attached to the bracket, which is installed on the gearbox with a 17 mm wrench or socket.
- Remove the end of the cable from the hole, then pull and pull out the cable.
- Release the latch and remove the chip from the speed sensor.
- Using a socket wrench, unscrew the three mounting bolts of the top cover of the pan and remove it.
- Install a reliable and durable support under the motor (you can hang it using suitable devices);
- Unscrew the fastening of the rear cushion (support) of the power unit to the bracket using a wrench or a 15 mm ratchet socket.
- Remove the rear engine mount stopper.
- Unscrew the two bolts securing the engine mount to the body (rear cushion).
- Remove the rear support.
- Remove the cushion stopper from below.
- Unscrew and remove the engine mount bracket fasteners from the rear of the gearbox housing.
- Using an 8 mm wrench, unscrew the top mounting bolt, then remove the rear engine mount and bracket.
- Unfasten the clamp and remove the wire plug from the reverse speed sensor (reverse signal light sensor).
- Unscrew the fastening bolt of the gear shift drive hinge box.
- Remove the switch rod together with the hinge housing.
- Unscrew the torque rod fasteners.
- Remove decorative trims or caps from the front wheels (if we are talking about stamped wheels).
- Using a screwdriver, remove the protective cap of the hub nut.
- Unlock the hub nuts by aligning them.
- Loosen the wheel bolts and use a 30mm socket to unscrew the hub nut. To unscrew it, considerable force must be applied; it is recommended to supplement the head knob with a piece of pipe as an extension and amplifier at the same time.
- When unscrewing the wheel and hub fasteners, the vehicle must have all wheels on the platform; all fasteners are tightened in the same way.
- Raise the parking brake handle and secure the vehicle; place chocks under the rear wheels to prevent accidental rolling away. Hang the front part and place strong, reliable supports. Remove both wheels at the front and remove the wheel nuts. It is recommended to replace the nuts with new ones during reassembly.
- To dismantle the steering knuckles, first unscrew the fasteners of the ball joints.
- Remove the shank from the hub and at the same time move the front shock absorber strut outward. To remove the left drive, turn the steering wheel to the extreme right position, respectively, when removing the right drive, turn it to the extreme left.
- After removing the left drive, a special plug must be placed in the vacant space; if this is not done, the gears will shift and it will become impossible to install the CV joints in place.
- Press out the right drive.
- Remove the drive on the right.
- Place a strong support under the gearbox.
- Unscrew the mounting bolts that secure the gearbox to the engine.
- Unscrew the lower right and lower left bolts securing the gearbox to the power unit.
- Move the gearbox as far back as possible and remove the support from under it, while holding the gearbox.
At this point, the dismantling is completed, all that remains is to lower the assembly and proceed to further disassembly, troubleshooting and assembly with new parts. Installation is carried out in the reverse order of removal.
After installation, you need to fill in new gear oil to the optimal level. For reliability, overflowing above the maximum mark by 100-200 ml is allowed.
This is due to the high location of the fifth gear, which often lacks lubrication.
The Lada Priora gearbox is not the best, but at the same time it has a simple design and can be repaired in a garage with your own hands if you have certain knowledge and skills for such work. For convenience, it is better to dismantle with an assistant. The gearbox is a heavy unit, and if removed without insurance, you can easily drop it on yourself and get injured.
Source: https://expertVAZ.ru/priora/kpp-korobka-peredach.html
How to change gears correctly on a Priora
1. Release the gas pedal. 2. Gently press the brake 3. When the car speed reaches the desired limit for a lower gear (if you were in fifth, then to switch to fourth speed it should be 70-90 km/h), press the clutch. 4. Without holding the lever in the neutral position, switch it to the desired gear. 5. Smoothly release the clutch. 6. Gently press on the gas to maintain speed. If further braking is necessary, do everything in the same sequence. The peculiarity of shifting gears in the reverse order is that from any higher gear you can immediately go to any lower one. For example, from fifth to third or second. To do this, you need to reduce the speed of the car to the indicators of one or another gear.
At idle, the engine produces 600-800 rpm. To start moving, the engine only needs to reach 1600 rpm. So at what speed should you shift gears? When the speed reaches 2500 to 3500 rpm, it does not matter what gear the car is currently moving in.
The fourth part of the Driving section contains a very important topic. To roll and not slide (for example), you need to start correctly. Now let's look at how to accelerate correctly. But first, let’s figure out what is responsible for acceleration dynamics in a car. Any car engine has two important characteristics: maximum torque (MTM) and maximum power (MP). For example, for a VAZ-21126 car (Lada Priora) with an engine capacity of 1.6 liters, MKM 145 Nm at 4000 rpm.
, MM 98 l. C. At 5600 rpm. It is easy to notice that next to these characteristics is the value of the crankshaft revolutions. In other words, maximum engine torque and maximum power are achieved only at a certain engine speed. There is no need to go deep into the analysis of engine operation, you just need to remember that in MM (maximum power) mode the engine develops maximum speed, and in MKM (maximum torque) mode maximum acceleration.
We are interested in precisely this acceleration, because the engine thrust, and, consequently, the acceleration intensity, depends on the torque. So, we found out that the engine torque is responsible for the acceleration dynamics of the car, which we can regulate by pressing the gas pedal and changing gears. The higher the gear, the lower the crankshaft speed at the same speed.
But what about the moment of gear shifting? On cars with automatic transmission, switching occurs automatically. The smart machine itself knows when to switch. In a car with a manual transmission, the driver must be sure that after changing gear the engine will have good traction.
Otherwise, acceleration will be sluggish. To choose the right moment, there is a MCM value. Normal operating acceleration occurs when the driver engages the next gear when the engine reaches maximum torque. In relation to the Lada Priora, which we took as an example at the beginning of the article, this means that the tachometer needle will be at around 35,004,000 rpm. It is possible, of course, less, but below the 3000 rpm mark.
You should not lower the arrow, because after changing gear the engine will pull weakly and will not have enough torque for the subsequent jerk. And if you need the most intense acceleration, for example when overtaking, then you can safely raise the engine speed to MM. Now let’s imagine how we will accelerate in a car with a manual transmission. We set off and are moving in first gear.
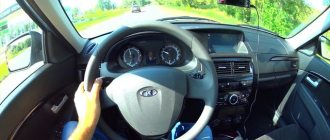
We begin to smoothly accelerate the car, for which we press the gas pedal. At the same time, we look ahead at the road, periodically glancing at the tachometer. When the tachometer needle reaches 3000 rpm, place your left foot on the clutch pedal and your right hand on the gear lever. Depress the clutch and at the same time engage neutral gear.
We hold the lever in neutral for half a second and engage second gear. Smoothly release the clutch pedal to the engagement point and hold it at this point for about half a second. Add gas while simultaneously releasing the clutch pedal all the way. Return your left foot to the platform next to the clutch pedal, and your right hand to the steering wheel.
For further overclocking, you will need to repeat steps 1-6. To stop without changing gears, smoothly press the brake pedal and reduce speed. When the tachometer needle drops almost to idle speed (1000-1200 rpm), depress the clutch pedal so that the engine does not stall, and continue to brake until it comes to a complete stop. Now a short comment on these actions.
The optimal speed for shifting up gears (from first to last) is the speed corresponding to the engine MCM. But, for example, in a situation where acceleration is carried out downhill or on a descent, you can start switching earlier, at approximately the 28003000 rpm mark. If acceleration is done on a climb, it is better, on the contrary, to switch later, somewhere at 4000-4500 rpm.
After each gear shift, you need to return your right hand to the steering wheel and your left foot to the platform next to the clutch pedal. When you remove your right hand from the steering wheel to change gear, you need to squeeze the steering wheel with your left hand at this moment more tightly so that the car does not accidentally swerve. What mistakes do drivers make while driving when accelerating? The most common mistake is suddenly releasing the clutch pedal. That is, the driver releases the pedal.
What could this lead to? The main task during acceleration and gear shifting is to achieve a smooth ride. The car should not jerk either at the start or while driving. Leaving the clutch pedal will certainly lead to the wheels slipping and then skidding. Therefore, the pedal must be released smoothly and with a short delay at the moment of grasping. A mistake made by novice drivers is that their left foot rests on the clutch pedal during acceleration. You need to get used to putting your foot on the platform, we have already discussed how.
Another mistake that beginners make is that they look for the gearshift lever with their eyes or look at it while shifting. In this case, control of the road is lost. In order to avoid making such mistakes while driving, you should work through all the actions while the car is standing still, and when your arms and legs remember their position, you can drive to the site. We will return to the topic of driving safety in the section, but for now it is necessary to understand the basic principles of driving a car. So, we have defined the concept of overclocking and found out how it should be done correctly.
How to shift the gearbox of a manual Lada Priora drawing
- Instead of rigid rods, a cable is used (Japanese company Atsumitec). Due to this, vibration on the body and gearshift knob is reduced.
- Multi-cone synchronizers were installed in 1st and 2nd gears. This increases the service life of the components and reduces the effort when engaging gears.
- The clutch diameter was increased to 215 mm.
In this regard, it was necessary to use a different crankcase, and place the starter not along the box, but along the engine. - The bevel angle of the synchronizer teeth was reduced (from 125 to 100º), as well as the preload force (from 150 to 70 N). This made switching easier.
- The gear selection mechanism has been newly developed (Schaeffler Group).
- The gear selection mechanism was moved from bottom to top. This made it possible to eliminate oil leaks and make gear shifting easier in cold weather.
- The design of the gear selection mechanism includes a selector plate, providing a clear gear shift pattern.
- The mechanism includes a lock to prevent accidental reverse gear.
- The oil volume in the gearbox decreased from 3.3 liters to 2.2.
- From the factory, the gearbox is filled with semi-synthetic instead of mineral water.
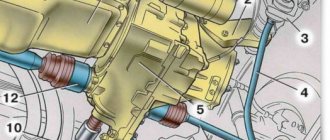
- Gear shift drive
- 1 – gear selector rod lever
- 2 – gear selector lever
- 3 – gearbox housing
- 4 – clutch housing
- 5 – gear selector rod
- 6 – rod bushing
- 7 – rod seal
- 8 – protective cover
- 9 – hinge body
- 10 – hinge bushing
- 11 – hinge tip
- 12 – clamp
- 13 – protective cover of traction
- 14 – transmission control drive rod
- 15 – gear shift lever
- 16 – ball joint cage
- 17 – ball joint of the gear shift lever
- 18 – jet thrust
Gearbox Lada Priora
Based on the above, it is recommended that if the cables fail, replace them. A technical scheduled replacement should be carried out once every 100,000 km. If there is a warranty on the car, then it is not recommended to split hairs and contact a car service to troubleshoot problems.
Installation and repair of a gearbox on a Lada Granta with a cable drive: adjusting the cables
- it is necessary to approach the car driving in front and equalize the speed of movement, while, of course, maintaining a safe distance;
- make sure that the oncoming lane is clear;
- engage a lower gear . For example, if you were driving in fifth gear, engage fourth;
- overtake quickly and carefully.
Please note => Allowance for not attending kindergarten
How to change gears correctly on a manual transmission
Many important elements of the old manual transmission were located at the bottom and were bathed in an oil bath - the shift mechanism, the rod clamps and reverse forks, the gear set seal, the reverse light switch. All of these elements were potential sources of leakage. Many people solved the problem with sealant, but moving the elements upstairs solved the problem once and for all.
Gearbox Lada Granta
Unlike gearboxes of cars of the “tenth” family, in which the synchronizer locking rings for all forward gears are the same, the Priora gearbox uses new synchronizer locking rings for 1st, 2nd and 3rd gears with an increased friction surface (synchronizer locking rings for IV and V gears remained the same). The smallest diameter of the cone of the old type blocking ring is 50 mm, the new type is 52 mm. In this regard, the Priora is equipped with new driven gears of 1st, 2nd and 3rd gears, which have an increased diameter of conical surfaces for synchronizer locking rings.
The gear shift mechanism of the gearbox with traction control is made as a separate unit and is attached inside the gearbox to the clutch housing with three bolts.
On the axis of the larger diameter mechanism (the main one) there is a three-arm gear shift lever, which is connected by one arm to the gear selector located on the switch rod.
When selecting gears, the lever moves along the axis and its second arm fits into the grooves of the rod drivers of the forward gear shift forks. The third arm of the lever turns the reverse gear fork, including reverse gear.
A lock is installed on the same axis, moving along it along with a three-arm lever and preventing the lever from engaging two gears at the same time. To prevent the lock from rotating around its axis, an additional axis is introduced into the design of the switching mechanism, along which the lock sleeve moves, connecting its two brackets. On both sides of the lock there are springs that install
Please note => Obtain Russian resident status
Unlike gearboxes of cars of the “tenth” family, in which the synchronizer locking rings for all forward gears are the same, the Priora gearbox uses new synchronizer locking rings for 1st, 2nd and 3rd gears with an increased friction surface (synchronizer locking rings for IV and V gears remained the same). The smallest diameter of the cone of the old type blocking ring is 50 mm, the new type is 52 mm. In this regard, the Priora is equipped with new driven gears of 1st, 2nd and 3rd gears, which have an increased diameter of conical surfaces for synchronizer locking rings.
Gearbox of the Lada Priora car
I let it cool down a little and accelerate in the manual, from about the same starting speed. Alas, here the result is more modest by almost a second, 11.0. There are two explanations for this. Firstly, the clutch still overheated and it needed at least half an hour to cool down. Secondly, manual mode requires some getting used to in order to select the right switching points.
The fact is that the AMT box does not require the driver to release the gas; it does it itself. Depending on the rotation of the crankshaft, this can be either 500 or 2000 revolutions. So, if you switch at the red line, immediately after which there is a cutoff, then the drop in speed will be maximum.
And if you don’t reach the cutoff, the switching time will be a little shorter and you can even gain several hundred revolutions.
Test drive: Lada Priora AMT with robotic gearbox
It should be noted that the Lada Priora model has a cable gearbox. It ensures efficiency and clarity of changing speed modes. On the Priora there are no synchronizers in reverse gear. Taking this into account, if there is a problem with activating reverse speed, it is recommended to depress the clutch and place it in neutral (N). Next, you need to squeeze and engage reverse gear.
Gearbox for Lada Priora
There are other recommendations that allow you to understand what a particular gear in a manual transmission is intended for. We need the first to get the car moving, the second to accelerate, and the third to overtake. The fourth and fifth are used respectively for traveling on city roads and country highways.
A few tips for learning how to change gears correctly on a manual transmission while driving.
- Secondary shaft - located at the bottom of the device;
- Drive gears are the main element of the input shaft.
They are in constant interaction with the driven gears of the secondary shaft; - Driven gears of all forward gears;
- Forward gear synchronizer;
- Front and rear bearings;
- Sump.
Performs the function of directing the flow of oil into the secondary shaft, and then under the driven gears; - Differential.
New gearbox "Grants" and "Kalina": traction to the cable
A completely new type of transmission is installed on improved Lada models. Grant's robotic gearbox is equipped with two actuators: the first solves the problem of pressing the clutch, the second ensures the correct selection of the gear sequence.
Types of gearboxes on the Lada Grant and their features
To avoid this, it is necessary to add gas, i.e. press the gas a little before releasing the clutch. This is done very quickly: the foot hits the gas pedal, in our case quite deeply, almost to the floor, and instantly releases it.
Immediately the clutch is released, and the right foot presses on the gas again, but this time to accelerate. The purpose of accelerating in this case is to raise engine speed to 5000 rpm or a little higher.
If you do everything correctly and then quickly release the clutch, you will not feel anything at all, and the car will begin to smoothly accelerate when you press the gas again.
Lada Priora Hatchback — WhiteAnomaLia — › Logbook › Shifting gears, how to and how not to)))
06 Dec 2021 yurisaktobe 179
Source: https://aktobeyurist.ru/bez-rubriki/kak-pereklyuchat-korobku-peredach-mehanika-lada-priora-risunok