Composition of a seat heating kit and how to install heaters on Granta with your own hands
Preparation for installation of heating elements
Before connecting the heated seats on the Grant, you need to secure the heaters under the upholstery of the seats. Of course, it is more convenient to do this on dismantled “seats”, previously disassembled into two parts: the back and the support. Creating acceptable conditions for installing heating elements is the goal of the preparatory stage. By the way, when determining the reasons for the knocking of hydraulic compensators, there is a slightly different logic.
Preliminary activities are carried out according to the following scenario:
- Disconnect the power supply to the seat belt sensor located under the seat. In many trim levels, this option is available only to the driver.
- Using an E10 head mounted on the knob, unscrew the four bolts connecting the base of the seat frame to the body and remove the seat. For ease of access to fastening elements, move the seat to the farthest or closest position. Similarly, remove and pull out the second front “seat” from the passenger compartment.
- Remove the backrest angle adjustment knob by prying it off with two flat-head screwdrivers.
- At the junction of the backrest and seat, remove the plastic covers on the left and right sides by unscrewing one screw each.
- Unscrew 2 bolts on each side securing the backrest frame to the metal base.
- Detach the backrest from the seat.
- Repeat steps 3-6 for the second chair.
Factory covers are attached to the frame with four clips. On the reverse side, the fixing elements are clamped with wires. Having untwisted the latter, we tighten the fabric. Before removing the backrest cover, disconnect the plastic lock at the bottom of the structure. When assembling, it is advisable to replace the wire with plastic clamps.
Installation of heaters
The purpose of preliminary positioning is to achieve such an arrangement of the heaters that the wires exit into the joint of the backrest and seat. You won't be able to play with the longitudinal base - the standard kit is designed strictly according to the dimensions of the depressions. After removing the protective tape, glue the element to the frame. If necessary, the foam is trimmed to allow the wire to exit unnoticed.
Installation of heating elements for heated seats
First, let's look at the mechanical part, that is, what needs to be done to install heating elements in the seats of the car, and then we'll look at the electrical connection of the heated seats. First you need to remove the seats. Everything is simple here. Just before unscrewing the driver's seat, look under it and pull out the seat belt indicator connector. To do this, press the connector latch and pull it towards you.
The seats are attached to the body with four bolts. The head of the bolts on Grant is a so-called “euro” head (E10). If you have a different one, take the corresponding key. Unscrew these bolts and remove the seats.
For convenience, we bring the removed seats home and start working with them at home. We disassemble the seats. We need to remove the backrest. To do this, turn the chair on its side. Take two flat screwdrivers. We insert them on both sides under the backrest angle adjustment knob and remove it by prying it up.
After that, using a flat screwdriver, we separate the two halves of the plastic caps. We do this very carefully, as you can accidentally break the guides.
Unscrew the screw holding the decorative trim. Let's take it off.
Take a 13 mm wrench. and unscrew the two M8 mm bolts securing the seat back to the base.
After this, we carry out similar work on the opposite side. Then we separate the halves of the chairs. Now you need to remove the factory seat covers. Let's start with the lower frame of the chair. We turn it upside down. The cover is attached to the frame with factory fasteners made of rigid wire.
They are easily released with pliers. To unclamp, you need to pinch the edge of the wire with pliers and twist it in a circular motion. The photo shows the places where you need to disconnect these same clamps.
After all the latches marked in the photo are released, we move the cover to the side and see the foam casting.
Now you need to release the seat back cover. There is a plastic lock at the bottom of the backrest. We disconnect it along the perimeter and lift up part of the cover. Turn the back over to the back side up. Under the cover you will see the same latches. It is necessary to remove four pieces, as in the photo.
After the foam casting is exposed, we take our warmers, try them on and attach them. Let's start from the back. The backrest heating pad has a trapezoidal shape, just like the space on the backrest for heating our chair. But it matches the chair only upside down, with the wire facing up.
Power supply or how to connect the heated front seats on the Lada Granta correctly
The cost of installation work at an unofficial service station is at least 2,500 rubles. For this money, already purchased heating elements will be installed in the car seat and the circuit will be connected according to the manual. All that remains is to make an anti-freeze product according to a home recipe and hit the road. This is for the quick ones. Painful owners will probably not like the electrical part of the integration.
Disadvantages of the standard kit
The instructions indicate how to install heated seats on the Grant and connect it to the on-board network. According to what is written, the electrics connect and function like this:
- The permanent plus is taken from the hazard warning button.
- The ground is connected to the bracket for fastening the standard wires of the negative pole.
- The standard fuse is replaced with a more powerful one.
- The heating is turned on/off using the buttons directly.
Only one function is correctly implemented - turning off the heating when the ignition is turned off. Otherwise, the connection scheme is not entirely successful:
- The positive wire that goes to the emergency light is thin and will probably work at the limit.
- The contact group of buttons operates in a dangerous mode, since it is not intended for power loads.
For your information. The kit offers simplified buttons for installation - they do not have a power indicator in the form of a yellow lamp (as on the rear window heating control).
Competent connection diagram
An unfortunate result of the standard connection algorithm is a melted fuse. Such a reaction indicates that the circuit is operating at its limit. An alternative scheme for connecting heated seats will help to avoid this. It involves the use of two four-pin relays and powering them from switch K4, which supplies the output “+” after turning on the ignition.
Additional items
It is advisable to carry out installation work after purchasing an additional mounting block of reduced size. You will also need regular contacts for connecting two relays and two Lyra contact elements linking a 10A fuse. We also add additional wires with a cross-section of 4 and 1.5 mm2 to the shopping list.
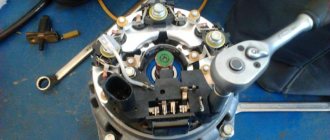
Search "+"
So, in order to connect the heated front seats on the Grant, you need to find out the number of the output plus of relay K4, which appears after turning on the ignition. This can be either the 87th or the 30th contact.
Usually this is contact element No. 30, but it doesn’t hurt to make sure once again. We remove the relay and diagnose. The test is carried out by connecting a 12V lamp to the 30th contact of the mounting block and ground. After activating the ignition, the lamp should light up.
Seat heating button for Lada Priora, Granta, Kalina 2
CHOOSE SECURE PAYMENTS After payment you will receive an electronic cash receipt
Pay for goods by credit card, using QIWI, Yandex.Money or WebMoney and save on your purchase from 4%, avoiding postal and bank commissions
This product was chosen by 107 customers
Controls whether the seat heating is on/off (one seat only).
Set: 1 button
Weight, kg: 0.05 Dimensions, cm: 6 x 3 x 3 Volume, m3: 0.00005
Summary
The technology for installing heated front seats on the Lada Granta consists of two stages: installing heating elements under the factory seat covers and connecting them to the on-board electrical network. The proposed electrical circuit organization scheme raises doubts.
The manufacturer of the branded kit suggests connecting the heaters directly to the buttons, and powering them from the alarm control button. Since the circuit is quite loaded, it is better to organize the heating power through two relays with a separate fuse. It is also advisable to replace the buttons - they do not indicate the operating mode.
Installation of heated seats on Lada Granta. 3 hours for everything about everything
The price of the issue is “0” rubles or installing heated seats on the Lada Granta.
The topic that was brought up for consideration is quite relevant, since such a function is very useful for human health. As a rule, it is installed on cars of intermediate level and above. Budget versions only dream of this, the domestic auto industry doesn’t even install this, but what to do if you want it and it’s cold in winter? 12-volt battery charge.
. Absolutely harmless to the human body and environmentally friendly. If not a manufacturing defect, then the service life is very long. It is possible, even recommended, to install it yourself. But how to do this, read below.
Installation algorithm
- Installing heated seats on a Lada Granta may take you at least 3 hours
, so calculate your schedule. Especially when the weather is frosty outside. - We drive the car into the garage, if in the summer, then it can be on any flat and clean surface;
- We turn off the engine, squeeze the handbrake, put it in gear or wedge the wheels with shoes;
- We are interested in the central part of the dashboard, called the beard, and the front driver's seat. By analogy, you can install it on all the others or leave it on one;
We took it off, and in front of us is a picture of a tunnel niche. On the sides at the front it is secured with two screws on each side and one at the back. Unscrew them using a screwdriver. Please note right away that the rear screws cannot be unscrewed without lifting the handbrake handle and removing the pressure sensor and casing. Otherwise, you won't be able to access it with a screwdriver.
Let's move on to the seat
. Place it on a clean and flat surface. Use pliers to remove the fasteners from the bottom. We do this carefully, as everything is fragile and delicate. Remove the top part of the casing.
We unpack our heater and check its integrity. On the bottom of the seat you will see a pre-installation in the form of a through hole, and stretch the wires from the pad there. And secure the heater itself to the foam rubber using double-sided tape, which is installed there by default, so that it does not fidget.
After checking the tightness of the fit and the exit of the wires from the hole, we cover the foam rubber with sheathing and fasten the brackets back
. If their further installation is not possible, you can use ordinary wire as a replacement, if it is not important to you.
We're done with the seat, let's return to the interior of our car. We run wiring under the rugs. We connect the ground to the handbrake sensor on the body, and plus the developers clearly indicate the “emergency light”. I don’t know why I went there, they probably know better.
The keys themselves (depending on the configuration) are located in the backstage area and have a greenish LED backlight. If the circuit is correct they will light up.
After the electric hoses are laid, we install the seat itself and connect the chips. We test the heating; it should be felt in four squares at once, evenly over the entire area.
We put everything back together in reverse order.
This completes the installation of heated seats on the Lada Granta. Enjoy the warmth while the thermometer outside the window shows minus. Good luck to you.
Product delivery options
Note! Below are the shipping methods available specifically for this product. Payment options may vary depending on the shipping method. Detailed information can be found on the “Delivery and Payment” page.
Parcel by Russian Post
Available payment methods:
- Cash on delivery (payment upon receipt)
- Using cards Sberbank, VTB, Post Bank, Tinkoff
- Yandex money
- QIWI
- ROBOKASSA
Shipping throughout Russia. Delivery time is from 5 to 12 days.
Parcel by Russian Post 1st class
Available payment methods:
- Cash on delivery (payment upon receipt)
- Using cards Sberbank, VTB, Post Bank, Tinkoff
- Yandex money
- QIWI
- ROBOKASSA
Shipping throughout Russia. Delivery time is from 2 to 5 days. More expensive than regular delivery by Russian Post, approximately 50%. Parcel weight up to 2.5 kg
Express Parcel EMS
Available payment methods:
- Cash on delivery (payment upon receipt)
- Using cards Sberbank, VTB, Post Bank, Tinkoff
- Yandex money
- QIWI
- ROBOKASSA
Shipping throughout Russia. Delivery time is from 3 to 7 days. More expensive than regular delivery by Russian Post, approximately 100%.
Transport companies
Available payment methods:
- Using cards Sberbank, VTB, Post Bank, Tinkoff
- Yandex money
- QIWI
- ROBOKASSA
Delivery is possible to any locality where there is a representative office of the transport company. Delivery time is from 2 to 10 days. Sending large parcels is approximately 50% more profitable than by Russian Post.
Courier delivery in Togliatti
Available payment methods:
- Cash upon receipt
- Using cards Sberbank, VTB, Post Bank, Tinkoff
- Yandex money
- QIWI
- ROBOKASSA
Delivery time from 1 to 12 hours.
Pickup from our warehouse
Available payment methods:
- Cash upon receipt
- Credit, installments
- Using cards Sberbank, VTB, Post Bank, Tinkoff
- Yandex money
- QIWI
- ROBOKASSA
Pickup times must coincide with store opening hours.
Heated seats, two connection options
Not all Granta trim levels have heated seats. In Russia, this element is extremely necessary, because getting into a cold car is quite unpleasant and is fraught with health problems. When buying, you don’t always worry about the little things and want to buy a car at a lower price. But then people like to add the missing functions themselves. Now we’ll look at how you can make seat heating without the help of specialists, with your own hands.
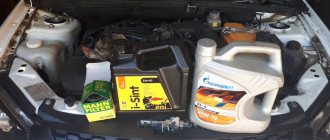
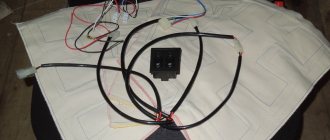
First, we will need to buy a heating pad, a Kalinovskaya one or one from Granta will do. The price for the original heating is 1100 rubles. In the kit you will find:
- wires, fuses, buttons
- warmers themselves for two chairs
- connection diagram
All this stuff looks like this:
If you wish, you can first remove the chairs. This will be more convenient, but leaving them in place will allow you to install the structural elements.
The installation process begins with unscrewing the plastic covers on both sides.
They need to be removed to gain access to the bolts connecting the chair and the backrest.
We unscrew these bolts and separate the seat.
Next, remove the seat covering material and fold it up. We do the same with the back.
We take our heating pads from the kit and slip them under the material.
Carefully place the casing in place, making sure there are no folds. After assembling the seat, you need to connect the black wires from the two heaters, and connect the white one to the power supply.
The power supply is located under the shift lever housing. Having unfastened it, we pass our wires from the right and left seats through the central channel. Don't forget to install the fuse, it is included in the kit.
Having completed all the steps, all that remains is to display the on and off buttons on the panel with cup holders.
The process of installing heating on Granta Liftback can be significantly simplified by using universal heating capes. In this case, there is no need to disassemble the floor of the car. You just need to throw them on the seat and plug them into the cigarette lighter socket.