On many cars, the front panel has a console in the middle part, which rests on the floor and serves to accommodate a wide variety of equipment. The so-called beard of the VAZ 2107 model is a fairly functional interior detail. The central console is an excellent stylistic solution for the developers of the VAZ 2107 car interior, and it is also very functional. Tuning enthusiasts often make this unit with their own hands and give it an original look. Additional elements are added to the design that increase the usefulness of this device and give it uniqueness. They often put on the beard:
- Watch.
- Radio or other multimedia device.
- Dimmer switch for instrument panel lighting.
- Switch block for electric fan, exterior lighting and fog lights.
- At the bottom of the gear lever there is a convenient pocket for small items.
Materials and interior preparation
Making this unit yourself is usually done from a plywood sheet with a thickness of at least 6 mm. For exterior finishing, a wide variety of materials can be used, mainly leatherette, matched to match the upholstery of other interior parts. Advanced tuning enthusiasts go further; they cover the front panel, the inner surface of the doors, and some other parts with this material.
To make the center console for a VAZ 2107 car from the materials listed above, you use the following tools yourself:
- electric jigsaw;
- battery drill or screwdriver;
- angle grinder;
- tape measure, plumbing corner, pencil;
- assembly gun for glue;
- furniture stapler.
The beard, made by yourself, is installed in place of the standard unit. It must be carefully dismantled in order to free up a platform for a homemade console.
How to dismantle the instrument panel: step-by-step instructions
First of all, you need to open the hood of the car and remove the negative terminal from the battery in order to de-energize our dashboard. After this, the work is performed in the following sequence:
- unscrew the dashboard shelf and the glove compartment body using a special screwdriver;
- turn off the power to the light bulbs that illuminate the interior of the glove compartment in your car;
- We very carefully remove the additional dashboard along with the clock and other devices. To do this, you will need to pry the part with a screwdriver and pull it out of the special grooves;
- turn off the cigarette lighter and warning lamps by removing the corresponding wires located behind the additional panel;
- we remove the switches located in the immediate vicinity of the gearbox lever and disconnect them from the on-board network;
- We unscrew the screws that you will immediately see under the switches and the bolts intended for fixing the main console of the torpedo. After this, you can freely remove it without fear of damaging the wires;
- remove the steering column cover;
- remove the heating system cover together with the air duct deflectors;
- dismantle the heater control unit;
- unscrew the last nuts holding the torpedo. For this purpose you need to use a key of 10.
After this, you can dismantle the instrument panel in the car without any problems. Using this approach, you do not have to worry about accidentally breaking any parts or breaking wires, since they are all removed before unscrewing the fixing nuts. Assembling the torpedo is carried out in the reverse order and can be done even without experience. The most important thing is to carry out all the work as carefully as possible and not skip any of the steps described above.
Sources:
- https://ladaautos.ru/vaz-2107/kak-delaetsya-boroda-na-vaz-2107-svoimi-rukami.html
- https://semerkavaz.ru/tyunig/kak-samomu-sdelat-borodu-na-vaz-2107/
- https://7-vaz.ru/tyuning/boroda-vaz-2107.html
- https://ladaautos.ru/vaz-2107/kak-pravilno-snyat-torpedu-na-vaz-2107.html
- https://avto-voshod.ru/ekspluatatsiya/kak-snyat-borodu-na-vaz-2107.html
The procedure for dressing a beard
Each of the craftsmen develops their own design of this element for the VAZ 2107 car, allowing it to achieve its maximum uniqueness. A beard is a spatial structure of complex shape, made up of flat parts. When making patterns for the side surfaces, it is recommended to use hard cardboard. This will make it possible to achieve maximum precision in the manufacture of individual parts.
The shape of the central console of the VAZ 2107 car, which is made by hand, can be completely different. Most often, craftsmen prefer to combine it with a box that is installed between the front row seats. This part houses the handbrake lever.
Materials and tools
Console tuning usually consists of making a new VAZ 2107 beard, on which mounting locations for switches, indicators, control devices and other equipment are pre-provisioned. The most affordable material for making your own beard is plywood. The thickness must be at least 6 mm, otherwise it will not be possible to achieve the required rigidity of the product. For finishing, artificial leather is most often used, matched to the color of the interior elements, or, more recently, carbon fiber of a suitable color.
Sometimes tuning the beard of a VAZ 2107 is accompanied by a comprehensive redesign of the interior design with the replacement of finishing materials for the door trim and trim of the front panel with carbon fiber or leatherette. To make a tuned VAZ 2107 beard, in addition to finishing materials, the following devices and tools are needed:
- jigsaw;
- electric drill or cordless screwdriver;
- “grinder” (angle grinder);
- locksmith corner;
- pencil;
- ruler (roulette);
- glue gun (tube of glue);
- furniture stapler (for fastening leatherette).
The new console (beard) is installed in place of the standard one, which should be dismantled to free up space and take the measurements necessary to create the workpiece drawings.
Making a beard VAZ 2107
Depending on your skills, imagination and personal preferences, you can develop an individual console (beard) design or implement a ready-made solution by copying the product you like. A beard is a complex spatial structure made from flat parts. To make it, you need patterns, which are best made from hard cardboard. Solid material allows for high precision manufacturing of console parts. If you are not entirely confident in your skills, you can first make a cardboard mock-up of the console. This will ensure the drawings are correct and check how well the new beard fits into the installation location.
The design of a do-it-yourself center console can be very diverse. Typically, the design includes a spacious box placed between the driver and front passenger seats (where the gear shift and handbrake levers are located). It can accommodate compartments for small items, appliances, switches or just coasters for glasses.
After the patterns are made and the console parts are marked, they are cut out of plywood with a jigsaw. It is better to connect parts using self-tapping screws and glue. The first will allow you to fix the elements motionlessly while the glue sets. This is the easiest and most reliable way to connect console parts.
The finished beard is covered with leatherette, fabric or carbon fiber. Glue and furniture clips are used to attach finishing materials.
When the glue dries, all that remains is to install the new console in place and secure it. Before mounting it, you should fix some of the instruments and switches, which will be difficult to install if the beard is fixed in its regular place. However, this depends on the design features of the tuned console. Sometimes it is easier to attach switches, instruments and devices after the console is fixed.
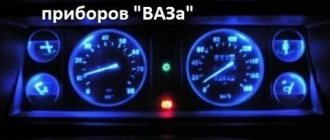
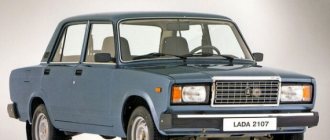
On the front panel of the VAZ 2107 in the middle there is a console (beard), on which various equipment is placed (clock, radio, switches, indicators). This part of the car interior is often referred to by drivers as the “beard”. Often car enthusiasts pay special attention to this console, making it original and at the same time increasing its functionality.
Beard tuning includes adding additional devices and elements that make it more informative and useful:
- Car radio.
- Dashboard lighting control.
- USB sockets for charging smartphones and tablets.
- Watch.
- Switch for fog lights, exterior lighting, heated rear window.
- Vehicle control instruments (ammeter, voltmeter).
- Pocket for small items near the gearshift lever.
What can be placed on the center console
Tuning enthusiasts make their own beard to place on this panel:
- watch;
- multimedia devices (radio, radio, etc.);
- knobs for adjusting the level of illumination of the dashboard;
- switch block for fan, fog lights, external lighting;
- pocket for small items;
- USB sockets for charging gadgets
- part of a car's control devices.
Before taking measurements for the manufacture of the center console, it is necessary to remove decorative trims from the existing part and anything that will interfere with the installation of the new part. In order not to be mistaken with the dimensions, you must first make blanks from cardboard and try them on.
Tools and materials
Tuning consists of making a new beard, on which it is necessary to provide in advance the mounting locations for indicators, switches, control devices and other equipment. The most affordable material for making a beard with your own hands is plywood. The thickness must be chosen at least 6 mm, otherwise the product will not be very rigid. To trim the console, artificial leather is most often used; it is matched to the color of the interior, or carbon fiber of a suitable color.
Often, tuning the beard of a VAZ 2107 is done by covering the front panel and doors with leatherette or carbon fiber. To make a customized beard, you will need the following tools and equipment:
- pencil;
- locksmith corner;
- roulette;
- jigsaw;
- grinder;
- drill or screwdriver;
- glue gun;
- furniture stapler.
The new beard is installed in place of the old one, the old console is dismantled to make the measurements necessary for the workpiece.
The most common reasons for dismantling
There are a lot of reasons for removing the tidy on a VAZ 2107, and some of them can be called banal, but nothing can be done. The most common reason when you need to remove the instrument panel is a burnt-out backlight bulb. Replacing light bulbs in the dashboard of a VAZ 2107 is carried out only when dismantling the device, and this procedure is simply impossible to perform otherwise.
The dashboard on the VAZ 2107 must also be removed for a number of the following reasons:
- Malfunction of pointer indicators.
- Failure of the instrument lighting, as well as lack of functionality of the arrow indicators.
- Replacing the device with a new one, for example, if a digital panel is installed instead of the factory instrument panel.
- Tuning or upgrading the device.
As practice shows, most often the need to dismantle the dashboard arises precisely because the backlight bulb burns out. If the device is dismantled for this reason, it is recommended to immediately replace conventional light bulbs with LED ones.
Required Tools
Before starting work, you will need to prepare the necessary tools so that you do not have to be distracted during the process. Despite the fact that the work of removing the device in question is quite labor-intensive, to implement it you will need a small set of tools, including:
- Phillips and slotted screwdriver.
- Electrical tape to indicate chips that are disconnected from the device.
- Work gloves for unscrewing the speedometer cable.
When all the tools are prepared, it remains to make sure that the parts and elements that are planned to be installed or replaced on the dismantled device are available. After this, we proceed to perform the main part of the work.
How to remove the instrument panel of a VAZ 2107
Instructions for removing the dashboard on a VAZ 2107
Initially, it should be noted that the process of dismantling the tidy on VAZ 2107 cars, the injector and carburetor are identical, therefore the instructions described below are appropriate for sevens of all years of manufacture. Having prepared to carry out the work, you can proceed by following the following sequence:
- First you need to turn off the power to the car, for which you remove the negative terminal from the battery. This must be done, since the work will be carried out in the electrical part, and the likelihood of a short circuit occurring is quite high.
- Next, we move into the interior, and using a slotted screwdriver, we remove three caps from the levers responsible for the operation of the heater.
- Using a slotted screwdriver, remove the plastic plug on which the heating sign is depicted. This plug is on the right, and under it there is a Phillips screw that needs to be unscrewed. (There are 2 screws under the plug, but only one needs to be unscrewed - the top one, which secures the right side of the dashboard).
- Next to the hazard warning button, there is an odometer reset button, which is secured with a plastic nut. The nut must be unscrewed and removed with the washer located behind it. The button is recessed inside the panel.
- The right side of the tidy is weakened at this stage, and it remains to perform several additional manipulations in order to completely dismantle the device. To do this, pull out the right side of the device, thereby freeing access to its rear part. Here you need to disconnect all the chips and wires to perform dismantling.
- Initially, the power chips for the stove button are disconnected. Be sure to remember the location of the wires. It is recommended to take photos so as not to be confused when assembly is carried out.
- Next you need to disconnect the speedometer cable. It is secured with a special nut, which can be unscrewed by hand.
- All chips connected to the dashboard are disconnected. It is almost impossible to confuse their locations, since they have different fastenings and differ in size.
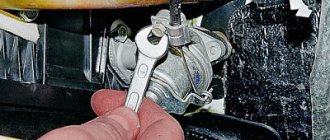
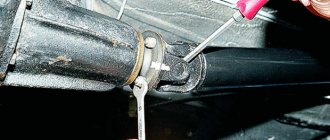
- The supply hose is removed from the economizer fitting. This cable is located on the left side of the device.
- After all the chips, cables and wires are disconnected from the device, you can dismantle it.
Making your own beard
A beard is a complex structure; it is made of flat parts. To make them you need to make patterns; it is best to make them from cardboard. It is necessary to achieve high precision of the console parts; rigid cardboard is quite suitable for this. If you are not confident in your skills, first make a mock-up of the console from cardboard. This will allow you to make sure that the drawings are made correctly and to estimate how the new beard will fit into the installation site.
After making the pattern, mark the details of the beard and cut them out of plywood with a jigsaw. All parts are connected using glue and screws. The latter will allow you to fix the console elements until the glue sets. This is the most reliable and easiest way to connect beard parts.
After the beard frame is ready, it is covered with carbon fiber, leatherette or fabric. For their fastening, finishing materials, furniture stapler and glue.
After the glue has dried, all that remains is to install the new console in place of the standard one. Attach switches and devices and secure.
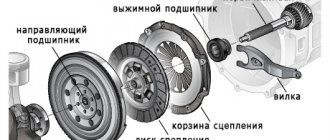
Radio tape recorder
No upgrade of the “six” is complete without installing a speaker system or at least a simple radio. A standard place for a radio receiver in the beard of a small-sized “six”. It should be trimmed to standard 1DIN. This can be done with a metal file. Then sand the edges with sandpaper.
Installing a radio
The radio tape recorder is attached to the beard using a metal case. Radio installation steps:
- Having bent all the tabs, use special spatulas to remove the radio from the case.
- The metal base is inserted into the prepared hole.
- We fix it using special tongues.
Cables are included to connect the player. The most commonly used are:
- black - “earth”;
- red and yellow (often wound together) - ignition “+”;
- blue - power for the active antenna;
- white - front left (FL) speaker;
- gray - front right (FR) speaker;
- green - rear left (RL) speaker;
- purple - right rear (RR) speaker.
You can connect the radio to the ignition switch to the free INT terminal. Then it will only work when the engine is running and the ignition is on. This connection scheme will protect forgetful car owners from completely draining the battery.
If you twist the red and yellow wires together, the radio will no longer depend on the ignition. You can listen to music with the ignition off too.
Typically, a connection manual comes with the audio system. Following the instructions and color scheme, installing audio equipment in the “classic” will not be difficult.
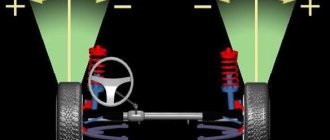
Speaker installation
A good place to place the speakers would be the front door panels. If you choose the right size speakers, they will fit here very well. To install, perform the following steps:
- Remove the trim from the doors.
- On the casing we cut a hole for the speaker. A hole of the required size can be made using a template. To do this, trace the speaker on paper. You need to work carefully so as not to miss the size.
- We attach the column and screw it to the casing using the fastening that comes with the kit.
- We carefully lay the wires in the cavity of the doors so that they do not sag or fall out.
- We install the casing in place.
Additional speakers are placed on the dashboard or on the side pillars of the windshield.
If the car owner changes the entire beard, creating it himself to his own size, then he can place a 2DIN radio in it. A player with a large screen will add charm to the appearance of the car.
Some craftsmen insert speakers instead of air ducts. But from personal experience I know that the standard “six” torpedo does not have side window blowing. In humid and cold weather, windows fog up and freeze. If you remove the air ducts for the windshield, the airflow will worsen even more. Therefore, I do not recommend this installation of speakers.
Video: installing speakers and Shumka
Antenna installation
The “six” did not have a standard antenna installed, but a place for it was provided on models before 1996. Adherents of original spare parts can find their original antenna on the car market. It is attached to the front fender of the car.
To do this, you will need to make a hole in the wing, install the antenna, tighten the bolts and connect the wires to the radio and ground. This installation method is quite complicated and not every car owner will decide to make holes in the body.
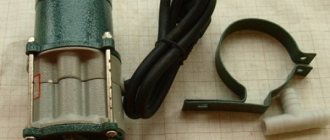
The ease of installation is distinguished by the interior active antenna, which is attached to the windshield. It is not exposed to precipitation, does not require additional care, and does not interfere with aerodynamics when the car is moving.
When purchasing an interior antenna, please note that the kit should include instructions, fasteners and stencils to simplify installation. There are two ways to install a radio antenna inside the cabin:
- The housing is attached to the glass behind the rear view mirror, and the whiskers are glued in opposite directions at the top of the glass.
- The antenna body is secured to the top of the windshield on the passenger side, and the poles are glued along the edges of the glass at right angles to each other.