One important procedure that directly affects the service life of a car is engine break-in. Many drivers are interested in whether it is necessary to break in the engine after replacing the rings.
and how labor-intensive this process is.
All the rules noted in the article will help you ensure reliable and efficient operation of the car for a long time.
Moreover, inexperienced, just novice drivers have no idea why a break-in is necessary after any engine repair. Well, in this article I will try to touch on all the important aspects of this issue.
It should be noted that the first stage of engine break-in may not take place in motion, but in place. This will take you 2 or 3 hours.
At the same time, if necessary, adjust the ignition or power systems. Then follows the process of running the engine in motion.
The duration of the process in motion should be at least 2-3 thousand kilometers. However, the user also needs to be aware of the following things:
- When starting the engine for the first time, do not forget to fully charge its battery.
- Warm up the engine before the first trip at idle speed to 80-90 degrees, while making sure that there are no leaks of technical fluids.
- Then, when the engine cools down to 40-50 degrees, warm it up again, and repeat the procedure, if possible, up to 10 times.
- For the first 1000 kilometers, exclude engine operation at high speeds (no more than 3500-4000 rpm) and under high loads (do not transport more than 2-3 people).
- After a (cold) start, it is important to warm up the engine, especially for the first 400-500 km. you should drive along the highway. Thus, you will achieve maximum “working” lapping of the rings and pistons.
- If the traffic occurs mostly in the city, then it is necessary to avoid running the engine at fairly low speeds, i.e. It is advisable not to drive under pressure.
- Find the documents for the car and read the car manufacturer’s recommended speeds for a process such as gear shifting;
- Avoid long climbs.
As is known,
A productive
engine run-in after replacing the rings
for the recommended 2-3 thousand kilometers will, of course, require an oil change. Moreover, its quantity must be constantly monitored!
It is also advisable to ensure that the oil filter is also in new condition or do not forget to replace it after break-in.
If necessary, the idle speed and valves are adjusted, and the timing chain is tensioned.
It is important to know that if there are various knocks or other extraneous sounds, you should quickly find their cause.
I would also like to advise drivers not to drive at a certain speed during the break-in process - above 80 km/h for the first 1000 km. and at a speed of 90 km/h for the second 1000-2000 km.
Try to avoid both prolonged and sharp acceleration and prolonged periods of sitting in traffic jams by changing gears in a timely manner.
In general, many experienced motorists and experts advise running in the engine gradually, without loading it. Treat the car as if you just picked it up from the factory.
Run-in is carried out, as a rule, so that the new rings “get used” to the overall system of the car. If the procedure is carried out incorrectly, unpleasant surprises await you.
For example, oil can get into the air purifier, which over time can lead to such drawbacks as quite high fuel consumption, in addition, sometimes problems with starting the car, etc. may arise.
In conclusion, I would like to draw the attention of motorists to the fact that such an event as an effective engine run-in after replacing the rings
is always carried out, and this process is also necessary in cases when a new vehicle is put into operation, or when any repair work has been carried out on the engine.
PS. Proper running-in of the engine after replacing the rings (be careful when using profanity in the story)
Tags: how to properly break in an engine, engine break-in
- Related Posts
- What to fill with antifreeze or antifreeze. What's better?
- Where does antifreeze go from the expansion tank?
- We select antifreeze according to the make of the car. Choice of antifreeze
« Previous entry
How long does it take to break in new rings?
Well, the time has come to replace the rings, as well as the valves, mileage over 200 thousand, oil from max to min. fell quickly, over 1000 km (then it almost stood still, but there is already a little gasoline in the oil, etc., so it seems that the level does not decrease, and there is gasoline + oil + carbon deposits instead of oil), when warmed up, unevenness was felt work (slight floating vibration, as if the speed is floating). The compression also had a range: 1 - 12, 2 - 11.2, 3 - 12, 4 - 10.3
(in reality, most likely even lower, because the oil ate well - it was most likely oil compression in some cylinders, and these values are overestimated).
It was decided to change the rings and rebuild the cylinder head - valves + guides + caps. After disassembly, it was discovered that there were 2 pistons repaired, 82.8 mm (the square was knocked out), the cylinders were free of scuffing and everything was very tight, it didn’t move anywhere, the rings weren’t visible if you looked from above. All pistons + combustion chambers + ring grooves on the piston were covered in a heavy layer of carbon deposits. washed with Sanita anti-grease gel (smear it on for 20 minutes and wash it off, and so on several times), the grooves for the rings were cleaned down to metal with fragments of old rings. All the rings were on the verge of falling, heavily worn (by eye the thickness of the new and old ones was significantly different). All new rings had to be ground down with a needle file, because... the gap was less than 0.25mm at the joint when installed in the cylinder. The piston with new rings did not fit into the 3rd cylinder - a belt of rust formed on top where the rings do not go, which was carefully sanded and lubricated with oil, and only after that it was possible to drive the 3rd piston.
After reassembling the cylinder head (replacing valves, guides, cutting in seats, lapping (crappy, as it turned out),
trimming of exhaust valves, because
the saddles are not the first freshness (the old ones were also trimmed), after assembly the compression showed only: without oil: 1 - 7 2 - 8.7 3 - 5.9 4 - 7.5 with oil: 1 - 8 2 - 9, 8 3 — 6.4 4 — 9.3
From which the conclusion was drawn that the grinding was bad, because
compression with oil did not rise much anywhere, and the leaking valves do not allow it to rise, which was confirmed after disassembling and pouring kerosene into the channels, everything was leaking
)).
Be sure to check the valves with kerosene, or for even scratches on the seat chamfer around the entire circle,
because
the valve is completely rubbing in, but the seat may not be rubbing in yet and it will be a bummer
.
If the valves get a little wet (do not leak), especially if this does not happen immediately, then this is normal lapping, otherwise some comrades think that the valves should be left with kerosene for days, but the valve is not a pipeline
, and the compression stroke there lasts tenths/hundredths split seconds, so
don’t rub until you’re fanatical, just sag the saddles.
.
After assembly with standard ground-in valves, the compression became:
:
1 - 9.5 2 - 10.5 3 - 7.7 - with oil 10.6 (unpolished rings where the belt was slightly sanded) 4 - 9.7
After 10 km!:
Started the car, drove only >10 km Price tag: 6,000 ₽ Mileage: 207000 km
Good afternoon. The engine began to actively take oil. I decided to change the rings. After opening it, it turned out that the decision was correct - the rings were indeed a pipe. But after replacing the rings, oil consumption increased even more. I've already driven 600 km, and oil is flying into the pipe. They explained to me that I need to wait 1500-2000 km until the rings wear in, and during this time fill in 15W40 mineral oil.
I would like to hear the public's opinion on this issue. Thank you.
Replacing piston rings is a procedure that will have to be encountered if the driver has been using the car for a long time. On average, the service life of the rings is 80-120 thousand kilometers, depending on the driving style, as well as the quality of the rings themselves and the assembly of the car engine.
After replacing the piston rings, many drivers forget about the need to break in the car. This is an extremely important procedure that should not be neglected if you want to ensure that engine repair and piston ring replacement are not in vain. In this article we will look at how to break in a car engine after replacing the piston rings.
#1 Pepper
- Group: FB Veterans
- Posts: 293
- Registration: 22 September 07
In my case, replacing the rings (compression + valve stem seals) and valve stem seals. It seems like it wouldn’t hurt to give the little guy a run-in? The question is: how many kilometers can you drive in the “vomit-fry-fry-vomit-fry” mode?
- Up of the page up there ^
#2 Lonely Wolf
- Group: Members
- Posts: 49
- Registration: 28 September 09
- Up of the page up there ^
#3 Shell-68
- Group: FB Veterans
- Posts: 4,864
- Registration: 08 April 08
- Up of the page up there ^
#4 Lonely Wolf
- Group: Members
- Posts: 49
- Registration: 28 September 09
- Up of the page up there ^
#5 joni
- Group: FB Veterans
- Posts: 2,120
- Registration: 20 July 07
- Up of the page up there ^
#6 ODAN
- Group: Members
- Posts: 191
- Registration: 28 January 10
Lonely Wolf (22.3.2010, 20:06) wrote:
- Up of the page up there ^
#7 Lonely Wolf
- Group: Members
- Posts: 49
- Registration: 28 September 09
ODAN (22.3.2010, 23:08) wrote:
- Up of the page up there ^
#8 Pepper
- Group: FB Veterans
- Posts: 293
- Registration: 22 September 07
funny..About the hoods.. Perhaps everything there from the factory comes with such tolerances that you really need to fuck it up if something falls off right away.. This option doesn’t work for me.. The replacement process is too gimmicky (rings take a long time to get to Russia)
I'm still waiting for adequate advice. Vomiting, I don’t know how much, and then frying it is not a break-in and I’m fucked, sorry.. In general, there are probably no questions with the break-in mode. Question about mileage...
Instructions for running in chainsaws
There are two types of break-in procedures, which are carried out on a new tool, and on a chainsaw after a major overhaul of the engine. A new chainsaw needs to be run in with an average load, since idling the engine helps reduce the engine's life. In order not to harm the tool, and at the same time carry out the procedure for grinding in rubbing parts correctly, you should ensure a gentle load on the chainsaw.
Running in the engine of a gas powered tool is carried out in the following way:
1. Setting the supply of the fuel-air mixture in an enriched form. To do this, you will need to adjust the carburetor. The process of starting the unit is described in detail here 2. The carburetor is adjusted by moving the adjusting screws L, H and T 3. Initially, the maximum engine speed is reduced by 600-700 rpm from the maximum value. To reduce the speed, you need to loosen screw H 4 with a slotted screwdriver. To determine the number of revolutions at idle, you need to use a tachometer. How to check the speed of a chainsaw with a tachometer is described here 5. If it is not possible to check the speed with a tachometer, then the adjustment should be carried out according to the instructions. Sawing operators need to purchase a tachometer to measure the speed, since the carburetor will regularly need to be adjusted for normal operation of the unit 6. Without a tachometer, adjustment is made by moving screw H a quarter turn in the rich direction. You can determine the increase in fuel supply by the sound of the engine 7. After completing the break-in stage, you will need to fine-tune the carburetor using a tachometer
During the running-in process, you need to let the unit run for 3-5 minutes at idle, and then start cutting wood with a small diameter of up to 10 cm. Heavy loads on the motor should be avoided, and the sawing process should be accompanied by pauses - 1 minute of work and a 20-second break for XX.
Types of engine break-in
The further operation of the vehicle depends on correctly performed running-in. Depending on the situation, running-in can be of several types:
- After partial engine overhaul;
- After major renovation;
- After replacing components.
After a major overhaul of the engine, running-in is carried out in order to grind in all engine components. It is better to carry out such running-in at a service center where special equipment is available. As for other cases, the running-in must be performed directly on the road, that is, while the car is moving.
How to perform break-in after replacing piston rings?
Before running in, the car must be prepared. To do this, perform the following steps:
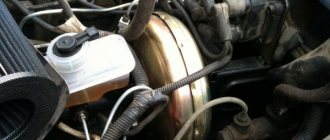
- Infects a car battery;
- Before leaving on the road, start the engine and warm it up to 80 degrees;
- After warming up, the engine is turned off and cooled to 40 degrees;
- Next, warm up again to 80 degrees and repeat the procedure at least 8 times;
- After preparation, inspect the machine and unit for faults;
- They drive onto a highway with little traffic and no bumps.
Basically, the rules for engine break-in are described in the technical operation book. Before you break in the engine yourself, be sure to read the manufacturer's recommendations.
How to break in the engine after replacing the piston rings will be discussed in detail using the Priora as an example in this video:
Why is the engine broken in?
Running in the engine after a major overhaul is necessary to ensure uniform grinding of the rubbing surfaces. Despite the fact that modern materials and processing methods make it possible to obtain surfaces without scuffing, rubbing parts have some roughness. For the most part, this applies to the cylinder-piston group. Thus, a repaired cylinder block and new pistons have deviations in size and surface defects.
During operation of the internal combustion engine, a large amount of heat is generated. Thus, the piston bottom heats up to 300℃ from interaction with the combustible mixture. The part is cooled through compression rings. In contact with the cylinder walls, the piston rings release heat, which goes away along with the lubricant.
During long-term operation, the piston rings rub against the cylinder walls. After the overhaul, the “connection” disappears. This is why you cannot reinstall used rings: they were “sharpened” to fit other dimensions of the cylinder and are not suitable for further work.
Failure to run-in leads to poor heat transfer from the piston to the cylinder. In turn, this causes overheating of the piston, detonation, deformation of the piston rings, or burning of the entire part.
To reduce break-in time, spare parts manufacturers have developed new profiles of compression rings: beveled, rounded, ribbed with tin filling, etc. Two-stage cylinder honing also affects the running-in regime, since the surface is run-in at a micro level.
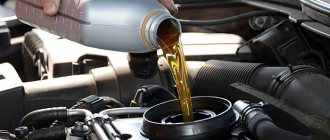
Changing the oil after engine overhaul
It should be understood that the obligatory result of grinding in parts (especially in the first hundreds of kilometers) in the engine is metal shavings. These chips enter the engine oil and accumulate in the oil filter. It is quite obvious that these chips need to be removed from the internal combustion engine.
This can be done by draining the lubricant and replacing the filter. This replacement needs to be done after 800-1000 km. By the way, you only need to fill it with suitable high-quality motor oil immediately after repairing the engine, before the first start, during the first replacement and further during operation.
The need for break-in activities
The process of assembling a power unit in a factory or repairing it at a service station involves installing completely new parts. Why does such an engine need to be broken in:
Important! Overheating is the main enemy of any power unit. Newly assembled motors are doubly afraid of high temperatures due to increased friction between new elements.
Running in the engine after a major overhaul or purchasing a new car is a gentle operating mode at 30–40% of the rated power of the unit. The goal is to break in and safely grind all surfaces under real conditions of direct contact between parts. In mass production, even modern metalworking machines are unable to perfectly adjust the dimensions of products and polish surfaces to zero.
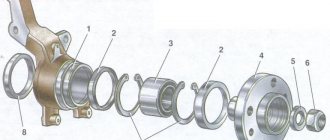
Features of removal and installation
First rule. When performing work, it is imperative to maintain cleanliness. Before dismantling the power unit, you should go to the car wash and remove all remaining dried dirt and dust using a high-pressure washer. Using a special cleaning agent, the engine housing is washed. You cannot wash a hot engine, since a sudden temperature change has a negative effect on the engine. Be sure to disconnect the battery. As soon as the body is processed, you need to wait a while until the motor dries out. Using compressed air from the compressor, remove all drops of water, and also treat the wire connections.
Second rule. Keep track of how the parts were before disassembly. It is best to use a digital camera or a smartphone with a good camera. Use your camera to take step-by-step photographs of the parts being disassembled.
Disassembly
First you need to dismantle the power unit. It is noteworthy that in some scooter models - for example, Honda Dio before 1994, you can completely replace the piston without removing the entire engine. Disassembly order:
- Unscrew and remove all parts that interfere with dismantling - throttle cables, rear brake cables, fuel and oil supply hoses, electrical blocks, shock absorber, and so on.
- In most models, the engine is secured with just one bolt to the frame. Unscrew it and roll out the engine.
- Remove the muffler, air filter, cylinder and generator casing. Using a compressor and brush, completely remove any dust from the cylinder. If necessary, wash the cylinder again. The part must be perfectly clean.
- Unscrew the spark plug and unscrew the nuts/bolts that secure the cylinder head. Before performing work, be sure to wash all the places where the crankcase is connected to the cylinder. Even if the engine was washed anyway, there will always be sand and dirt under the fins. When removing the cylinder, residual dirt may penetrate inside the crank chamber.
- Unscrew the head and then proceed to dismantle the cylinder. In some cases, it happens that the cylinder is stuck and does not want to be removed easily. Here you need to pick it up using a pry bar. If you find that the cylinder gaskets are coming off in chunks and are stuck to a metal surface, you should carefully and carefully remove them. It is important to achieve maximum surface evenness. If there is no replacement gasket, you need to buy a new one or a paronite sheet and cut a new gasket out of it. It also happens that during the repair process the owner damaged the aluminum gasket located between the cylinder and the crankcase. You can do it yourself and make a new gasket using a cola can. But before that you need to completely remove all traces of paint.
- A clean cloth should be placed between the crankcase walls and the connecting rod to prevent foreign objects from getting into the crankcase. If this requirement is not met, the new cylinder-piston group will most likely fail in the future, and the crankshaft will also break.
- To squeeze out the pin, you must first remove the stopper from the piston pin. Always remember that the finger fits quite tightly, so you will have to make a lot of effort to remove it. While pushing out the pin, make sure there is no lateral load on the connecting rod. Otherwise, you will have to purchase a new one, since the old part in this condition is not subject to further use. The operation must be performed so that the piston rests against an object sideways. You can support it on the wall by laying a piece of wooden beam.
- Remove the piston and get rid of the cage bearing. The old gasket should also be removed.
After completing all the work to dismantle and restore the cylinder-piston group, it is necessary to perform the installation in the reverse order.
What determines the duration of the run-in?
The larger the area of the rubbing surfaces, the longer they take to get used to each other. Accordingly, the duration of the gentle driving mode depends on the number of newly installed spare parts operating in friction mode.
First, it’s worth figuring out which major parts are replaced by a major engine overhaul:
Reference. Depending on the model of the power unit, the cylinder liners are bored out for repair pistons or replaced entirely. Replacing crankshaft bearings involves grinding the journals to accommodate thicker bearings.
If the cylinder-piston group or liners are not changed during the engine restoration process, the repair is considered current, and the running-in duration is reduced. How long does it take to break in updated spare parts in a gentle mode:
European and American manufacturers are increasingly selling cars with run-in engines - this operation is done at the factory. Then, when purchasing a car, the service book indicates the mileage before the first maintenance is 10–15 thousand km.
In factory conditions, the so-called cold running-in of the engine is used on a special stand. The electric motor rotates the crankshaft at a certain frequency, and the computer monitors all indicators and controls the grinding duration. Such equipment is extremely rare in car services.
In what cases is it not necessary to break in updated elements through gentle operation:
Note. It is assumed that these works were carried out separately. Simultaneous updating of the listed parts is usually done during complete disassembly of the engine and is equivalent to routine repairs.
First launch after major overhaul
The first 2,000 km are considered the most important here. At this time, operation should be gentle. The rules that must be followed are:
- Do not drive at very high or low speeds.
- The speed should not be constant, and the revolutions should not be the same.
- It is better to refrain from transporting trailers; it is unacceptable to transport too heavy loads.
- It is forbidden to perform sharp braking and brake the engine.
When grinding in engine parts after a major overhaul, it is unacceptable to subject it to heavy loads - the load should increase gradually. It is also extremely undesirable to force the engine to idle for a long time, naturally, excluding the warm-up mode. Idling is a serious load on the internal combustion engine.
Before driving, the engine warms up for some time. You should not be zealous here, since the power unit will reach operating temperature while driving. On the first trip after repair, it is better not to take passengers with you, so as not to create additional burden. It is better to choose the route in advance, excluding bumps and steep climbs.
You should not drive too fast - 60 km/h will be enough. Driving in high gears and under tension is unacceptable. Loads should be dosed: deceleration-acceleration. The gear must be selected correctly so that the power unit operates at medium speeds. These actions will give the piston rings the opportunity to get used to them, because even the highest quality grinding does not smooth out irregularities as much as rolling in does.
First engine start
In addition to grinding in engine parts during operation, the first start of the engine after a major overhaul is also important. The mechanic must ensure the following points:
Gas distribution system marks
After starting the engine, you need to make sure that the oil pressure warning light goes out. You cannot press the gas pedal at this time: you need to let the engine run at warm-up speeds and pay attention to the presence or absence of extraneous sounds. For the first few seconds, let's hear a knock from the hydraulic pushers.
Oil pressure warning lamp
The engine warms up to operating temperature, then turns off. The next cycle is cooling to 40 degrees, after which it is necessary to start it again and warm it up to operating temperature. These cycles need to be repeated several times.
After making several starts, the mechanic must make sure that there are no leaks of technical fluids. After completing the start and stop cycles, the engine can be started and run at higher speeds. It is necessary to start the engine and warm it up to operating temperature with the gas pedal. The speed should not exceed 2500 rpm, and its increase and decrease should occur smoothly.
Tips for breaking in a two-stroke scooter:
To reduce the break-in time and the number of problems, I advise you to do this: 1. Buy synthetic oil (good, for example, Motul 2T800) 1 liter.
2. Drain the factory oil from the oil tank, pour 750 grams of synthetic oil into it.
3. We buy gasoline A95 Euro. We pour 10 liters and add 150 grams of synthetic oil. Shake thoroughly and leave for an hour to dissolve.
4. Drain the factory gasoline from the gas tank and pour in our mixture of gasoline and oil.
Before installing new rings
Before you start work, you need to get everything you need. The operation will require wrenches, sockets, preferably with a ratchet, a torque wrench and a piston ring puller.
When choosing a new set at an auto parts store, you should pay attention to both the appearance of the packaging and the rings themselves.
The packaging must contain complete information about them, namely: who the manufacturer is, what they are made of, etc. The rings must also have markings indicating the top side, they themselves must not have any flaws, in addition, there must be There should be instructions that describe the correct installation of the piston rings.
If the seller claims that small defects will rub off, he is openly lying, trying to sell substandard goods, it is better to refuse such a purchase, since the money will be wasted.
Brake system
I'll start with, perhaps, the easiest thing - the brakes (I want to leave the engine for a snack). Why should they be rubbed in? Even when you install new brake pads , and even more so discs, you need several tens, and maybe hundreds of kilometers, for the top layer to wear off (both here and there) and for the surfaces to be “stuffed,” so to speak, for further heavy-duty work (probably everyone noticed black dust on the discs after installing new pads)
There is an upper (softer) layer on the pads
There is no such layer on disks; it starts working immediately. BUT there is no mirror here, which is stuffed with friction linings. As a result, a grinding process is also needed.
To reveal their effectiveness, the brakes require careful handling in the region of 200 kilometers. Everything is simple here.
If the engine smokes after replacing the rings
Using the Skoda Octavia 2010 as an example, we can consider the case of smoke. Even if you select original rings for the vehicle, problems may occur. Situations occur under various circumstances:
- during heavy loads;
- sudden rise;
- traction force;
- acceleration
If you look at the original Skoda rings, you can see that they were made with small holes. Some rush to turn to a turner to have the elements knocked out on a workbench - to make grooves.
In fact, it is necessary to understand the essence of the problem and inspect the rings. In ideal condition, they should be rigid and fit tightly to the cylinder.
- nozzle replacement;
- change of linings;
- checking the video.
When replacing rings, specialists often make mistakes:
- constriction;
- use of non-original spare parts;
- chain change;
- pulley clamp;
- crankshaft rotation;
- low quality tool.
If you turn to a non-professional, the driver will definitely be faced with ordinary rings, but they do not always fit in shape, and there are often problems with strength. Inexperienced specialists try to tighten the knots as much as possible. And since a regular thread is used, it is easy to tear off.
Signs of piston ring wear
Blue or black smoke from the exhaust pipe indicates that wear has reached a critical stage. This indicates that excess oil entered the combustion chamber past the oil scraper ring and burned there along with the fuel. Black smoke coming out of the crankcase ventilation tube indicates that the compression rings, due to wear, allow gases to escape from the combustion chamber into its cavity.
Critical wear is accompanied by a decrease in compression (the ability to maintain pressure) in the engine cylinders. This means that some of the gases formed during the combustion of the fuel mixture, which was supposed to push the piston, broke into the crankcase without performing useful work. This is what will lead to a drop in pressure in the cylinder, therefore, the engine will lose some power. Increased oil consumption is observed.
Compression is checked with a special device - a compression meter. When the nominal pressure values are unknown (there are no operating instructions), it is first measured in a dry cylinder, then a little engine oil is poured through the spark plug hole, and the measurement is made again. If the compression increases, then the rings need to be replaced. Similar signs can be observed in the case of their “occurrence”.
“Sticking” occurs when carbon deposits formed in the piston grooves prevent the piston rings from springing, resulting in a decrease in the tightness of their contact with the cylinder surface.
This problem, if the case is not very advanced, can be corrected with the help of special fuel additives. For an engine with a carburetor system, you can try cleaning it with a carbon remover spray that is injected directly into the carburetor. If removing carbon deposits from the combustion chamber has no effect, then there is only one way out - replacing the piston rings and cleaning the grooves.
This is interesting: Instructions for replacing the fuel pump yourself
How long to run an engine after a major overhaul?
How long it takes to run-in after an engine overhaul depends on the test method. An incorrectly carried out test leads to jamming of the motor on the first day. To avoid breakdowns, you need to act carefully and follow the prescribed inspection regime.
On average, the grinding-in of internal combustion engine parts lasts 3000 - 8000 km. You can determine the readiness of the engine by its responsiveness and torque: after pressing the gas pedal, the car cheerfully takes off and confidently accelerates at full speed.