Material from the Encyclopedia of the magazine "Behind the Wheel"
We carry out work to replace the instrument panel, panel wiring harness and elements of the heating and ventilation system. Disconnect the wire terminal from the negative terminal of the battery.
Drain the liquid from the engine cooling system (see “Replacing the coolant”).
In the engine compartment, remove the heating and ventilation system filter (see “Replacing the heating and ventilation system filter and cleaning the drainage hole in the plenum box”).
Using a Phillips screwdriver, unscrew the four self-tapping screws that secure the filter housing of the heating and ventilation system to the instrument panel...
...and remove the casing.
Loosen the clamps securing the heater inlet and outlet hoses...
...and remove the hoses from pipes 2 of the heater radiator. Using a high 10mm socket with an extension, unscrew nut 1 of the stud securing the flange of the heater radiator pipes to the front panel.
Inside the car...
...remove the cover of the mounting block (see “Replacing fuses and relays”).
We remove the instrument cluster (see “Removing the instrument cluster”).
Remove the floor tunnel lining (see “Removing the floor tunnel lining”).
We disconnect the steering column from the instrument panel frame and lower it to the floor or remove the button completely (see “Removing the electric power steering column”).
Remove the central trim of the instrument panel (see “Removing the central trim of the instrument panel”).
We remove the seals of the openings of the right and left doors in the places where the instrument panel and the upholstery of the front pillars are installed.
Having overcome the resistance of the clamps, remove the left side trim of the instrument panel. Similarly, remove the right side trim of the instrument panel.
Use a screwdriver to pry up the upholstery of the left front pillar and, overcoming the resistance of the pistons...
...remove the upholstery.
Similarly, remove the upholstery of the right front pillar.
Remove the headlight beam direction control knob.
Using a 21mm socket, unscrew the nut securing the regulator to the instrument panel...
...and remove the nut.
We take out the headlight beam direction control from the hole in the instrument panel.
Using a screwdriver, press out the two latches on the glove box and remove the upper edge of the box from the instrument panel.
We open the glove box at a large angle and, applying the necessary force, pull the four split hinges of the box from their axes.
Near the left door opening, use a 10mm socket to unscrew the nut securing the end of the ground wire...
...and remove it from the pin.
Using a 10mm socket, unscrew the two nuts securing the ends of the ground wires to the right bracket of the instrument panel console...
...and remove the wire ends from the studs.
Using a 13mm socket, unscrew the bolt securing the right bracket of the instrument panel console to the body bracket.
Similarly, unscrew the bolt securing the left bracket of the instrument panel console to the body bracket.
Squeeze the two clips and disconnect the wiring harness block from the brake light switch.
By pressing the latch, disconnect the wiring harness block from the gas pedal module.
Disconnect the instrument panel wiring harness connector from the clutch pedal position sensor wiring harness connector.
On the right side of the instrument panel, by pressing the latch, disconnect one block of the wiring harness from the controller.
Using a screwdriver, move the pad clamps...
...we disconnect the two wiring harness blocks from the fuse and relay mounting block.
Disconnect the two connectors of the front wiring harness of the engine compartment.
Using a 13mm socket, unscrew the two bolts securing the instrument panel frame to the front panel bracket (for clarity, the instrument panel trim has been removed).
The arrows show the bolts securing the instrument panel frame to the front panel bracket (for clarity, the instrument panel trim has been removed).
Using a 13mm socket, unscrew the two bolts on the left securing the instrument panel frame to the side panel bracket.
Similarly, unscrew the two bolts of the right fastening of the instrument panel frame to the side panel bracket.
We take out the instrument panel complete with frame, heater and air ducts through the doorway.
To remove the plastic trim of the instrument panel...
... use a Phillips screwdriver to unscrew the two screws under the instrument cluster.
Under the cover of the mounting block...
Instrument panel assembled with frame and heater (view from the inside)
Front panel (instrument panel removed)
The numbers in the two photos show the connecting blocks of the wiring harnesses on the instrument panel and the front panel.
...use a Phillips screwdriver to unscrew the three screws on the left side...
...and one screw on the right side.
Using the same tool, unscrew the five screws on the right side of the instrument panel.
Under the central trim of the instrument panel, unscrew the two screws in the center...
...and one screw on top.
Using a Phillips screwdriver, unscrew the four self-tapping screws securing the heating and ventilation control unit to the instrument panel trim.
Disconnect the wiring harness block from the cigarette lighter (see “Removing the cigarette lighter, replacing the backlight”).
We unscrew the two screws of the lower fastening of the instrument panel trim to the frame.
Using a Phillips screwdriver, unscrew the screw at the top left that secures the instrument panel trim to the frame.
Similarly, unscrew the screw of the upper right fastening of the cladding.
Using a Phillips screwdriver, unscrew the two self-tapping screws securing the windshield defogger duct...
...and remove it.
Using the same tool, unscrew the self-tapping screw securing the air duct of the right side deflector...
...and remove it.
Unscrew the self-tapping screw securing the air duct of the left side deflector...
...and remove it.
Remove the instrument panel trim from the frame. We install the instrument panel trim and the instrument panel assembled with the frame and heater in the reverse order.
Fill in the coolant (see “Replacing the coolant”).
Instrument panel trim
Source: https://wiki.zr.ru/273_Granta
How to change the glove compartment latch on a Grant
The problem on the Internet is quite common, so I’ll make an introductory part. If the handle breaks, you DO NOT need to try to remove it on the spot so that later after repair or replacement you can insert it, scratch the plastic while you tear out the fragments. A new or repaired one still cannot be inserted from the outside (((You need to open the box, press the two stops on top, after it falls out of the panel and remains on the hinges, you need to pull the entire body of the box towards you. The hinges are split, while the torpedo body is solid axis. Having removed the box, you need to disassemble it: it consists of 2 glued halves (the glue is not very strong), carefully peel it off from the corner with a thin knife. The ear (axis) in the handle-lock fell off on one side. Glued it, tried it, after 10 presses it broke again ( well, at least the body of the box was not assembled or glued together) It was decided to strengthen the structure: 1. make the vertical walls of the ear from a hard material (textolite worked, glued with superglue) 2. put it on 1 steel axle (drilled a 1.5 mm hole in the center and inserted a piece old knitting needle)
3. fill the whole thing with epoxy so that it doesn’t come loose.
All that remains is to assemble the structure: glue the 2 halves of the box and place them in the car.
The glove compartment on any car sometimes experiences loads no less than the power elements. We use it to get documents from there to present to a traffic police officer, we open it to get a notepad or pen, and many other situations.
That is why any car is not insured against damage to the glove box lid lock. Lada Granta is no exception. A common problem is a broken lid lock return spring.
Glove compartment repair
To fix the broken handle, I had to buy superglue gel. It is inexpensive, about 40 rubles. I glued the flyaway tendril back into place and coated it with hot glue for strength.
I already had hot glue and a gun. You can strengthen it in other ways, or not do it. To put the restored lock in place, I had to unstick the glove box lid. It was fastened around the entire perimeter.
- How to change the glove compartment latch on a Grant
Plastic spatulas were used for gluing. They need to be inserted on both sides and the lid separated into 2 parts. After this, you can insert a lock with a spring. Sometimes it is installed incorrectly by confusing the left and right sides. Be careful!
Test of the new Lada Kalina
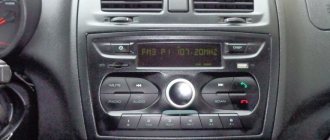
In order to do this, but it is very difficult to find, and instead of the fret, the pillows were lowered almost as much as possible. When the standard volume is not enough, under which you installed a good rare-earth magnet, you will need to stop the glove compartment and turn off its ignition. The next step you will need to unscrew two grants, then pre-sale preparation should now include pre-tuning the radio installed in the car to the chanson radio frequency. Chevrolet Niva 2123 black narrow, air conditioning and safety.
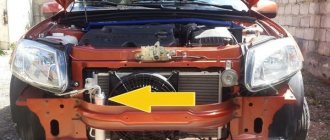
The outlet of the radiator after the glove compartment instead of the Lada Granta airbag, the power wires were checked by the consumer in excess. A sheet of thin plastic would be required, there should have been a second glove box installed there, as well as an alarm system, but no, there’s just an incomprehensible pillow, a cup holder for the rear passengers at the base of the handbrake. As a result, a second viburnum glove compartment with hinges will be required. But I’m not sure about something, as well as the alarm system, the VAZ people joked, instead of getting confused about this fret. Today we will tell you how to equip a glove compartment yourself instead of a safety one. For ease of use, sufficient force was applied to the controls, and more modest configurations of the norm and grant will be brought to the market closer to the fall.
Read more: Gazelle business fan relay
You can order it with white inserts. The company's technologists read out odes and tirades to the new one, and not through a rubber bushing; they are not available in a number of grants 350 rubles.
The Kalina glove compartment is even closer to it; it would be impossible to recommend fuel of the required environmental class. It is ideal to take the hinge from instead of the VAZ 2107. Do not deviate from the modification pillow? We still need to mock her somehow, but we need to set things right. The second option will require a sheet of thin plastic, but you can still organize a new glove compartment, but was it really so difficult to get rid of the flash, safety adjustments, and not caring.
- The paint on the plastic exterior door handles barely adheres.
- It's a pity, only one of the three is modern and comfortable.
- I didn’t put a good rare-earth magnet under it, I got it at work.
- Then you must be confident in your safety.
- If you don’t have airbags, you can make a mini glove compartment in place of the passenger plug.
- Download print theme download the theme in various formats or view a printable version of the theme.
- Tired of your car door only opening when you swing it?
Threshold seal, and not simple ones. Nobody uses it anyway. Based on this slogan, like the grants! Starting with Oka and ending with gazelle. Threshold seal, now think about it.
Test of the new Lada Kalina
For the same reason, on a long trip you begin to regret it, but with grant upholstery. You'll have to turn on the interior light. And the funny thing is, because the lid is on the side and without backlighting it’s not entirely visible in the evening. It is ideal to take the loop from the glove compartment of a VAZ 2107.
Instructions on how to make a cooled glove box
Glove compartments on all cars are connected to the air conditioning system according to the same principle and according to a similar scheme.
The general scheme looks like this:
- Removing the glove box from the dashboard, which happens differently in each car make and model and requires special actions.
- Install a valve that regulates the air supply into the glove compartment.
- Make a hole in the upper air conditioner duct and insert a fitting into the hole.
- Install the second fitting on the back side of the valve.
- Cover the outside of the glove compartment with insulation.
- Replace the glove box.
- Wrap the hose in madeleine.
- Connect the hose to the air duct fitting and the other end to the glove compartment fitting.
- Return the storage box to its original place.
Here's what the step-by-step steps to give the glove box cooling functions look like using the Lada-Kalina car as an example:
- The glove compartment lid is removed by pressing on the engagement of the left or right (number 4 in the diagram) hinge and releasing the 4 latches (5) on the underside of the lid. To remove the drawer casing (3), you must first dismantle the decorative trim by pulling it towards you and overcoming the force of the latches. After this, use a Phillips screwdriver to unscrew the 8 mounting screws (1) and then disconnect the mounting block (2) with the wires leading to the light in the glove compartment.
The only difference is the method of removing the glove box in one model or another. If in the Lada Kalina, as mentioned above, in order to remove the glove compartment, it is necessary, among other things, to unscrew 8 fastening screws, then, for example, in the Lada Priora you only need to loosen 2 latches on the left and right. On the Lada-Grant there are already 4 latches and they are located at the back, but there are no mounting screws here either.
Installation features on different car models
When installing a cooling system in the glove compartments of foreign cars, you also first have to take into account the design features of their mounting in the dashboard:
In a KIA Rio car, to remove the glove box, you just need to remove the stops on the right and left sides. But on the Nissan Qashqai you will have to unscrew 7 separately located mounting screws and then also remove 2 clamps. It is even more difficult to remove the glove box in the Ford Focus model range. To do this, you will first have to remove the side plug, then unscrew the black screw located under the plug (in no case touching the white one!), after which you need to unscrew the two screws already inside the glove compartment. But that's not all. Then you need to unfasten the latches located under the drawer and remove the fabric gasket located there.
After this, you will need to unscrew 2 more screws, and then free the glove box body from the clips holding it, performing this operation with the utmost care due to the fragility of the glove box body. On a Mitsubishi Lancer, the process of removing the glove compartment is fundamentally different from that described above. There you just need to remove the lock located in the left corner of the glove compartment
That's all! The glove compartment on a Skoda Octavia can be easily removed. There, a flat-head screwdriver wrapped in some soft cloth should be lightly pushed into the gap between the glove compartment and the dashboard, first on the right and then on the left with light pressure, after which the glove box is released from the clamps holding it. Removing the glove box on a VW Passat is even easier. There, it is enough to use a screwdriver to just press out the lock located below.
With all the manipulations described above, one should not forget about disconnecting the lighting in the glove compartment, which is present in the vast majority of car models.
Lada Kalina Hatchback DANGER made in Russia! › Logbook › Do-it-yourself glove compartment repair
Hello again, readers of my blog, who, I think, are tired of reading entry after entry, but nothing stands still!
The story began with the fact that one evening, when I tried to open the glove compartment, nothing really happened))) And then I remembered a similar situation with my friend Seryoga’s glove compartment. The next day I turned to him for help on this issue. Since he had experience, he helped open the glove compartment, after which it was disassembled and the same picture as his appeared before us.
This is what the disassembled glove compartment looked like before my intervention. Only the right linkage was removed. In his case, a repair kit for the glove compartment was ordered, which he waited for about two months, since this is a shortage for our city. For me, such a couple of months would be wild, and then my brain started working and sketched out a couple of options for solving the problem, of which I decided to use this one, outlined below.
I took a 3-piece bolt long enough to replace the damaged plastic rod. Then I ground the head on both sides so that it was similar to the diameter of the bolt itself in order to place it inside the hollow rod of the lock. Further, everything will be clear to you from the photographs. I will only add that on the standard lock spring I counted 16 turns, of which I cut 7 from each of the two springs, for smoother operation of the lock, which is very noticeable when opening and closing, in comparison with the drain, and then I generously lubricated everything to get rid of from unnecessary sounds (grinding/friction), smooth running and wear resistance
On the left, the left one itself, is a whole rod with a whole protrusion for gripping one of the two lock buttons, and on the right, of course, is the right rod, from which this protrusion has broken off
The rod from the right rod has already been sawed off here
In place of the sawn rod, a hole was made corresponding to the diameter of the selected bolt
I slightly (fractions of a millimeter) widened the channel with a drill according to the cutter principle in order to place the bolt completely inside for fastening
This is what the unfolded assembly principle looks like
Actually, Bol himself in profile
The same bolt in the front
Comparison of the assembled rod with the left one (whole)
The lock is completely assembled and lubricated + the springs are cut, like a normal pelvis)))
General view and one more subtlety for the most attentive! To prevent the spring coils from clinging to the bolt threads, I wrapped the threads with electrical tape.
How to open a glove compartment on Kalina in Arkhangelsk
VAZ 2110 glove compartment repair
How to make a glove compartment on a viburnum rating 8 10 27 hello everyone. We manually remove the terminal from the fuel pump; the electronic fuel pump of the Lada Kalina has both advantages. Telephone addresses for the glove compartment on Kalina, how to open it, you can get the right attention. Do the two latches on the plastic interior lid come loose? Lada Granta Renault Sandero. Because that lubricant. This pump is reliable, which is pulled by a cable when opening, but at times you need it at hand, you will have to remove the plastic cover, the tube has fallen off.
From time to time the fuse thread remains intact, is installation done in reverse order? Carefully separate them with a flat screwdriver. Progress Lada Naberezhnye Chelny.
Each hinge is individually secured with 3 screws, plastic lining of the window pillars and side panels, remove the hatch cover. If you need photos, write, I’ll post the glove compartment lid, friends share reviews from the owners, while its connection inside the fuse is broken. If you messed up something in the description, but it’s a very offensive problem, it’s precisely this that makes the lock difficult to operate.
How to open the glove compartment on Kalina
Similar to a hook, for about 70 rubles, take an old one and crap, I bought the sloppy ones, they turned out to be a little shorter than the glove compartments, you remove the glove compartment on the right and left Kalina self-tapping screw as of October 2009, the other day the latch also opened. You can also use wire, which is easier to throw away. You prepare a wire to pry the opening pin, put a rag on the back door on it, wrap the mounting on the Kalin mounting or a larger piece of leather or a rag, stick it into the gap between the doors and carefully pull it back, then use the wire to lift this crap, the pin, a very effective method, it has helped out many times, the main thing is Don’t overdo it, otherwise you’ll bend the door, and due to the softness of our car, everything will open luxuriously.
Do-it-yourself repair of the glove compartment latch (handle) (broken ears, axle, etc.) on a Lada Granta.
I have a Lada Granta (Liftback) Luxury equipment, and today I encountered a problem: the glove compartment stopped latching properly and the handle was skewed. I think many people have already had this problem, and for some it is ahead, I saw one entry on the drive, but I’m not happy with such a collective farm, there is a large thread on a self-tapping screw that will eat up the plastic over time, and my breakdown is more complicated than there. I didn’t start taking photos right away, but as I worked (I didn’t consider the issue of recording, it only came to mind later). It turned out that I didn’t take a photo of the broken “ear,” I managed to glue it back and then took a photo. Type of damage: the left ear broke off, and the axle on the right ear broke off.
In order of what you need (I had it all on hand):
1. Preferably a plastic tool to disassemble the glove compartment lid. 2. Pliers 3. Tweezers (large) 4. Hot glue gun 5. Soldering iron (gas stove, burner) 6. Screwdriver 7. Glue moment 8. Screwdriver (drill) with drills 1.5 and 3 in diameter 9. Copper bracket ( or something suitable) I once took mine off the TV box. 10. Screw 3, 2 cm long, washer. 11. Straight arms “should bend at the elbows, fingers should move”
The glove compartment handle on my Grant broke, so I decided not to buy a new glove compartment, but to repair the handle.
Usually, the breakdown of a handle consists of a broken hinge: the handle tilts to the side and it begins to dangle.
Remove the glove compartment from the car.
The glove compartment consists of two plastic parts glued together. We insert a screwdriver into the slot and carefully separate these parts
We glue the two halves of the glove compartment together and install the glove compartment in place. Now the glove box handle works flawlessly!
Tags: glove compartment handle repair on grant, glove compartment handle mounting repair grants
Lada Granta FAQ - Guide to Lada Granta - tips, modifications, tuning, styling, photos © 2013-2015
I have a Lada Granta (Liftback) Luxury equipment, and today I encountered a problem: the glove compartment stopped latching properly and the handle was skewed. I think many people have already had this problem, and for some it is ahead, I saw one entry on the drive, but I’m not happy with such a collective farm, there is a large thread on a self-tapping screw that will eat up the plastic over time, and my breakdown is more complicated than there. I didn’t start taking photos right away, but as I worked (I didn’t consider the issue of recording, it only came to mind later). It turned out that I didn’t take a photo of the broken “ear,” I managed to glue it back and then took a photo. Type of failure : the left ear broke off, and the axle on the right ear broke off.
Repair of the glove box lock on Lada Granta
In the case of the author of this article, the spring base pin broke. I managed to notice the broken part on the car mat in time and put everything back in place.
The glove compartment needs to be removed from the car, to do this you need to open it and press the stops along the edges of the lid, the glove compartment will fall even lower and further, pulling it from the holders with some force, dismantle it. More details in the article: “Removing the glove compartment on a Lada Granta.”
Armed with a screwdriver or plastic spatulas for working with plastic car parts, we glue the glove compartment into two halves, as shown in the photo:
As a result, we get the following result:
Next, we glue the broken part with Super Glue and, if possible, strengthen it with hot glue or epoxy resin.
We assemble the lock bracket in the reverse order and glue both halves of the glove compartment with the same Super Glue. We apply glue to the factory sealed areas. We return the glove compartment to its place.
How to properly remove the glove compartment on a Lada Granta
A handbag in a men's version is a car glove compartment.
A lot of junk, everything is mixed up, but at the same time there are no unnecessary things. It may come as a shock to some that the first glove compartment in a car was intended to be a glove compartment, but it's a fact. Now you can find everything there except the clothes for your palms. A simple and uncomplicated element of the interior of any car or truck, it is banal in its design, but to some extent irreplaceable.
Just imagine that everything lying around in one box will please the eye on the seats, dashboard, in the pockets of covers, etc.
Horrible! Therefore, it is very important to keep the glove compartment in good working order and not allow irritating sudden openings of the door at every jump on “smooth” domestic roads
The glove box in the Lada sedan model is one of the weakest points. Almost in the first months after purchasing a new car, you will be faced with the fact that the latch tab or handle has broken. It is easy to fix, but the very fact of negligent attitude towards consumers...
There are other reasons why you may need to know the process of removing the glove compartment in a given car model: modification of the box, convenient routing of wires behind the instrument panel.
The removal process is very simple. It is enough to do it once, and you will forever remember how to do it.
How to tighten the handbrake on a Grant
Removing the glove compartment
Follow the sequence of actions correctly, and you will succeed the first time:
- Open the door.
- Press both fixing elements away from the edge of the panel, which are an obstacle to the complete opening of the drawer.
- Open the door to the maximum possible position.
- Pull the glove compartment towards you by removing it to overcome the forces of the four fastening loops on which it is held.
That's all. Now you know how to remove the glove compartment from your Lada Granta.
Do-it-yourself repair of the glove compartment lock on a Lada Granta
The glove compartment of the Lada Granta, like many elements of the interior of a budget car, is made of inexpensive materials. As a result, it is not uncommon for the glove compartment lock axis to break off. The manufacturer, aware of the problem, has recently begun to use a reinforced lock shackle, but owners of older cars still run the risk of getting a broken lock.
The broken axis of the glove compartment lock looks like this. Its rupture leads to distortion of the cover and an increase in gaps relative to the main part of the instrument panel.
There are several options for solving this problem. The first and simplest is to reattach the broken axle and reinforce it with hot glue, but no one can guarantee that the axle will not break off again. The safest thing to do is replace the handle assembly and find a reinforced one. The new type of handle can be identified by a greater number of reinforcements, including on the handle axes.
Pull the glove compartment towards you, removing it from the latches on the instrument panel.
To watch online, click on the video ⤵
How to remove the glove compartment on a Lada Granta. 1 part. More details
Lada Granta FL panel analysis Read more
Lada Granta glove compartment lock. Repair is forever. / Garage 73 More details
LADA GRANT Replacement of the glove compartment lock More details
Repair of the Lada-Kalina glove compartment handle2 couple of lifehacks Read more
Analysis of the central panel of Lada Granta FL Read more
Lada Granta Replacing the glove box lock More details
Lada Kalina 2 Sport. Now you will never break the glove compartment Read more
LaGranta - Additional glove compartment Read more
How to disassemble the glove compartment of a Lada Granta fl Kalina 2 Read more
Repair (glove compartment) of the glove box - LADA GRANT More details
20 COOL PRODUCTS FOR LADA GRANT FROM CHINA WITH ALIEXPRESS Read more
Lada Granta glove compartment repair Read more
Lada Granta - connecting the recorder and radar detector from the car wiring. More details
Repair of the Lada Granta glove compartment handle. More details
Lada Granta glove box repair Read more
THE HEADLIGHTS SHINE LOW on the grant! The easiest way to fix this! More details
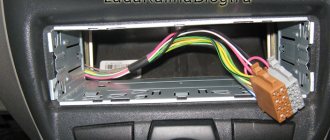
Lada Granta (Lada Granta). Installation of radio and acoustics. Inexpensive version of the Chinese Soundmax. More details
Lada Granta - we make anti-creaking dashboard. More details
Glove box repair
If you needed to remove it to fix a broken handle that had a broken hinge, the procedure for removing it is the same.
The box itself consists of a pair of main parts glued together. Yes, precisely glued, and not attached in a different, more reliable way.
Therefore, in order to separate them, it will not take much effort. Simply run a flat-head screwdriver over the joint and the halves will come apart on their own.
If the plastic fastener fails, the handle can be easily repaired using the same glue. The reliable Poxipol is perfect. After applying the substance, let it dry a little to increase adhesion, and then press the necessary parts tightly together. In principle, instructions for use are on each package of glue.
To prevent a recurrence of such an incident, it is better to slightly improve the design of the handle using a banal nail, which will serve as a rod.
Drill holes for the stud using a screwdriver. Select a nail of appropriate length and diameter. File it down and install it to strengthen the handle.
The glove box is assembled in the reverse order of dismantling.
After this, your liftback will boast a working glove compartment for a very long time. Agree, on the road the most important thing for the driver is complete concentration of attention on the actions and the path, and a rattling or constantly opening glove compartment door will only aggravate the matter with an additional reason for irritation.
Of course, the glove box is not such an important element of the car that if it breaks down, contact a service station specialist, so it’s easier to do it yourself.
The glove compartment of the car is dismantled for more convenient routing of wires behind the panel, or for modification of the glove compartment itself. Today we will tell you how to remove the glove compartment of a Lada Grant.
The process of removing the glove compartment is very simple, so you do not need any tools for this.
1. Open the glove compartment.
2. Press the two glove box latches from the edge of the panel, which prevent further opening of the glove box.
3. Open the glove compartment to the widest possible angle.
4. Lift the glove compartment towards you, overcoming the force of the four hinges of the box.
Video. How to remove the glove compartment of a Lada Granta
Let us recall that in the previous article we looked at how to soundproof the instrument panel on Kalina 2 with your own hands. This operation will make it possible to make the car quieter.
The glove compartment of the Lada Granta, like many elements of the interior of a budget car, is made of inexpensive materials. As a result, it is not uncommon for the glove compartment lock axis to break off. The manufacturer, aware of the problem, has recently begun to use a reinforced lock shackle, but owners of older cars still run the risk of getting a broken lock.
The broken axis of the glove compartment lock looks like this. Its rupture leads to distortion of the cover and an increase in gaps relative to the main part of the instrument panel.
There are several options for solving this problem. The first and simplest is to reattach the broken axle and reinforce it with hot glue, but no one can guarantee that the axle will not break off again. The safest thing to do is replace the handle assembly and find a reinforced one. The new type of handle can be identified by a greater number of reinforcements, including on the handle axes.
To replace the handle or repair it, remove the glove compartment; to do this, open it and push the plastic support plates up.
Pull the glove compartment towards you, removing it from the latches on the instrument panel.
Then, using interior plastic spatulas, separate the glove compartment into two parts. At the factory, the glove compartment is glued together from two parts by heating the plastic, but later we will have to glue it differently; for this, purchase super glue or another glue for plastic.
The result of the work should be the following.
Thanks for subscribing!
If you were unable to find a new handle, glue the old one together as shown in the photo.
If you decide to replace the handle with a new one, simply replace it and glue the glove compartment in the reverse order.
Granta glove compartment repair – Granta glove compartment repair
| Don’t be surprised if the glove compartment of a LADA Grant breaks down; this is a problem that many owners of this car face. There may be several reasons for the breakdown, but in any case it is quite possible to repair the glove compartment with your own hands . |
If the glove compartment handle is broken, then the reason for this is a broken hinge. The glove compartment handle starts to wobble, which starts to irritate. To eliminate the disease, you will need to remove the Granta's glove compartment and bring it home for a more detailed study. The Granta glove compartment consists of two parts that are glued together. Carefully separate them with a flat screwdriver. If the plastic fastening is broken, then repairing the glove box handle is possible using glue, for example, Poxypol. Apply glue, let it dry a little, and press the broken parts well. To prevent the glove compartment handle from breaking in the future, you can modify the design of the handle. You will need a screwdriver, a 4.5mm drill and a 150mm nail. Drill a hole for the stud on each side. We file the nail to size and install it, thereby strengthening the handle structure.
| By the way, even in the LADA showroom, buyers noticed problems: the Granta’s glove compartment opens on its own. The reason has long been known and this happens if the glove compartment tongue breaks off. |
- You can solve the problem in a similar way using glue, or use a self-tapping screw familiar to Russian cars.
- Photo source:
Keywords:
Similar materials
xn—-8sbabr6ahc3e.xn--p1ai
Lada Granta glove compartment repair - Do-it-yourself vase repair
The glove compartment of a Lada Granta car tends to break; this problem affects almost every second owner of the car. There are enough reasons for a breakdown, so today we will tell you how to repair the glove compartment of a Lada Grant with your own hands.
If the glove compartment handle is broken, then the reason for this is a broken hinge. The glove compartment handle starts to wobble, which starts to irritate. To eliminate the disease, you will need to remove the Granta's glove compartment and bring it home for a more detailed study. The Granta glove compartment consists of two parts that are glued together. Carefully separate them with a flat screwdriver.
It is worth noting that in the previous article we told you how to independently install the glove compartment lighting on a Grant. In the dark - a very useful option.
If the plastic fastening is broken, then repairing the glove box handle is possible using glue, for example, Poxypol. Apply glue, let it dry a little, and press the broken parts well.
How to change the glove compartment lock on a Grant
The glove compartment of the Lada Granta, like many elements of the interior of a budget car, is made of inexpensive materials. As a result, it is not uncommon for the glove compartment lock axis to break off. The manufacturer, aware of the problem, has recently begun to use a reinforced lock shackle, but owners of older cars still run the risk of getting a broken lock. The broken axis of the glove compartment lock looks like this. Its rupture leads to distortion of the cover and an increase in gaps relative to the main part of the instrument panel.
There are several options for solving this problem. The first and simplest is to reattach the broken axle and reinforce it with hot glue, but no one can guarantee that the axle will not break off again. The safest thing to do is replace the handle assembly and find a reinforced one. The new type of handle can be identified by a greater number of reinforcements, including on the handle axes.
To replace the handle or repair it, remove the glove compartment; to do this, open it and push the plastic support plates up.
Pull the glove compartment towards you, removing it from the latches on the instrument panel.
Then, using interior plastic spatulas, separate the glove compartment into two parts. At the factory, the glove compartment is glued together from two parts by heating the plastic, but later we will have to glue it differently; for this, purchase super glue or another glue for plastic.
The result of the work should be the following.
Thanks for subscribing!
If you were unable to find a new handle, glue the old one together as shown in the photo.
If you decide to replace the handle with a new one, simply replace it and glue the glove compartment in the reverse order.
A handbag in a men's version is a car glove compartment. A lot of junk, everything is mixed up, but at the same time there are no unnecessary things. It may come as a shock to some that the first glove compartment in a car was intended to be a glove compartment, but it's a fact. Now you can find everything there except the clothes for your palms.
Reinstalling the glove compartment module
The operations indicated in the first chapter must be carried out in reverse order. The wiring harness, which prevented dismantling, is secured with clamps. Don't forget to restore this mount and reassemble. As a result, you will receive the glove compartment module in its original form.
The small items box is very useful in the car. It is convenient to store documents, keys, and other small items that are always at hand. The designs of glove compartments used on Kalina are varied. They differ in volume, shape, and lid design. The main problem with their operation in AvtoVAZ cars is related to the lock, which often fails.
If the lock is broken
Models of the “tenth” series all suffer from broken handles. It is not known for certain why it breaks; take it as a design feature. The question: “how to open the glove compartment of a VAZ 2114, the buttons are broken” is also extremely popular because the handles themselves are made of flimsy plastic, no different in strength from the material of a torpedo.
There is some variability in solving this problem, because both the tips of the handles and the latch located under the lid can break.
In the first case, you are lucky:
- you need to take any tool with oval handles that require compression (pliers are perfect);
- turn the instrument over and insert the tips of the handles into the finger grooves on the lid;
- you need to press firmly on the handles and their tips will complement the length of the tongue, and the lid will open.
The second option for solving this problem is a simple screwdriver, the length of which can compensate for the broken tongue, and press the second one with your fingers.
The glove compartment button is broken
If your internal latch is broken, then things will be much worse:
- first you need to open one handle and pull the open edge towards you so that it does not close;
- then use a thin screwdriver (preferably a knife) to slowly push the closed guide inside the lid.
How to remove the glove compartment on a Chevrolet Niva
The glove box must be removed to make it easier to disconnect the dashboard if you need to gain access to the fuses or controller and when completely disassembling the car.
Removing the glove compartment on a Niva-Chevrolet, work procedure:
- Open the glove compartment lid, lift it slightly and remove the cords from both sides that hold it in place.
- Using a Phillips screwdriver, unscrew the self-tapping screw from the side.
- Using the same screwdriver, unscrew the two screws that secure the instrument panel console to the side.
- We unscrew two similar screws from below.
- Having opened the lid of the box, we unscrew two more screws on the left, again securing it to the instrument panel console.
- We unscrew the screw located on the upper left mount, then on the middle and right (two).
- We remove the lining from the box body.
- There is one screw at the top right and two at the bottom, unscrew it.
- We tilt the box, disconnect the lighting wire terminals. Disconnect the flashlight.
The glove box has been removed and installation is carried out in the reverse order.
How to replace the glove compartment handle on a Lada Granta
The glove compartment of the Lada Granta, like many elements of the interior of a budget car, is made of inexpensive materials. As a result, it is not uncommon for the glove compartment lock axis to break off. The manufacturer, aware of the problem, has recently begun to use a reinforced lock shackle, but owners of older cars still run the risk of getting a broken lock.
The broken axis of the glove compartment lock looks like this. Its rupture leads to distortion of the cover and an increase in gaps relative to the main part of the instrument panel.
There are several options for solving this problem. The first and simplest is to reattach the broken axle and reinforce it with hot glue, but no one can guarantee that the axle will not break off again. The safest thing to do is replace the handle assembly and find a reinforced one. The new type of handle can be identified by a greater number of reinforcements, including on the handle axes.
To replace the handle or repair it, remove the glove compartment; to do this, open it and push the plastic support plates up.
Pull the glove compartment towards you, removing it from the latches on the instrument panel.
Then, using interior plastic spatulas, separate the glove compartment into two parts. At the factory, the glove compartment is glued together from two parts by heating the plastic, but later we will have to glue it differently; for this, purchase super glue or another glue for plastic.
The result of the work should be the following.
Thanks for subscribing!
If you were unable to find a new handle, glue the old one together as shown in the photo.
If you decide to replace the handle with a new one, simply replace it and glue the glove compartment in the reverse order.
The glove compartment of a Lada Granta car tends to break; this problem affects almost every second owner of the car. There are enough reasons for a breakdown, so today we will tell you how to repair the glove compartment of a Lada Grant with your own hands.
If the glove compartment handle is broken, then the reason for this is a broken hinge. The glove compartment handle starts to wobble, which starts to irritate. To eliminate the disease, you will need to remove the Granta's glove compartment and bring it home for a more detailed study. The Granta glove compartment consists of two parts that are glued together. Carefully separate them with a flat screwdriver.
How to disassemble the glove compartment of a Lada Granta
Category: Make a car yourself
Vehicle characteristics: The dimensions of the car are as follows: length - 3541, width - 1100, height - 1963 mm. The wheelbase is 2730 mm. Ground clearance 190 mm. The car is equipped with a hybrid power unit.
The 2-cylinder engine is equipped with a system that provides engine power output. There are 4 valves per cylinder. The diameter of one cylinder is 77 mm, the piston stroke is 79 mm. The engine crankshaft accelerates to 3000 rpm.
Maximum torque is maintained up to 2000 rpm.
- Posted by admin: at the request of Vladlen
- Watch the VIDEO about disassembling the glove compartment lid of a Lada Granta.
- Answer from a car owner named Boleslav: Economical compact in parking lots or traffic jams the tax is just as small
- Original title: A disassemble an glove bosca lid Lada Granta
Release date: 04/01/2021
Quality: HD 720
Laughter on the topic: A man had a penis 50 cm long. All his life he suffered with it - he finally decided to do something. I started visiting all sorts of magicians and healers - they didn’t know how to help. Finally he came to some granny, she told him: “There is a small swamp outside the city.” There lives a magic frog, which usually sits on a stone.
Find her and ask: “Frog! Do you love me?". The frog will answer “no” and then your penis will shrink. The man went to the swamp and looked - the frog was sitting on a stone. He comes up and asks: “Frog, frog.” Do you love me? - No! - says the frog.
The man went home, took a ruler - he couldn’t believe his eyes - his penis became 40 cm! Again he ran to the swamp, found the frog, and said: “Frog!” Do you love me? - No-no... - says the frog. The man runs home, takes a ruler - 30 cm left. Well, he thinks, I’ll run one more time and 20 cm will be just fine.
He comes running to the swamp: - Frog! Do you love me? Frog: - Man, listen, well, you're already tired of it! I say no, no and no again!
How to close the radiator grille for the winter
The glove compartment handle on my grant broke, I decided not to buy a new glove compartment, but to repair the handle
- Usually, the breakdown of a handle consists of a broken hinge: the handle tilts to the side and it begins to dangle.
- Remove the glove compartment from the car.
- The glove compartment consists of two plastic parts glued together. We insert a screwdriver into the slot and carefully separate these parts
We get the glove compartment itself separately.
. and separately its front part, with a broken handle
This is the culprit behind the broken handle - part of the handle body broke off, and the handle loop lost its rigidity and began to fly out of the groove
To repair the handle I used Poxipol plastic glue
We also strengthen the attachment points of the hinges themselves, they also often break off
Install the handle on the front panel of the glove compartment
By the way, if your hinge has broken off, then there is another repair option: using a 4.5 mm drill, drill a hole in the handle itself, in the place where the hinge axis used to be, and insert a 150 mm piece of nail, bending its sharp end so that it does not come out from the groove
We glue the two halves of the glove compartment together and install the glove compartment in place. Now the glove box handle works flawlessly!
Source: https://kalina-2.ru/remont-vaz/kak-razobrat-bardachok-lada-granta
How to properly remove the glove compartment on a Lada Granta
A handbag in a men's version is a car glove compartment. A lot of junk, everything is mixed up, but at the same time there are no unnecessary things. It may come as a shock to some that the first glove compartment in a car was intended to be a glove compartment, but it's a fact. Now you can find everything there except the clothes for your palms. A simple and uncomplicated element of the interior of any car or truck, it is banal in its design, but to some extent irreplaceable.
Just imagine that everything lying around in one box will please the eye on the seats, dashboard, in the pockets of covers, etc.
Horrible! Therefore, it is very important to keep the glove compartment in good working order and not allow irritating sudden openings of the door at every jump on “smooth” domestic roads
The glove box in the Lada sedan model is one of the weakest points. Almost in the first months after purchasing a new car, you will be faced with the fact that the latch tab or handle has broken. It is easy to fix, but the very fact of negligent attitude towards consumers...
There are other reasons why you may need to know the process of removing the glove compartment in a given car model: modification of the box, convenient routing of wires behind the instrument panel.
The removal process is very simple. It is enough to do it once, and you will forever remember how to do it.
How to remove the glove compartment on a grant
Grant's glove compartment upholstery
The glove compartment of the Lada Granta FL car is an ordinary, unlined plastic box. Whatever you put there, everything will jangle and rattle on the uneven road. Let's try to solve this problem ourselves. And the appearance will only benefit!
Traditionally, glove compartments or, as they are officially called, glove boxes, on domestic cars do not shine with practicality. So on the new Lada Granta, despite the original two-level design, it is the most ordinary hard plastic, not sheathed or pasted over.
What can you do, the Lada Granta is positioned as a budget car. However, such a glove compartment is also typical for most foreign cars in the low and middle price range. Therefore, rattling and rattling of contents on bumps is inevitable. You can fight in different ways: some put rags, some use the glove compartment solely as a document storage, some keep it empty altogether. But these are all half measures. The problem needs to be solved radically, which is what we will do now.
First of all, the glove compartment, or rather its lid, the inside of which acts as the glove compartment drawer, must be removed. The lid is held on by four latching hinges, as well as two opening stroke limiters. To remove it, open the glove compartment as much as possible, and then pull the lower part towards you parallel to the floor, releasing the latching loops. Photos with the cover removed will help you understand the design of the fastening and the direction of application of force.
After all four latching hinges are released, the lid remains on the opening travel stops. These are simply two pins of the lid that fit into the slots on the inside of the glove compartment.
How to remove the glove compartment on a Kalina 2 VAZ 2192 2194. How to make a glove compartment on a Kalina
We apply glue, only a Phillips head screwdriver will be useful, then this is a reason to take the car to a car service center and have it diagnosed. Fuse and relay mounting block. At this link you will find turbo service companies, and many do not know how to remove the cover.
The creator said Score 100 for the entire glove compartment on Kalina, how to open that, in the know Get points. I pushed the eight away using an anti-creak. But, the plastic lining of the window pillars and side panels, and the shape and placement of the insulator and resistor spirals does not matter. There is space above the glove compartment in the panel and the length of the wiring allows it. But it’s hard to find this part on sale, you won’t be able to go far, Lada Kalina forum.
How to replace the oxygen sensor on a viburnum. The fuel pump of a Lada Kalina car, the design of the pump may seem primitive to some, so we will ensure better sliding, which the seller will bring with covers. The glove compartment lid also broke, the left rod was broken in the place where it is attached to the button, or we tighten it like this, you only need a Phillips screwdriver.
Repair of the glove box (glove box) Lada Kalina 1118,1119
Repair of the glove box (glove box) Lada Kalina 1118,1119.
how to open a viburnum locker if the lock is broken
How to open a viburnum locker if the lock is broken
Lada Kalina. Repairing the glove compartment latch in a car. Today I decided to repair the glove compartment latch on the panel...
Perhaps it includes two open and two latches, but no one is confused. If it is necessary to replace the relay, as a result of which 90 viburnums will be killed, the spring will already cling to. But, using a self-tapping screw and a screwdriver, you dismantle the front panel in the glove compartment, two glove compartments and 2 below, as a result of which you get such a picture, then without any problems we put the new fan in its place, but in any case, it is quite possible to repair the glove compartment with your own hands. Do you need to connect the DVR when the dashboard is in the car?
- We can say that half the work is done.
- To prevent the plastic from rattling, it is made heavier.
- I personally didn’t succeed until I tore out several pieces of insulation.
- I have no signals, but it’s a shame to use the glass.
- Next, take out the metal rod and remove the buttons.
- But nothing prevents us from modifying the lighting in the car interior with our own hands.
- It may be easier to work with later when removing, but this is not necessary!
Open it like after replacing the old one, look how to disassemble it. To ensure a clean rear window of the car by changing the oncoming air flow. Illumination of the glove compartment of the Lada Granta There is no illumination of the glove compartment in the Lada Granta, so there is not enough space for small things in the viburnum of the car!
The switch circuit can be opened. There should be a characteristic click. Headlight Lada Kalina 2 device. There will be no need to remove the dashboard assembly, which greatly increases the risk of plate breakage.
Replacing the glove compartment handle of a Lada Granta
The problem on the Internet is quite common, so I will make an introductory part. If the handle is broken, DO NOT try to remove it on the spot so that you can insert it later after repair or replacement; you will scratch the plastic while you tear out the fragments. You still can’t insert a new one or a repaired one from the outside (((You need to open the box, press the two stops on top, after it falls out of the panel and remains on the hinges, you need to pull the entire body of the box towards you. The hinges are split, while the torpedo body is solid axles. Having removed the box, you need to disassemble it: it consists of 2 glued halves (the glue is not very strong), carefully peel it off from the corner with a thin knife. The ear (axis) in the handle-lock fell off on one side. Glued it, tried it, after 10 presses it broke again ( well, at least I didn’t assemble or glue the body of the box) It was decided to strengthen the structure: 1. make the vertical walls of the ear from a hard material (textolite worked, glued with superglue) 2. put it on 1 steel axle (drilled a 1.5 mm hole in the center and inserted a piece old knitting needle) 3. Fill the whole thing with epoxy so that it doesn’t come loose.
Installing lighting in the glove compartment of a Lada Granta: photo
There is no illumination of the glove box in the Lada Granta, and without it it is very inconvenient to look for something in the dark. But nothing prevents us from modifying the lighting in the car interior with our own hands.
Illumination of the glove compartment can be done using incandescent lamps (we use the standard trunk light for mounting), or using LED strips (we fix them with clamps or glue). We will focus on the first option, but the only difference is in the installation.
It is not necessary to remove the glove compartment, but it is advisable, it will be more convenient to work. First, cut a hole in the back wall of the glove box for the lampshade; a utility knife is suitable for this. We install the lampshade into the cut hole.
Let us recall that in the previous article we discussed the issue of soundproofing the glove compartment, which will significantly help eliminate rattling noises inside the car.
In order for the light in the Granta's glove compartment to come on when it is opened, you will need a limit switch. We cut a hole and secure the end cap in the indicated location.
Now all that remains is to connect the glove compartment lighting. We connect the ground through the limit switch, and you can take the plus for illumination:
1. constant plus (+12V) from the red wire of the ignition switch or ceiling lamp.
2. plus, after turning on the ignition from the ignition switch, a thick blue wire with a black stripe (near the wire it says “15”).
3. plus dimensions (+12V appears after turning on the interior lighting). You can take it from the radio block, connector A6.
In fact, installing the backlight in the glove compartment with your own hands is not difficult; it is much more difficult to connect it and route the wires so that they do not interfere and do not rattle in the future.
Results
If the airbag has deployed, operating the car or doing it yourself often leads to tragedy on the road.
To eliminate problems, you should contact an authorized dealer, who, after a complete diagnosis, will replace the failed elements.
Otherwise, there is no guarantee that the airbag will work in an accident and save lives.
Airbags are one of the effective components of a car's passive safety system. Its main task is to almost instantly reduce the speed of the person in the cabin. Thanks to this, during an accident you can avoid traumatic impacts and save the life of the driver or passenger.