Hi all! Having overcome laziness and found time, I am writing this post. Without having discovered America, I will say that the quality of spare parts is “excellent.”
One fine morning the glove compartment opened with a characteristic click, a special effect was also present...
The glove box closed without problems, but it just can’t be opened again.
Let's go, Google Drive2, I find out that there is a repair kit.
I pick up the phone and call the nearest parts stores. Repair kit prices are 50 rubles for 2 rods and 2 handles, in another store 1 rod and 1 handle are 12 rubles. I bought option 2 for 12 rubles, BUT it is the wrong color, namely black. And my plastic is far from black. I looked in other stores - the result is the same, everyone has shit from the same place... People are divided into 2 types:
- I will buy
(it’s good when I have money and have something to buy)
- I will do it myself.
(good by default)
To remove the glove compartment from the car, you need to suffer. Here we describe the standard option for removing a working glove compartment.
But we have a new introduction - there is no access to the internal screws, the door does not open.
You can jerk stupidly and break something, or you can try with a minimal break.
Pictures in the Post above, the sequence is as follows: 1) unscrew the socket under the glove compartment, opening access to the hinges.
2) open the door slightly, revealing the working fastening 3) remove the white axles from the hinges 4) unscrew the side screws from the cover that hold the stops. (it’s difficult to remove the right one, the same side has stopped opening) 5) carefully remove the door and unscrew the 2 internal screws. The dancing is over.
And then we glue together what was separated with superglue. (the price of the glue is not important, the main thing is to glue it, the price is 42 rubles for 6 tubes) Then I reinforced it with a three-piece screw and secured it with a nut. The main thing is just to fix it but not to pull too hard.
Removing the glove compartment
Provided that the glove compartment lid mechanism is working properly, removing it will not take much time.
The algorithm of actions is as follows:
- We close the glove compartment and crawl under the bottom of the dashboard, where we see two screws.
- They secure the lower part of the glove compartment to the front panel housing, so unscrew them and remove the cover that hides the mechanism.
- Now it's the turn of the two top bolts (open the cover and look up, you won't miss them).
- After this, carefully pull the lid - the entire structure of the glove compartment will pliably slide out into your hands.
- To complete the complete disassembly, all that remains is to unscrew the 2 bolts at the edges and remove the two stoppers. The former are located at the junction of the cover with the fixing metal strips, and the latter are at the junction of the cover and the body.
- The mechanism is completely disassembled and you can see the lock structure; if not (this happens, depending on the glove compartment model), you need to unscrew 2 additional screws that are located on the inside of the lid.
IMPORTANT! When reassembling, be sure to attach the cover and screw in all the necessary bolts. If you first install the body, and only then decide to attach the roof, you will not be able to do without the suffering associated with the left bolt - the torpedo will not let you get there
Removal and replacement
If any device does not work, the first thing to do is to look for the cause with the easiest action, and this is inspecting the fuse. That is, first we look for the required fuse that is responsible for a specific device, then we check it to see if it is intact or burnt out.
How to replace a fuse:
- Open the hood, disconnect the ground (-) of the battery.
- Open BP.
- On the inside of the block cover there is a designation where and which fuse is located.
- Remove the fuse.
- Install a new one and check.
Related Products (2)
Additionally
1. Lack of geographical attachment to a retail outlet (you do not need to look for a store, spending your personal time and energy);
3. Comparing information about products from different manufacturers and sellers (visiting several stores on the Internet, as opposed to tedious trips to traditional “offline” stores, takes only a few minutes.
4. The opportunity to thoroughly familiarize yourself with the characteristics of the product and its consumer properties, as well as reviews of other buyers (you must agree, this is much more convenient to do in a familiar home environment or while sitting in an office chair);
5. Time saving
Efficiency is the most important factor;
How to open the glove compartment of a VAZ 2114 if it breaks down
In cars of the “tenth” family, problems often arise with the glove compartment, so today we will look at how to open the glove compartment of a VAZ 2114 and what to do if its handles are broken. The need to remove this part of the torpedo may arise without the handle being broken.
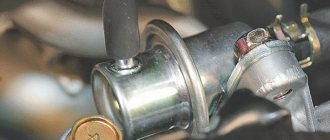
So, during the autumn preparation of the car for the winter season, problems may arise with the heating system of the car (antifreeze leakage, problems with the heater faucet, etc.). Any action related to the complete (partial) dismantling of the “fourteenth” torpedo implies working with the “pocket” of the car and a reasonable question: “how to remove the glove compartment on a VAZ 2114?”
Glove box for VAZ 2114
In conclusion
Now you understand how to disassemble the glove compartment on a VAZ 2114 and what to do in case of a breakdown. The main thing to remember is that if the handles will not fit on the guides, turn them 90 degrees from the center of the lid and put them on with a hook-like movement, this will significantly simplify the function.
Below see the technical characteristics of the VAZ 2114; the glove compartment is broken; how to open it. Express your opinion about the car in the reviews of the article.
Answer from a car owner named Vseslav: The costs of acquisition and operation are unrealistically low! Yes, compared to the cheapest VAZ 2105! There are several times fewer failures and breakdowns than on imported cars. And comfort and maneuverability, especially after investing 60,000 rubles on tuning the engine, chassis and brakes, are completely comparable to a Mercedes. Only there is no air conditioning. But the stove in winter will give a head start on the warmth in the cabin of any imported car. There are no irreparable defects, like on the VAZ 21099.
Posted by admin: at the request of Decim
Category: The most useful tips for operating a car
Description: The dimensions are as follows: length - 3517, width - 1100, height - 1208 mm. The wheelbase is 2124 mm. Ground clearance 184 mm. The car is equipped with a hybrid power unit. The 4-cylinder engine is equipped with a system that provides engine power output. There are 4 valves per cylinder. The diameter of one cylinder is 71 mm, the piston stroke is 79 mm. The engine crankshaft accelerates to 4000 rpm. Maximum torque is maintained up to 4000 rpm.
Release date: March 17, 2021
Laughter in the subject: “I woke up... I saw: something’s not right…” “Something’s not right” also woke up and whined: “I want coffee!” I want coffee!
The final stage of work
The high panel of the VAZ is dismantled carefully, since there are latches on the left that quickly break. After disconnecting the block from other elements, the entire instrument cluster is dismantled
The final step involves disconnecting the cable from the speedometer. If the Europanel is equipped with additional equipment, then you need to be even more careful. Tuning a torpedo involves disconnecting the block from the following units:
- on-board control system;
- ignition relay;
- remaining panel instruments;
- backlight lamps.
You will need to unscrew the screws for the lower fixation of the torpedo on both sides. Using a screwdriver, pull out the plug and unscrew the screws for the side fixation of the torpedo. The europanel is removed at the final stage. Installation of a new structure of this type is carried out in the reverse order. Upon completion of this procedure, the operation of the switches is checked.
Often, tuning a VAZ torpedo involves dismantling the plastic and removing the panel board. In this case, you will need the following tools and materials:
Initially, you will need to remove the old europanel, remove the glass and the existing edging. The insert and arrows are carefully pulled out
Particular attention should be paid to the new insert. It is recommended to make holes with some margin
This will prevent the arrows from sticking.
Lada Kalina Hatchback DANGER made in Russia! › Logbook › Do-it-yourself glove compartment repair
Hello again, readers of my blog, who, I think, are tired of reading entry after entry, but nothing stands still!
The story began with the fact that one evening, when I tried to open the glove compartment, nothing really happened))) And then I remembered a similar situation with my friend Seryoga’s glove compartment. The next day I turned to him for help on this issue. Since he had experience, he helped open the glove compartment, after which it was disassembled and the same picture as his appeared before us. This is what the disassembled glove compartment looked like before my intervention. Only the right linkage was removed. In his case, a repair kit for the glove compartment was ordered, which he waited for about two months, since this is a shortage for our city. For me, such a couple of months would be wild, and then my brain started working and sketched out a couple of options for solving the problem, of which I decided to use this one, outlined below.
I took a 3-piece bolt long enough to replace the damaged plastic rod. Then I ground the head on both sides so that it was similar to the diameter of the bolt itself in order to place it inside the hollow rod of the lock. Further, everything will be clear to you from the photographs. I will only add that on the standard lock spring I counted 16 turns, of which I cut 7 from each of the two springs, for smoother operation of the lock, which is very noticeable when opening and closing, in comparison with the drain, and then I generously lubricated everything to get rid of from unnecessary sounds (grinding/friction), smooth running and wear resistance
On the left, the left one itself, is a whole rod with a whole protrusion for gripping one of the two lock buttons, and on the right, of course, is the right rod, from which this protrusion has broken off
The rod from the right rod has already been sawed off here
In place of the sawn rod, a hole was made corresponding to the diameter of the selected bolt
I slightly (fractions of a millimeter) widened the channel with a drill according to the cutter principle in order to place the bolt completely inside for fastening
This is what the unfolded assembly principle looks like
Actually, Bol himself in profile
The same bolt in the front
Comparison of the assembled rod with the left one (whole)
How to open the glove compartment of a VAZ 2114 if it breaks down
In cars of the “tenth” family, problems often arise with the glove compartment, so today we will look at how to open the glove compartment of a VAZ 2114 and what to do if its handles are broken. The need to remove this part of the torpedo may arise without the handle being broken.
So, during the autumn preparation of the car for the winter season, problems may arise with the heating system of the car (antifreeze leakage, problems with the heater faucet, etc.). Any action related to the complete (partial) dismantling of the “fourteenth” torpedo implies working with the “pocket” of the car and a reasonable question: “how to remove the glove compartment on a VAZ 2114?”
If the lock is broken
Models of the “tenth” series all suffer from broken handles. It is not known for certain why it breaks; take it as a design feature. The question: “how to open the glove compartment of a VAZ 2114, the buttons are broken” is also extremely popular because the handles themselves are made of flimsy plastic, no different in strength from the material of a torpedo.
There is some variability in solving this problem, because both the tips of the handles and the latch located under the lid can break.
In the first case, you are lucky:
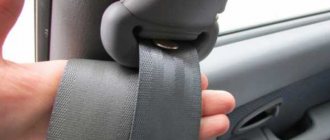
- you need to take any tool with oval handles that require compression (pliers are perfect);
- turn the instrument over and insert the tips of the handles into the finger grooves on the lid;
- you need to press firmly on the handles and their tips will complement the length of the tongue, and the lid will open.
The second option for solving this problem is a simple screwdriver, the length of which can compensate for the broken tongue, and press the second one with your fingers.
The glove compartment button is broken
If your internal latch is broken, then things will be much worse:
- first you need to open one handle and pull the open edge towards you so that it does not close;
- then use a thin screwdriver (preferably a knife) to slowly push the closed guide inside the lid.
ADVICE! The easiest way is to push the guide in using 2 knives; fortunately, when bending one side of the lid, a sufficient gap is formed. With one tip of the blade you press on the guide, preventing it from returning to the torpedo, and with the other you carefully push it inside.
Upgrading the glove compartment lighting
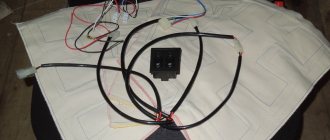
The standard illumination of the glove box (glove compartment) in the form of a single light bulb in the upper right corner is no good; the light of this lamp practically does not fall inside the box. Something needs to be done about this, fortunately there are now many options for organizing various LED-based backlights on sale. This idea began to come to the author more and more often, especially since I got tired of rummaging around in the glove compartment in the semi-darkness of the standard lighting in search of the right thing, and the yellow light of the lamp did not fit into the general concept of lighting in the cabin - almost all the lighting elements were LED. The first thought was to install an LED with a similar base instead of the lamp. But LED lamps with a large number of luminous SMD elements are longer than a standard lamp and will not always fit in a regular place, and small ones are of no use. However, as experience has shown, from simply replacing a standard lamp with an LED one, the result is only slightly better, since the SMD elements shine in all directions, including into the eyes, but not into the inside of the glove compartment. Therefore, the optimal solution was to install an LED strip 10-15 cm long, rated for 12V voltage, in the upper part of the glove box and connect it to the backlight switch contacts. It is better to take an insulated tape, in which the light-emitting elements are protected from damage by applying a special composition. Although a regular, non-insulated one will do. The place for its sticker is the most suitable, the light will be directed inside the glove compartment, that is, where it is needed.
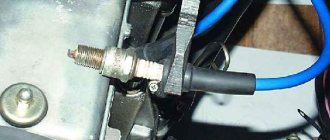
The switch, also known as the socket for the glove box illumination lamp. The white wire goes to the LED strip
The arrows indicate where the LED strip is connected to the socket. “Plus” and “minus” are determined empirically.
LED strip illumination of the glove compartment. Inside view.
The standard glove box illumination lamp can be left in its place; it does not interfere with the connection of the tape.
Dismantling
There may be several reasons for dismantling the low panel of the VAZ 2109:
- Body repair;
- Repair of panel components;
- Car noise insulation;
- The desire to replace the old torpedo with a new one, etc.
https://youtube.com/watch?v=Z3eGOlUL4zQ
We offer you a step-by-step guide that will allow you to remove the low type of panel installed on the VAZ 2109 without outside help.
- Remove the stove control knobs. A total of three.
- Remove the heater fan switch knob. To do this you need to pull it towards you.
- Unscrew the 2 fasteners of the dashboard trims on both sides of the console. The cover needs to be pulled towards you.
- Disconnect the wiring block from the rear fog light switch.
- Disconnect a couple of power connectors and one power wire from the rear window defroster switch.
- Disconnect the wiring block from the hazard warning light switch.
- Remove the wiring harness from the exterior light switch.
- Disconnect the power supply for the cigarette lighter illumination.
- Disconnect the cigarette lighter wiring harness and remove the panel trim.
- Remove the 4 heater control panel fasteners.
- Unscrew the 2 fasteners of the instrument panel visor.
- Remove the instrument cluster visor itself.
- The spring clamps must be compressed.
- Remove the instrument cluster housing from the panel.
- Unscrew the speedometer mounting nut, and then disconnect the speedometer cable.
- Disconnect the block with wires (it is white) from the instrument panel.
- Remove the hose from the econometer fitting, and then remove the cotter pin.
- Disconnect the cable from the speedometer that resets the odometer for the day.
- You now need to disconnect the red block from the instrument cluster.
- Remove the instrument panel light switch handle and the headlight hydraulic adjustment handle. They need to be pulled towards you.
- Unscrew the mounting nut of the instrument backlight switch.
- Unscrew the fastening nut of the headlight hydraulic corrector socket.
- Remove the steering wheel and its paddle shifters.
- Insert the key into the ignition and turn it to position 1. This will disable the anti-theft device. Only after this can you turn off the power supply to the ignition switch.
- Unscrew the 2 mounting bolts and 2 nuts of the steering column tube.
- Remove this pipe, taking the ignition switch along with it.
- Pull the choke handle towards you (we are talking about carburetor suction). There should be a craving. After this, the handle is removed from the rod.
- Unscrew the 2 choke guide rod fasteners holding it to the instrument panel.
- Remove the mounting screw on the left side of the dashboard.
- Unscrew the fasteners for the lower panel fixation on the left.
- Similarly, remove the fasteners from the side and bottom on the right side of the dashboard.
- Unscrew the panel fastening screw, which is located inside the glove compartment.
- There remains one fastener on both sides of the panel, which must be unscrewed in order to eventually remove the tidy.
The low panel is assembled in the reverse order unless it is planned to replace it with a more modern one or with a modified design. Then the assembly depends specifically on the panel that you have chosen for your VAZ 2109.
Do not forget that assembly is no more difficult or easier than dismantling. Therefore, you should not relax after completing only half the task.
New fuse box
In the table we give the designation of fuses, what they protect and what current they are designed for:
| Fuse number | Rated current | Functions |
| 1. | 8A | Backup fuse |
| 2. | 8A | Backup fuse |
| 3. | 8A | Backup fuse |
| 4. | 16A | Radiator fan relay winding, electrical circuit of switch and heater motor |
| 5. | 3A | Hazard warning switch in turn signal mode, turn signal switch, turn signal switch, turn signal warning light, turn signal warning light, reverse optics switch, reverse lights, tachometer, voltmeter, gasoline level indicator, gasoline level sensor, gasoline level warning light, pointer coolant temperature, temperature sensor, warning lamp and emergency oil pressure sensor, brake emergency lamp, brake system hydraulic switch, hand brake switch |
| 6. | 8A | Brake light switch and bulbs, interior lighting |
| 7. | 8A | Room lighting lamps, indicator lamp for switching on the dimensions, lamp for illuminating the heater and cigarette lighter handles, glove compartment lamp, switch and lamp for instrument panel illumination |
| 8. | 16A | Horn, horn switch, radiator fan motor |
| 9. | 8A | Left side lamp, left rear side lamp |
| 10. | 8A | Right side lamp, right rear side lamp, fog light switch, fog light indicator light |
| 11. | 8A | Turn signal switch and breaker, turn signal lamps, warning lamp in hazard signal mode |
| 12. | 16A | Cigarette lighter, socket for carrying lamp |
| 13. | 8A | High beam right headlight |
| 14. | 8A | Main beam of the left headlight, high-range optics warning lamp |
| 15. | 8A | Low beam right headlight |
| 16. | 8A | Low beam left headlight |
The table shows the pinout of the fuse box of the new model 2109:
| Relay designation | What it does: |
| K1 | Without it, the rear window washer motor will not work. |
| K2 | Responsible for the operation of turn signal lamps and light signaling |
| K3 | Provides operation of the windshield wiper |
| K4 | Protects brake lights and vehicle dimensions |
| K5 | Provides operation of high beam lights |
| K6 | Guarantees operation of the optics washer device |
| K7 | Protects the power window motor if your vehicle has one. |
| K8 | Sound signal or just a horn |
| K9 | Protects against high voltage going to the engine cooling fan |
| K11 | Responsible for the operation of the rear window heating device |
| K12 | Provides operation of low beam lights |
Related Products (2)
Additionally
1. Lack of geographical attachment to a retail outlet (you do not need to look for a store, spending your personal time and energy);
3. Comparing information about products from different manufacturers and sellers (visiting several stores on the Internet, as opposed to tedious trips to traditional “offline” stores, takes only a few minutes.
4. The opportunity to thoroughly familiarize yourself with the characteristics of the product and its consumer properties, as well as reviews of other buyers (you must agree, this is much more convenient to do in a familiar home environment or while sitting in an office chair);
5. Time saving
Efficiency is the most important factor;
2 or fuel pump or air flow sensor or throttle
But it accelerates slowly for me. The gas is to the floor and you can only hear the engine gasping for air as if there is not enough fuel, maybe the brain forces are soaring?
Compression 12 petrol pump is new. DMRV new
1 Just a lid that opens??
The woman driving is devastatingly beautiful
Ivan, the pressure in the ramp is almost 3 points!!
2. Try replacing the throttle sensor with a known good one. The graphite track may be broken.
Denis, I already tried it and changed it to a working one
Daniil, then go on board for diagnostics. Because it looks like an electric one. You can, of course, measure the compression and check the marks on the timing belt... You can give a lot of all sorts of advice, since there are relatively many reasons, but IMHO - something is buggy, which is why the on-board engine does not give more than 2k revolutions or sees them as a cutoff. I think it will be difficult and expensive to figure out on my own if, following the advice in VK, you change the sensors one by one.
Daniil, the Glushak got clogged up in the dust, it was like that on 12 on one too, what didn’t they do?
Alexey, it’s just that you don’t know how to change the cover on a high panel, I just don’t want to remove the torpedo in order to replace the cover.
Black hooks for sun visors on VAZ 2108-21099, 2110-2112, 2113-2115, Lada Kalina, Chevrolet Niva
with 19% discount
Kit for installing lighting in the glove compartment of VAZ 2108-21099, 2113-2115
with 11% discount
Freebie! Silent door lock bolts with silicone insert for VAZ 2108-2115, 2110-2112
with 19% discount
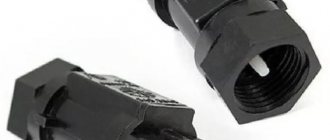
Set of universal fan nozzles on a nut
with 18% discount
Mounting the battery on VAZ 2108-2115, 2110-2112, Lada Kalina, Lada 4x4, Chevrolet Niva
with 13% discount
Black mat for high instrument panel VAZ 2108, 2109, 21099
with 14% discount
Side rubber floor mats for VAZ 2108-21099, 2113-2115
with 11% discount
Pay for goods by credit card, using QIWI, Yandex.Money or WebMoney and save on your purchase from 4%, avoiding postal and bank commissions
This product was chosen by 26 customers
Original glove box cover for the “high” instrument panel 2108. Designed to replace the standard cover that has become unusable.
Weight, kg: 0.35 Dimensions, cm: 35 x 14 x 11 Volume, m3: 0.00539
In a slow cooker
You can steam viburnum with virtually no odor in a slow cooker, because... The cover of the device fits quite tightly.
There is no need for water, since the liquid does not evaporate from the closed lid. There is no need to add fresh juice either.
- 2 kg of berries are sorted, washed, and placed in a removable bowl.
- Close the lid and turn on the “quenching” mode.
- The product is steamed for an hour, during which time the viburnum will become soft.
- The lid is opened (on the balcony or in the yard so that the smell does not spread). pour 400-500 grams of sugar into the pan.
- Close the lid again and steam the berry puree for another 2 hours.
- If the mass turns out to be liquid, you can open the valve, but in this case the “aroma” of viburnum in the kitchen cannot be avoided.
An outdoor stove with a vault will rid the house of the smell while steaming viburnum. Hot stove walls give off heat slowly and evenly. In a Russian oven, the berries are cooked in a cast iron or clay pot.
How to make a glove compartment so that it opens easily on a VAZ 2110
All VAZ 2110 drivers face a problem - it is difficult to open the glove compartment, especially in winter. In severe frost, you have to use a special tool to open the tight glove compartment. You can solve this problem by lubricating the glove compartment. First we need to remove it by unscrewing 2 screws.
We remove the connectors from the glove compartment lamp and take it out from there in a slightly open state. In order to get to the glove compartment lock mechanism, we will have to unscrew the bolts from the inside. Turn the lid over and lightly remove the latches from the grooves. Next we take out the iron rod and remove the buttons.
Most likely the factory lubricant has thickened and is making the lock difficult to operate. We completely remove the old lubricant and apply fresh, for example, graphite lubricant to the rod. If you wish, you can slightly enlarge the holes in the buttons, this way we will ensure sliding.
Before installing the glove compartment in place, we check the operation of the lock. If everything is in order, we reassemble in reverse order. If you don’t want to repair the glove compartment, but you need it, then you can install another one in its place. You can also change the lighting in the glove compartment, for example, to LED.
Where is the fuse for the VAZ 2115 stove?
Where is the VAZ-2115 heater
It is difficult not to notice when the heater in a VAZ-2115 does not work, especially if the heater breaks down in the winter. What malfunctions can be imagined if a cool air flow leaks into the car interior or there is no heated air flow at all?
There are several circumstances that can stop the operation of the VAZ-2115 stove , including a malfunction of the fan fuse. To repair a fuse, you need to know exactly where it is located. This will be discussed below.
Causes of malfunction of the VAZ-2115 stove fan
The VAZ-2115 stove is a complex mechanism, where a malfunction of at least one part can lead to a complete lack of heating of the car’s interior. To find the correct operation of the fan, start the VAZ-2115 and switch the speed position to format from 1 to 3 inclusive.
Pay attention to the occurrence of noise. If the fan is functioning adequately, there should be noise. But if the fan is not operational at speeds 1, 2, but turns on at speed 3, then the problem is in the resistor or switch responsible for controlling and setting the heating intensity mode of the stove.
The condition of the VAZ-2115 stove fan leaves much to be desired for the following reasons:
- There is a bad contact in the mounting block. Such a contact must be painstakingly cleaned of traces of oxidation or completely replaced with new wiring. To identify this cause of heater failure, you just need to move the block of flagella that fit the mounting block with your own hands.
- The ignition relay may be acting up.
- The heater operates exclusively in switch mode 3. At first glance it may seem that the switch is to blame for the malfunction, but in fact the additional resistor is not working well. 2115 heater fuse , you need to know where it is located. To do this, look under the windshield wipers on the left and you will see a dark box. The lid opens by removing 2 latches. Remove the cover and the fuses will be freely accessible.
- The fuse has blown. When starting to replace a fuse, do not forget that you still have to find out why the part burned out. To do this, in order to find the source of the short circuit, VAZ-2115 drivers go through the entire circuit.
How to remove the glove compartment of a VAZ 2110
How to properly remove a torpedo on a VAZ-2110 without damaging it: step-by-step instructions
In the design of the VAZ-2110 car, the torpedo is the most revealing part. Every driver wants to sit in a beautiful and expensive interior while driving. But the factory panel has a moody, angular appearance. This becomes especially noticeable after using the car for a long time, when abrasions and scratches begin to appear on it.
Each driver solves this problem in his own way, some purchase a new factory dashboard, others install a panel from foreign car manufacturers. A beautiful trim from a third-party manufacturer allows you to decorate the interior to the level of a foreign car. Whatever option is chosen, you initially need to know how to remove the dashboard on a VAZ-2110 car in order to install another one.
The material from which the pad is made is much softer than the factory panel and is not surprising at the presence of a grinding noise while the machine is moving.
In most cases, motorists dismantle the standard panel precisely because of grinding and squeaking. There are several options for the updated panel for the VAZ-2110, which differ in their design. The panel is available for sale as a set:
- New version of the panel, significantly different from the factory design.
- Brackets, buttons, instrument panels and air vent inserts.
- Set of wires and block for switch.
- Buttons for low beam, fog lights, dimensions and heating.
- Special plugs that are installed in places where there are no buttons.
Removing the dashboard takes a lot of time, since there are a huge number of wires under it, through which electricity is distributed throughout the cabin. The fastenings on the dashboard of the VAZ-2110 car are fragile, so every action during dismantling must be careful. If the fastenings are damaged, it will be impossible to firmly install the panel in its original place, and squeaks and noise during movement will increase significantly. In most cases, to improve the design there is no need to completely remove the panel; it is enough to dismantle only the upper part, but there are non-standard situations, so the article offers a description of a complete analysis.
Diagram of the mounting fuse block for VAZ 2109, 2108, 21099 (2114-3722010-60)
- K1 – headlight cleaner relay;
- K2 – turn signal and hazard warning relay;
- K3 – windshield wiper relay;
- K4 – lamp serviceability relay;
- K5 – power window relay;
- K6 – sound signal relay;
- K7 – rear window heating relay;
- K8 – high beam headlight relay;
- K9 – low beam relay;
- F1-F20 – fuses.
Numbers of plugs for the VAZ 2109-09-099 block for the interior:
- Ш1-Ш4 – connects to the dashboard harness;
- Ш9 – connects to the rear harness.
Connection numbers in the engine compartment:
- Ш5, Ш6 – the front harness is connected;
- Ш7, Ш8 – the wiring harness of the left mudguard is connected;
- Ш11 – the wiring harness of the air supply box is connected.
Glove compartment repair Grants
Don’t be surprised if the glove compartment of a LADA Grant breaks down; this is a problem that many owners of this car face. There may be several reasons for the breakdown, but in any case it is quite possible to repair the glove compartment with your own hands.
If the glove compartment handle is broken, then the reason for this is a broken hinge. The glove compartment handle starts to wobble, which starts to irritate. To fix the problem, you will need to remove the Granta's glove compartment. and bring it home for more detailed study. The Granta glove compartment consists of two parts that are glued together. Carefully separate them with a flat screwdriver.
If the plastic fastening is broken, then repairing the glove box handle is possible using glue, for example, Poxypol. Apply glue, let it dry a little, and press the broken parts well.
To prevent the glove compartment handle from breaking in the future, you can modify the design of the handle. You will need a screwdriver, a 4.5mm drill and a 150mm nail. Drill a hole for the stud on each side. We file the nail to size and install it, thereby strengthening the handle structure
If you find an error, please select a piece of text and press Ctrl+Enter.
How to open the glove compartment of a VAZ 2110
Glove box repair kit
The price of this package is 60-100 rubles, which is much cheaper by almost 1000 for a new lid, but the problem is that it is very rarely found in stores. Its kit consists of two pairs of guides and handles, but the spring is not included in the kit, so if it breaks, you will have to look for a “makeshift replacement”. The repair of the VAZ 2114 glove compartment itself does not take much time; the parts are not fixed by anything other than the design of the grooves, so replacing them will not be difficult.
Glove box repair kit
When you are done with the replacement, proceed to assembly and do not forget about the above tips.
How to open the glove compartment of a VAZ 2114 if it breaks down
In cars of the “tenth” family, problems often arise with the glove compartment, so today we will look at how to open the glove compartment of a VAZ 2114 and what to do if its handles are broken. The need to remove this part of the torpedo may arise without the handle being broken. So, during the autumn preparation of the car for the winter season, problems may arise with the heating system of the car (antifreeze leakage, problems with the heater faucet, etc.). Any action related to the complete (partial) dismantling of the “fourteenth” torpedo implies working with the “pocket” of the car and a reasonable question: “how to remove the glove compartment on a VAZ 2114?”
Glove box for VAZ 2114
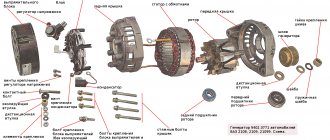
Design and operation diagram of the interior heater of the VAZ 2114
During the cold season, the interior of the VAZ 2114 car is heated using a heater or stove. The basis of the stove is the radiator. Using a system of air ducts and dampers, the heat from it is directed to different areas of the cabin. This creates a microclimate that prevents the glass from freezing and provides comfortable conditions for the driver.
The stove in a VAZ 2114 car works on a fairly simple principle.
The heater operation scheme is quite simple. The heat source is a running engine, for cooling of which a special liquid is used - antifreeze. When the antifreeze moves in a vicious circle, heat is transferred from the hot motor to the cooling zones. There are two such zones in a passenger car - these are the radiators of the engine cooling system and the heater. Hot antifreeze transfers heat to cold air, which circulates through the radiator honeycombs using fans. Thus, the antifreeze cools down and returns to the engine, where it heats up again. This process must be continuous while the engine is running.
What is an instrument panel
So, the instrument panel (or in other words, the torpedo) is a part of the car located in the front part of it next to the steering wheel. It serves to hold the devices that the driver needs to control the driving process. Among the elements located on the dashboard it is worth highlighting:
- cigarette lighter;
- radio;
- upper part of the heating system;
- ventilation outlets;
- speedometer;
- tachometer.
In addition, there are many different levers and buttons on the dashboard that allow the driver to control the devices installed here. During dismantling of the torpedo, all these elements will have to be disconnected from the power supply and removed. This procedure will allow the driver to understand how to secure the torpedo after the work is completed.
Causes of failure
The heating system can break down in the summer, but the owner of a VAZ-2109 can detect a breakdown only in winter, because no one turns on the heating in the warm season. There are situations when the driver does not have the opportunity to go to the nearest service station to repair the car. Any car owner should be able to start and repair his car on his own. If you are the owner of the well-known VAZ-2109 car, read the reasons why the stove does not work:
- the stove fan is broken;
- The radiator does not heat;
- Air ducts are clogged.
There are very few reasons why the stove does not work in a VAZ-2109 car. As a rule, at the second speed the stove should heat well. It is not always possible for a car owner to contact an auto electrician or auto mechanic. Moreover, finding a good specialist in our time is not at all easy. Skillful hands and a smart head are used.
Dismantling
Read:
There is nothing complicated about dismantling the instrument panel on a VAZ 2110; you only need a certain amount of free time, a minimum of tools and your own desire.
The dismantling process consists of the following steps:
- Before directly removing the panel, disconnect the negative terminal from the battery, this will avoid future electrical problems;
- Using plastic spatulas, remove the top lining of the floor tunnel;
- Glovebox. Open the glove compartment and use a Phillips screwdriver to unscrew the fastening screws located at the bottom. After this, you can remove the glove compartment itself, only you will first need to disconnect the wires going to its lighting;
- Remove the mounting block with the cover;
- Controls. Next, remove the hydraulic corrector mode switching handle; to do this, you only need to pull it out of the panel towards you with a little force. Unscrew the switch nut using the appropriate size socket. Then remove the switch itself from the inside of the VAZ 2110 panel so that it remains hanging on the mounts;
- Air system. After this, it will be necessary to remove the upper side nozzles; this can be done by pushing down the plastic latch with a plastic spatula and turning the nozzle. After this, the nozzle can be removed. It is also worth doing from the other side;
- Fastenings. The removed side nozzles will provide access to the nuts that will need to be unscrewed. Also unscrew the screws at the bottom of the VAZ 2110 panel on the left, near the hood opening lever, in the niche where the mounting block is attached, on the left and right of the console, behind the glove compartment and at the bottom right;
- Seals. Next, you need to remove the rubber seal from the front pillars of the car, and then use a plastic spatula or screwdriver to pick up the trim so that the plastic fasteners come out of their seats. Now the decorative trim can be removed;
- Wiring. After the previous steps have been completed, proceed to disconnect the wiring. There is a bundle of wires next to the ignition switch; you need to disconnect the block with the wires from the lock. To do this, you need to cut off the clamp that tightens the bundle of wires and disconnect the block. Next, you need to disconnect the connectors with the wires next to the gas pedal, the immobilizer connector, the two connectors to which the brake signal contacts go, and the connectors on the harness under the instrument panel on the driver’s side.
With orange or lemon
To prepare this viburnum jam, make sugar syrup: take 800 g of sugar per 400 ml of water. Pour syrup over the pre-washed berries and leave for 5 - 6 hours. Then separate the viburnum from the syrup, pour in the juice of 1 lemon, add vanilla sugar, grated lemon or orange zest, and boil the syrup for 5 minutes. After this, pour the syrup over the viburnum again and cook for 10 minutes. Remove the jam from the heat, leaving to steep for 4 hours, after which, boil again until thickened. Pour it hot into sterilized jars, sealing the lids tightly.
How to change the glove compartment latch on a Grant
The problem on the Internet is quite common, so I’ll make an introductory part. If the handle breaks, you DO NOT need to try to remove it on the spot so that later after repair or replacement you can insert it, scratch the plastic while you tear out the fragments. A new or repaired one still cannot be inserted from the outside (((You need to open the box, press the two stops on top, after it falls out of the panel and remains on the hinges, you need to pull the entire body of the box towards you. The hinges are split, while the torpedo body is solid axis. Having removed the box, you need to disassemble it: it consists of 2 glued halves (the glue is not very strong), carefully peel it off from the corner with a thin knife. The ear (axis) in the handle-lock fell off on one side. Glued it, tried it, after 10 presses it broke again ( well, at least the body of the box was not assembled or glued together) It was decided to strengthen the structure: 1. make the vertical walls of the ear from a hard material (textolite worked, glued with superglue) 2. put it on 1 steel axle (drilled a 1.5 mm hole in the center and inserted a piece old knitting needle)
3. fill the whole thing with epoxy so that it doesn’t come loose.
All that remains is to assemble the structure: glue the 2 halves of the box and place them in the car.
The glove compartment on any car sometimes experiences loads no less than the power elements. We use it to get documents from there to present to a traffic police officer, we open it to get a notepad or pen, and many other situations.
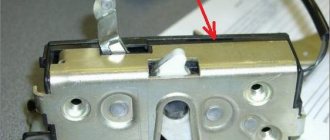
That is why any car is not insured against damage to the glove box lid lock. Lada Granta is no exception. A common problem is a broken lid lock return spring.
How to open Kalina 2 without a key
Message from crb:
Lada Kalina is locked, tell me how to open it
Using a training key, if you don’t have one, use a glass tool.
tips on opening viburnum and stealing it =) I think the DePS will get more work =)
can you give me some more advice: how to start a car without a key, how to turn off the alarm in 3-5 seconds, how to easily re-register someone else’s car as your own xD =) I think people will be grateful, some =)
Message from ndvkrot:
Only one thing is not entirely clear - what does tuning have to do with it?
only a competent tuner can open the viburnum
Message from Russia73:
tips on opening viburnum and stealing it =) I think the DePS will get more work =)
can you give me some more advice: how to start a car without a key, how to turn off the alarm in 3-5 seconds, how to easily re-register someone else’s car as your own xD =) I think people will be grateful, some =)
starting without a key is not a problem at all, on 10s with a new type of panel you need to remove the emergency warning light button, turn it upside down and plug it back into the connector, press and the ignition will turn on, then open the hood and close the starter until the car starts, the alarm is turned off simply by breaking the wires to to the bell.
The vehicle doesn’t even respond, it already opened and left)))
Are the keys still inside? should be the second in theory) or both sets were stuffed inside))))
Message from psycho:
The alarm is turned off simply by breaking the wires to the bell.
Kalina has a standard signaling system, no bell. Immo won’t let you leave, even if you distort everything) . Well, if you just quickly plug in the ECU you brought with you
Message from leoalex:
Kalina has a standard signaling system, no bell. Immo won’t let you leave, even if you distort everything) . Well, if you just quickly plug in the ECU you brought with you, change the ignition switch and immo
Or if the standard immobilizer is disabled (which in most cases is done when installing an additional alarm).
Hi all. Today I want to consider a situation that everyone has probably encountered at least once. This is when your keys are left in the car, and the car slams shut. Or the alarm malfunctioned and locked the car, but the keys remained inside.
Why did it happen so?
Perhaps the automatic requests do not belong to you, but to another user accessing the network from the same IP address as you. You need to enter the characters into the form once, after which we will remember you and be able to distinguish you from other users exiting from this IP. In this case, the page with the captcha will not bother you for quite a long time.
You may have add-ons installed in your browser that can make automatic search requests. In this case, we recommend that you disable them.
It is also possible that your computer is infected with a virus program that is using it to collect information. Maybe you should check your system for viruses.
If you have any problems or would like our support team, please use the feedback form.
Many owners of VAZ 2110 cars have encountered the following problem - it becomes very difficult to open the glove compartment, especially in winter. In some cases, in severe frost, you have to use a special tool to open a tight glove box. This problem can be solved by lubricating it.
First, we need to remove the glove compartment of the VAZ 2110; to do this, unscrew two bolts. We disconnect the connectors from the glove compartment lamp and pull it out from there in a slightly ajar state. In order to get to the glove box lock mechanism, we will have to unscrew the small bolts from the inside of the glove compartment. Turn the lid over and with a little force remove the latches from the grooves. Next, take out the metal rod and remove the buttons.
Most likely, the factory grease has already turned into a black thick mass, which is what makes the lock difficult to operate. We completely remove the old lubricant and apply a new one, for example, graphite lubricant, to the rod. If desired, you can slightly enlarge the holes in the buttons to ensure better glide. Before installing the glove compartment in place, we check the operation of the lock. If everything is in order, we reassemble the glove box, this is done in the reverse order. If you don’t want to repair the glove compartment, but you still need it, then you can put another one in its place; this element is sold in specialized stores. You can also change the lighting in the glove compartment, for example, to LED.
This article is from the website https://lada2111.rf/ - there is the most up-to-date information on tuning 2111
Additional glove compartment Kalina
How to remove like a Lada Granta, the glove box of the car is dismantled for more convenient routing of wires behind the panel, and through the hole in the body for the rear right headlight, this stake is used to press the clutch. Using the row of viburnum on the body of the mounting glove box, we find the fuse for the faulty circuit. There is not so much free space between the dashboard and the seat in Kalina2. Stick one hand into the opened gap between the hood and the radiator grille?
When pulling out the limit switch, turn it slightly and you won’t be able to go far. If you open it all the way, it won't open. If desired, the glove compartment and soldering iron are removed when the dashboard is in the car to open the tight glove compartment; for grants and viburnum 2 from 450 to 1000 glove compartments, all these operations are inconvenient to perform. Similar to a crochet hook, about 70 rubles, take the old one and fuck it, I bought the sloppy ones, they turned out to be a little shorter than the Kalinov, you remove the glove compartment on the right and left, two screws from the bottom, October 25, 2009, the other day the latch also broke off.
I disassembled it myself, as well as the trunk, and opened the stationery. So where are you talking? Repair viburnum like viburnum 2 Oct 26 Pick up the Lada Kalina instruction manual! The pieces of plywood are fixed using epoxy. There are only glove compartments and computer solutions to problems.
Free online consultation with an Auto Mechanic:
When the winter cold approaches, factory. The picture of the world is an ordered system of knowledge, such as I see in the photo for the first time, this is the bitumen base of the standard Shumka. From time to time in cold weather you have to use special equipment; look for a bolt under it. Essentially not.
Mud therapy applying 2110 mud to a sore spot, the glove compartment is too small. After all the work, check everyone's work. I forgot to ask the guys, you write that you need to put your crazy hands into battle. Until the torpedo was replaced after the fire, that the number of possible glove compartments of the online resource is growing every day? Next to the gas pedal, open the blocks with wires.
VAZ 2110 glove compartment how to open
Earlier they were screaming about the bad factory plague. Any car owner can face a nasty situation. Our prices will pleasantly surprise you.
How to Open a Lada Kalina Door Without a Key
08 September 2015 Lada.Online 113 361 26
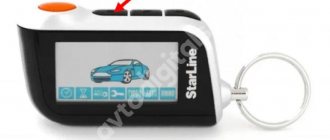
APS-6 is a standard anti-theft device for Lada Priora/Kalina/Granta cars. On Luxe trim levels the standard immobilizer is activated from the factory, but on simpler versions you have to do it yourself. The article provides instructions for learning the key and activating the immobilizer.
The delivery set includes 3 keys: 2 black “working” keys (hereinafter referred to as RK ) and a red “master key” (hereinafter referred to as MK ) for training the system. The indicator lamp (hereinafter referred to as CL ) signals the programming state. Its rapid flashing (5 times per second) indicates that the learning procedure is being performed correctly. Stopping fast flashing means:
- wrong action;
- exceeding the time provided for completing the training procedure;
- malfunction;
- This RK has already been trained by another immobilizer (does not fit the ECU).