In short, I wrote a lot of text, the computer became dull and everything was erased... So just about the main thing.
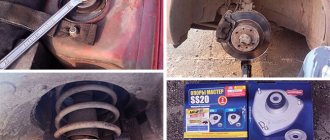
The right rear wheel began to shuffle against the fender liner. The friction point is the internal part in the mudguard area. At first it shuffled when turning, then even on bumps.
I thought the stand was dead. But before purchasing spare parts, I decided to take it apart and see what the problem actually was.
None Started to take it apart.
Full sizeSuch chaos)
None We remove the rack, wipe off the many years of dirt and what do we see?
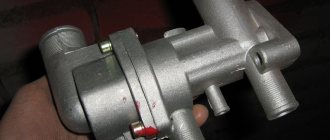
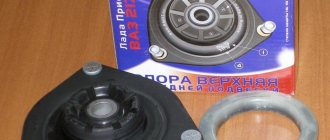
1118-2915004-20 Kalinovskaya stand! Not bad... we disassemble it and see a torn boot and a bump stop 2110, which hangs on the strut rod like an omno in an ice hole.
We start googling information and find out the following: Rear pillars 2110 and 1118 have the same characteristics. The only difference is in the thickness of the stem; in viburnum it is thinner. Accordingly, if you are going to install the 1118 rack on the 10th family, you need to use a viburnum buffer - 11180-2912622-11.
No sooner said than done! We go to the store and buy two new buffers.
viburnum bufferBy the way, the stand turned out to be in excellent condition! This means it was definitely not her fault. And since everything was disassembled, I decided to replace the rear springs. According to the info, springs are changed every 100 thousand km, which means it’s definitely time! In addition, I was always bothered by the fact that when the car was lightly loaded, the rear part sagged very much. And this despite the fact that there are “houses” on the beam, albeit in the 1st position.
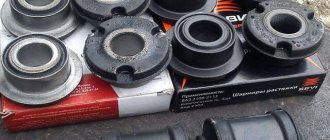
And so it was purchased: — Rear suspension springs 2111 (Lada, class A with orange stripe) — 840 RUR. — Shock absorber boots 2108-10-15 (VAZ) — 230 re. — Bagels 4 pcs.
(BRT) - 40 rub. - Rear pillar buffer 1118 2pcs (VAZ) - I don’t remember how many, I threw out the receipt...
Springs
None
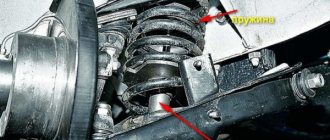
Strut with new spring
Let's put it in its place!
Simply put, over 11 years of operation and more than 100 thousand km. mileage, the springs have lost their properties. By the way, the springs were exactly the same, with an orange stripe (the paint on the old springs was still 80 percent alive).
The racks 1118 felt great, I don’t know why they were there. Perhaps the previous owner did not find the 2110 and offered this option. But as a fact, after replacing the springs, the rear of the car rose by 2 cm under its own weight.
If I were a low-slung fan, I would scream in horror! )) But that's what we needed. And the impressions completely surprised me!
It’s as if I didn’t change the springs, but the struts. The rear of the car behaves completely differently. More collected, doesn’t wobble as much when turning.
Swallows bumps much better! Overall, I'm pleased with the result! By replacing the springs, we not only added height and eliminated sagging, but also added comfort and that’s a fact!
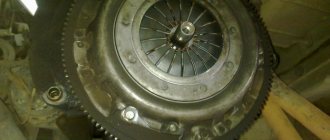
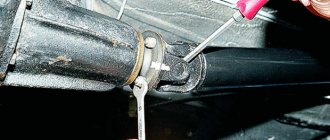
Well, I replaced the left rear wheel bearing to the heap. It rustled very loudly and buzzed when turning. The whole thing fell apart. When I unscrewed the hub nut, the hub itself fell off and the bearings scattered all over the garage. Tin... But I knocked the bearing itself out of the hub for about 2 hours. It stuck tightly. Delivered by Vologda - 690 rubles! 690 CARL?! Damn...what kind of prices. Now there is silence =))) Well, here we go, since the trunk has been disassembled...
Full sizeto be continued Issue price: 1,800 ₽ Mileage: 118,536 km
(votes: 82) Category: 211021112112
Good afternoon. Today a VAZ 2110 arrived at our car service center. It came to us with problems with the rear suspension.
When hitting potholes, the rear pillar breaks through. Driving brings complete discomfort. Therefore, in this article we will tell you how to remove and replace the rear shock absorber strut on a VAZ 2110, 2111, 2112.
| Article: Rear shock absorber strut – 341824 |
| Tools: To replace the rear pillar on a VAZ 2110, 2111, 2112, you will need a 6″, 17″, 19″ wrench |
| Removing and replacing rear shock absorber struts VAZ 2110, 2111, 2112: |
| First of all, unscrew the top nut on the rod with a 17″ wrench. At the same time, hold the tip of the rod with a 6″ wrench. |
| Then we take out the nut, washer, muffler and strut support. |
| After that, using 2 19″ keys, unscrew the lower part. |
| We take out the bolt. If you can’t pull it out with your hands, you need to knock it out with gentle blows. |
| Next, pull out the rear strut assembly. |
| If you need to replace any part, disassemble the rack. |
| After that, we assemble everything in reverse order. Removing and replacing the rear shock absorber strut on VAZ 2110, 2111, 2112 took us about 50 minutes. After this, the rear suspension began to work like new. Good luck on the roads! |
Video on removing and replacing rear shock absorber struts on VAZ 2110, 2111, 2112:
After 50 thousand km. mileage, it’s time to think about how to change the rear struts on a VAZ 2110-2112.
Even if there are no obvious signs of wear, after such a long period of use, you should worry about this in advance and purchase new rear struts. This operation is not an overly complex or time-consuming job and does not require any special tools, so it is not necessary to go to a service station to carry it out. Replacement of rear shock absorbers can be easily done on your own in a garage.
Review of VAZ 2110-2112 racks
There are about a dozen, if not more, varieties of rear struts that are suitable for replacement in VAZ 2110-2112 cars, supplied both by domestic manufacturers and imported into our country from abroad.
Moreover, most of them do not meet the factory characteristics of stock racks from the VAZ 2110. The original racks are supplied by TM SAAZ under catalog numbers 2110-2915004 and 2110-2915004-01. Unfortunately, it is difficult to name the optimal manufacturer, because each motorist decides for himself what is more important. Often, achieving comfort when driving on rough roads can only be achieved by sacrificing handling and vice versa. It is from the point of view of the ideal compromise between these two characteristics that there are different price offers for racks from different manufacturers.
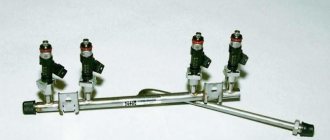
Front and rear struts LADA 2110
From the point of view of design features, you have to choose between simpler and cheaper oil (hydraulic) shock absorbers and more technologically advanced gas and gas-oil shock absorbers. To be fair, it is worth noting, given the pricing policy, oil shock absorbers are still considered more preferable among motorists.
If we talk about how much a VAZ 2110 rear shock absorber can cost, we recommend that you rely on the following figures:
- one rack costs about 1700-2300 rubles/piece;
- Replacing the strut spring yourself will cost you 2000-2500 rubles;
- compression buffers are relatively inexpensive - approximately 350-400 rubles / piece.
Rear shock absorber replacement process
When replacement is required
The mechanism must be replaced in cases where the spring is damaged. Even the smallest crack or chip can cause the part to perform poorly. There is a possibility that the spring will simply begin to sag. Spring subsidence occurs in the following situations:
- At the moment of deterioration in the smoothness of vehicle control.
- The car has a visible tilt to one side.
- If there is a noticeable increase in height between the front and rear of the vehicle.
- Extraneous noise and mechanical damage to the part.
Replacement
To replace the rear struts yourself, you do not need to go to a service station. This process can be done at home and will not take more than an hour.
Tools and tools you will need:
- jack;
- a “shoe” or an ordinary brick to block one of the wheels;
- wrenches at “6”, at “19”, at “22”;
- rust remover like WD-40;
- small mount.
Work order:
- Place the machine on level ground.
- Secure one of the front wheels with a “shoe” or brick.
- Open the luggage compartment lid, move the trim on one of the rear “glasses” at the place where the pillar is upper mounted.
- Using a wrench set to “22”, unscrew the nut securing the strut, holding the shock absorber rod with a wrench set to “6”.
- Using a jack, lift the car body from the side of the wheel where you plan to replace the strut.
- Having climbed under the car, unscrew the nut securing the lower part of the rack to the rear beam bracket with a “19” wrench.
- If the nut does not budge (soured), treat the threads around it with WD-40, let it penetrate the joint for about 20 minutes, then try again.
- When the nut is unscrewed, remove the bolt and remove the lower part of the shock absorber from the bracket. To simplify this process, you can use a small pry bar.
- Remove the shock absorber.
- Go to the trunk and remove the support washer and strut pad from where the upper part of the shock absorber is mounted.
- Remove the lower spring, cushion, bushing, boot and compression buffer from the shock absorber. If the boot, buffer, or shock absorber pads show signs of damage, they also need to be replaced.
- Carefully inspect the shock absorber spring. There should be no cracks, chips or other signs of destruction on it. If they are present, the spring must be replaced.
- Reassemble the new rack in reverse order.
- Install the new rack by first inserting its rod into the upper mount, and then securing the lower part into the bracket with a bolt.
- It is recommended to finally tighten all connections after the car body has been lowered, i.e. after you remove the jack.
- Upon completion of the work, rock the car body several times on the side where the rack was installed.
- After 100-150 km, tighten the shock absorber mounting nuts.
Tools for repairs
If after diagnostics you find that it is necessary to repair elements of the rear pillar, or install a new one, you need to prepare for work. To do this you will need the following tools and materials:
- Jack (preferably hydraulic type).
- A set of keys. You will need: for “17”, “6”, “19”.
- Special key for removing racks. You can use tubular keys for “17” and “6”.
- Special puller for tightening springs. Without it, installing the rear shock absorber will be quite difficult.
- Electrical tape or thin wire.
How to remove rear lights on VAZ 2114, 2113, 21099, 2109, 2108
Before proceeding with the replacement, you must disconnect the minus terminal from the battery. If you are confident in your electrical wiring, then you don’t have to disconnect the terminal, but making sure that power is not supplied to the lights is strictly necessary.
Then we open the trunk lid and move aside the so-called windows in the trunk trim, which are secured with Velcro. It is through these viewing windows that the nuts securing the lights are visible:
Using a ratchet, unscrew the two nuts securing the flashlight on one side, as shown in the photo below.
Now disconnect the power plug from the board by pressing the latch.
Now there are two more nuts left on the other side, which are also accessible after opening a special “window” in the carpet.
After this, we carefully take the flashlight body from the outside and try to move it back, thereby removing it from its seat.
The second light on VAZ 2114 and 2113 is changed in the same way. Don't forget to connect the power plugs after installing new lights.
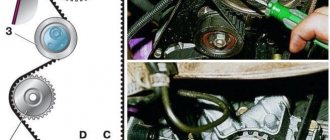
Replacing springs on a VAZ 2110 (rear)
The technology for replacing rear suspension springs involves completely dismantling the struts. However, do not be afraid - there is nothing complicated about it. The first step is to remove the plastic plug on the strut cups and unscrew the top nut on the shock absorber rod. A special wrench will help us with this: having two degrees of freedom, it prevents the rack from turning when trying to unscrew the nut. This key can be freely purchased at any VAZ spare parts store.
Under the nut there will be a large metal washer and a rubber pad. It will be extremely convenient to remove them from the glass using a screwdriver with a magnetic handle. Now it's finally time to use the jack, lifting the rear of the body and tilting the wheel to the side. It will be convenient to loosen its mounting bolts while the VAZ 2110 is still on the ground. It is correct to place the removed wheel under the car body as a jack insurance.
Next we proceed on the following points:
- 1. Unscrew the nut securing the lower part of the strut to the rear suspension of our car (penetrating lubricant will help you);
- 2. We pry the shock absorber with a lever, removing it from its seat in the beam, after which it will freely fall to the floor;
- 3. Don’t forget to remove the special rubber band from the inside of the glass, which is likely to stick to the car body;
- 4. You can now freely remove the spring from the strut. The replacement is almost complete;
- 5. You can also visually check the technical condition of the rack and the condition of the anthers.
Please note that there is a special protrusion on the stand cup where the lowermost coil of the spring fits. When installed, it faces the direction of the wheel. It will be convenient to tape the upper rubber gasket to the spring with electrical tape so that during installation its protrusion does not move relative to the coil. Further assembly is performed in reverse order.
Work order
Before deciding how to change the front shock absorbers, you need to thoroughly prepare. An inspection ditch is not required here; in good weather, everything can be done outside, on a flat concrete platform. Replacement of racks is carried out using the following tools:
- standard set of open-end wrenches and sockets with sizes from 6 to 22 mm;
- plumbing tools - hammer, screwdriver, pliers;
- jack complete with wheel wrench;
- puller for squeezing out ball joints and pins;
- a pair of pin-shaped clamps with grips for compressing springs;
- rags and cloth gloves.
The specified set of tools and the algorithm for performing the work are suitable for all models of the “tenth” Zhiguli family, including the VAZ 2112. To change the struts on the VAZ 2110, you should park the car on the site, fix its wheels and lift it with a jack from the required side. Then remove the front wheel, open the hood and follow this algorithm:
- Disassembly begins in the engine compartment. The shock absorber rod must be freed from the protective cap (if there is one) and the 3 nuts must be loosened with a 14 mm wrench.
- There is a round rod with a groove or a tetrahedral one measuring 6 mm. In the first case, a powerful slotted screwdriver is inserted into the groove; in the second, the rod must be held with a key. Loosen and unscrew the 19 mm fastening nut.
- For further disassembly you need to move under the wheel arch. There, you need to remove the brake fluid hose from the groove in the strut, and then unscrew the 2 nuts securing it to the steering knuckle. The remaining bolts should be knocked out of the holes by hitting them with a hammer through a soft metal guide.
- Remove the cotter pin from the nut holding the steering rod ball pin, having first straightened its ends. Unscrew the nut and use a puller to press the pin out of the seat in the rack bracket.
- Finally unscrew the 3 nuts located under the hood and holding the assembly suspended. Now the shock absorber along with the spring can be removed from the car.
It is recommended to treat stuck threaded connections with WD-40 aerosol lubricant before unscrewing. It is more convenient to do the remaining work in a vice with copper or aluminum pads, but you can do without them. Further replacement of the front struts of a VAZ (“tens”) consists of compressing the springs with clamps and final disassembly of the unit in order to remove the faulty shock absorber. To do this, you will have to remove the cup, support, boot and compression stroke buffer.
When disassembling, pay attention to the condition of the support bearing and replace it if necessary. After this, you can install the new stand on the machine in reverse order.
If the parts were changed after an impact on the suspension, then the procedure is mandatory.
Replacing springs yourself
Tools
In such cases, it is simply impossible to do without repairing or replacing equipment. You must have the following tools, devices, and parts on hand:
When each of the tools is near the car, you need to start replacing the front spring. This work involves some risk of injury. Such work must be performed with care, attention and compliance with all safety rules. Perhaps some help from an experienced mechanic would be helpful. Personnel can be found at the nearest service stations.
Replacement process
If you finally decide to act on your own, you need to perform several actions:
- The front wheel of the car is disassembled from the side where the spring needs to be replaced.
- The wheel is removed from the car.
- The steering wheel of the car must be turned to the maximum in the opposite direction from the removed wheel.
- The cotter pin is removed.
- The nut that secures the tie rod end pin to the strut arm is released and removed.
- The finger itself is removed.
Note: if a puller is not available, the nut does not need to be removed completely. It is necessary to slightly loosen the fastening and use a hammer to remove the pin.
- The front brake hose coupling is removed from the strut holder (see VAZ 2110: replacing the front struts yourself).
- The upper support of the guide post has a plug made of rubber. It needs to be removed.
- The shock absorber rod nut is unscrewed. Here it is necessary to ensure that the opposite part is clamped, since the nut can rotate.
- Before unscrewing the strut mounting bolt, marks must be applied to it and the strut bracket.
We determine that the element did not fire
There are several signs by which a malfunction can be identified:
- The body is amplified by vibrating on the ridge on the side of the damaged shock absorber;
- Feels in the steering wheel;
- The braking distance becomes longer;
- When turning, the car enters;
- Traces of oil stains;
- When driving in a straight line, the car drifts away;
- There is a knocking and extraneous noise in the rack.
If you do not repair the front struts at a service station on time or with your own hands, this can lead to dire consequences:
- The supporting bearings will collapse;
- Tires will wear unevenly, jump, and form bumps on the rubber surface;
- The supporting bearings will not pass;
- The braking distance will be longer, which is dangerous on any part of the road;
- The brake pads will be damaged and their service life will be significantly reduced.
There are two main ways to test items to see if they are faulty. One is a professional, the other is a craft, but also quite effective.
- Special table for shaking. It is driven by the car and the computer calculates the efficiency of the shock absorbers. It should be noted that new racks may show a result of about 75%!, but this is quite normal. If the percentage is less than 50, then it's time to change the part.
- Manual rotation. You need to take the front part of the car, behind its wing, and start swinging. Try to achieve the maximum amplitude that allows you to bear your body weight. In any case, ask a friend to help. The point is that after swinging, suddenly remove your hands and look at the car. If it immediately returns to its original position and does not wobble anymore, then everything will be fine. If you detect even a slight hesitation, you can assume that the struts should preferably be replaced in the near future.
Replacing front struts, supports and springs VAZ 2110, 2112, Lada Kalina, Granta, Priora, 2109 Video guide on how to independently replace front struts, supports and springs on front-wheel drive cars.
Replacing front struts, supports and springs VAZ 2110, 2112, Lada Kalina, Granta, Priora, 2109 Video guide on how to independently replace front struts, supports and springs on front-wheel drive cars.
Selecting new parts
It is not difficult to purchase a rear shock absorber for a VAZ 2112; there is a fairly large selection at any auto store. The question is what type of rack to choose. There are 2 types of them:
- conventional hydraulic (oil);
- gas-oil (gas).
Parts of the first type are cheaper and handle road unevenness much more smoothly. When the car is operated without special loads and with a quiet driving style, oil shock-absorbing elements can last quite a long time, provided that you do not come across a fake. Gas-oil shock absorbers are more expensive and behave more rigidly, which improves car handling and is a definite plus for an aggressive driving style. In addition, they last longer when used under increased loads.
To avoid purchasing low-quality products from unknown manufacturers, you should choose products from brands that have proven themselves on the roads of Russia:
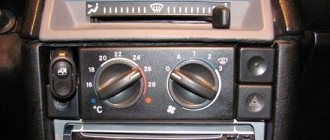
- SS 20 (Samara plant, Russian Federation);
- Kayaba;
- Monroe;
- Sachs.
At the same time, it is necessary to take into account that products of these brands are most often counterfeited in underground workshops. Therefore, it is better to buy parts from official sales representatives of these manufacturers. The same applies to VAZ 2110 springs, which sometimes change due to shrinkage from loads.
If there is an obvious malfunction of one of the shock absorbers, it is recommended to replace both elements.
There is no point in changing them one by one; you will only waste money and time on replacement. Using an old rack together with a new one will cause rapid wear of the latter. A “bad” part will handle irregularities much worse than a new one, which will put a double load on it.
An exception is a situation where, for various reasons, a new shock absorber installed recently has failed. Then it makes sense to replace only it.
Types of shock absorber struts
The choice of shock absorber struts depends on the quality and type of road surface and driving style:
- Hydraulic (oil) strut devices are well suited for reliable and comfortable movement within the city or outside it. But the presence of an air mixture in the compensation chambers is their main disadvantage: zero shock absorber efficiency at low air levels; if there is an excess of the latter, the shock absorbers are also not reliable. The compression process is carried out without resistance. This contributes to the fact that the efficiency of such devices is reduced, and they also have poor heat transfer. When moving along a dirt road, where frequent and sudden movement of the piston occurs, the formation of cavitation bubbles is provoked. This may result in foaming of the oil. The advantage of such racks is their low price and small dimensions.
- To hold the car when moving at high speed, heavy load and continuous movement, it is better to use rear gas struts on the VAZ 2112. This is the most rigid shock absorber design. Increasing the impact load on the car body reduces comfort for the driver and passengers. In addition, their cost is quite high.
- A compromise option for oil and gas struts is two-pipe gas-filled struts. These are fairly soft devices that perform well when driving at high speed over rough terrain where the road surface is uneven. Low-pressure gas pressure prevents oil from boiling and effectively dampens vibrations. Racks of this type are the most durable and reliable devices.
Replacing the rear struts of a VAZ 2112 car
When choosing rear struts, you must take into account that a cheap one will need to be replaced much more often than an expensive one.
Advice: replacing the rear pillar on a VAZ 2112 is best done in pairs: the right and left ones are installed from the same manufacturer. It is better to have the same type of struts, both rear and front, for everyone (oil or gas).
When replacing the rear pillar of a VAZ 2112, attention is paid to the quality of the support. It should provide:
- Quiet operation.
- Possibility to change the height of the car.
- Warranty for at least four years, excluding mileage.
Repair of rear struts of VAZ 2112
Advice: Very often on a VAZ 2112 the rear pillar cannot be repaired. This may cause the vehicle to move dangerously on the road.
You can install the rack on the car yourself. To do this, it is necessary to strictly follow the instructions and installation procedure. Removing the rear pillar:
- In the area where the rear arches are located, the luggage compartment is disassembled.
- The cap protecting the upper mount of the rack is removed.
- The nuts holding the shock absorber rod at the top are loosened. To do this, the car is secured from moving, the rear of the car is raised with a jack and the wheel is removed.
- Unscrew and remove the lower rear pillar mounting bolt.
Unscrewing the rear pillar lower mount
- The nuts securing the upper fastening of the struts are unscrewed.
- By moving downwards the stand is removed. The general view of the unit is shown in the photo.
Rear pillar
- When the rear pillar is removed on a VAZ 2112, it is disassembled.
- All parts of the device must be thoroughly washed with kerosene.
- Products are checked by visual inspection for cracks, burrs, and dents.
- If any defects are detected, it is better if the rear pillar of the VAZ 2112 is replaced with a new one. It is not allowed to perform welding work on the product, which may lead to loss of its functionality.
Installing new racks
How to replace the rear struts of a VAZ 2112 can be clearly seen in the video. All work on installing new rear struts is carried out in reverse order.
Also on our resource you can find out how to replace the front struts. First you need to put on the new stand:
- A buffer that provides the compression stroke.
- Casing, together with the top cover.
- Spacer sleeve.
- Shock absorber cushion.
- Support washer.
- A spring.
Tip: It is often difficult to get the elongated shock absorber rod into the upper hole into the car body. The process can be facilitated by using a rubber gasoline hose 15 centimeters long, which, having good flexibility, freely passes into the hole in the car body. Even if the rod is displaced relative to the body hole when the car body is lowered, the rod will fall into place, following the hose.
- The shock absorber rod is installed in the upper hole.
- The stand is pressed against the beam.
- The lower part of the rear pillar is inserted into the beam mount.
- The lower fastening of the unit is fixed.
- Wheels are installed.
- The car is lowered.
How to install a new rack
Now you need to install a rear pillar on the VAZ-2110. Be sure to install a new shock absorber, spring, bump stop, cushions, and support washer. Secure the cushions to the spring with electrical tape or wire. All products made of rubber must be replaced. Next you need to do the following:
- Place the stand assembly in its place and insert the rod into the hole in the glass.
- Tighten the shock absorber using the rear beam. To do this, you can use a long crowbar or a jack.
- Install the lower shock absorber spring into the bracket on the beam.
- Insert the bolt and tighten the nut.
- At the top, attach the shock absorber rod mounting nut.
The price of the rear pillar of the VAZ-2110 is about 1000-1200 rubles (stock version). The kit will cost about 2500 rubles. (without pillows, anthers, springs). The work is carried out equally on the left and right sides of the car. Upon completion of the repair, it is necessary to install the wheel, lower the car and check the condition of all threaded connections. It is advisable to tighten the nuts after installing the car on the wheels. It is necessary that the car suspension is under load.
The quality of modern roads leaves much to be desired. It would seem that a modern domestically produced car should be able to overcome such ridiculous turns, bumps, potholes and other shortcomings of Russian roads. But, unfortunately, the cars do not meet the best characteristics. One of the modern problems of the VAZ 2110 car is the front spring, which often breaks due to the poor quality of roads. Replacing the front springs of a VAZ 2110 is a necessity. Replacing springs on a VAZ 2110 can be easily done with your own hands.
Which racks are better to install on VAZ 2110, 2112, 2114 and 2115 Detailed analysis
- Oil-based, sometimes called hydraulic, are quite soft. They are well suited for people who prefer a measured, not fast ride. And also for those who, for whatever reason, often drive on dirt roads;
- Gas ones are tougher. They prevent the car from swaying at high speeds and when cornering. But, using them on a primer quickly leads the suspension to a deplorable state;
- Gas-oil ones have average performance between both types of racks.
- Soft-Drive is the softest shock absorber offered by the manufacturer; in terms of driving performance, they are practically no different from the original ones. The car will still rock, but their service life will be much longer;
- Sport. The rigidity of these racks is almost 80% higher compared to the original ones. In this regard, they perfectly hold the road. But, when traveling over bumps, the movement will not seem too comfortable to you. This line includes shortened racks designed to lower the car;
- The X-Drives are quite rigid and do a good job. The manufacturer recommends them for use in the northern regions of our country;
- The standard is perhaps the toughest of the entire line. The disadvantage is that the oil freezes even in slight frost. It takes a considerable amount of time to “roll out” the car.
- EXCEL-G is a gas shock absorber strut. It uses nitrogen. As a result, the knot turns out to be quite soft. This will be appreciated by those who like a comfortable and not too fast ride;
- Ultra SR are sports shock absorbers. With their help, the car holds the road perfectly. Possible use in conjunction with low profile tires. And also together with tires that have a radial tread pattern;
- Premium is a hydraulic shock absorber. It is a complete analogue of the factory one. But, at the same time, it is made of higher quality materials. And what is typical, it lasts much longer.
- Highway, these are quite rigid racks. This indicator ensures optimal cornering at high speeds. This model is popular with buyers. Not very suitable for driving on dirt roads;
- The standard ones are distinguished by good performance, both in the heat and in extreme cold. Perfect for car enthusiasts from regions with harsh climates;
- Comfort Optima is the most popular rack of the entire line. This is due to their versatility. They are medium hard. Therefore, they are suitable for almost any road surface and driving style;
- Sports are the toughest stances. They are practically not intended for driving around the city. But at the same time, they perfectly keep the car from swaying in the sharpest and most dangerous turns.
AutoFlit.ru
Sequence of work when replacing rear struts
To get to the upper mounting of the rear pillar, you need to remove the backrest on the rear seat and move the upholstery on the rear wheel arch to the side.
Next, using a 17 ring wrench, you need to unscrew the nut on the shock absorber rod, while you need to hold the rod from turning, using a 6 wrench. This procedure can also be performed using a special wrench for struts.
After unscrewing, the nut is removed, after which it is necessary to remove the support and spring washer, as well as the upper rod cushion. Then, using a jack, raise the car, after which the rear wheel is removed from the side where the strut is being replaced. The wheel is removable for easy access. If desired, this procedure can be carried out without removing the wheel.
Using a 19mm wrench, unscrew the nut of the bolt that secures the shock absorber strut to the rear beam. To prevent the bolt from turning when unscrewing, it must be held with another wrench.
Next, the bolt is removed. If the mounting bolt cannot be removed by hand, it must be knocked out using a hammer and a mandrel.
After which the shock absorber is removed, along with the spring. From the removed shock absorber, remove the spring, the lower cushion with the bushing, as well as the compression stroke buffer and protective cover. It is necessary to remove the rubber spring gasket from the body support cup.
Before installing a new rear strut, the previously removed lower support cup is attached to the shock absorber, and a compression stroke buffer, a protective cover, a cushion, and a lower thrust washer are attached to the shock absorber rod. Next, a spring is installed on the shock absorber, which must be positioned so that the rubber gasket on the spring coincides with the support washer on the car body.
Then the lower part of the rack is secured to the rear beam, while the fastening bolt should not be fully tightened, but simply slightly tightened.
On the shock absorber replacement side, a stop is placed under the rear beam, and the car is lowered on a jack, while it is necessary to direct the strut rod into the hole in the body. After the rod comes out of the hole in the body, the upper support washer and cushion are put on it, the rod nut is tightened, and the wheel is installed.
The lower mounting bolt of the strut to the beam is tightened after the car is removed from the jack and is on its wheels.
When the rear struts of the VAZ 2110 have been replaced, it is necessary to adjust the camber of the front wheels and the pressure regulator of the rear brakes.
If you have begun to feel all the unevenness of Russian roads with your whole body, then, apparently, it is time to check and, if necessary, replace the rear struts of your car. This structural unit is subject to particular wear and tear during regular travel on country roads and when transporting heavy loads. Along with the rear struts on your VAZ 2109, the rear springs are usually replaced, so let’s consider carrying out this work as a whole.
How to change rear struts on a VAZ 2112 ~ AUTOTEXNIKA.RU
page » How to Change Rear Struts on a VAZ 2112
15.09.2018
How to replace the rear struts of a VAZ-2112 with your own hands
If a VAZ-2112 car requires replacing the rear pillars, then this process can be carried out independently, unless, of course, the car owner knows little about car repairs.
What instrument should be prepared?
To properly replace rear struts
for the VAZ-2112 car and simplify the progress of work, you must prepare the following tools:
- blade for installation work;
- Special tools called ratchet and wrench;
- keys for 19, 17, as well as carbines and ring types of keys;
- machine lubrication;
- key for fastening the rack rod.
What reasons indicate the need to replace the rear pillars?
Rear shock absorbers should be replaced in the following cases:
- If traces of oil are visible in the shelving area.
- If damage is found on the outside of the shock absorber.
- Corrosion begins on the piston rod.
If your car struts are faulty, your vehicle's braking system and chassis may soon be damaged. The wheels of the car will begin to wear out very quickly, driving a vehicle will become quite difficult, since the coordination of the car’s movement will be completely disrupted.
How rear pillars are gradually replaced
As mentioned earlier, replacing the rear pillars is not a very complicated process, if we talk about repairing the VAZ-2112, the main thing is. perform all operations step by step with the recommendations of professionals:
- Before installing the machine on an overpass or pit for repair and inspection, it is necessary to slightly unscrew the locking element that secures the rear pillar. To remove it, you can be inside the car or reach the fastener from the trunk. When unscrewing, the rod associated with the stand must be stationary. To fix it in this condition, you can use a 6 key or a special installation device.
- Using a special mechanism (jack), the car is raised to the required level, and the wheel is removed.
- Using key 19, the locking elements securing the rear shock absorbers are loosened. In this case, it is necessary to unscrew the nut and bolt to hold it firmly so that it cannot be turned. Unscrewed fasteners are removed from the inside. To easily remove the fasteners, it is advisable to use a hammer or a punch. Remove the bolt very carefully as it is easy to damage the threads.
- Once the fasteners are removed, it is necessary to secure the bottom of the rear posts to eliminate snagging of the parts.
- Then unscrew the upper fastening of the rear pillars with a special device or two keys (carabiners and 6).
- After this, you can easily fully tighten the rear suspension of the VAZ-2112, replacing all elements will be quick and easy.
Replacing rear struts (shock absorbers) on VAZ 2110, 2112, 2114, Kalina, Granta, Priora, 2109 and 2108
instructions for replacing rear
shock absorber
struts
on front-wheel drive
VAZ
.
Replacing the rear struts of a VAZ 2110 in detail
Enjoy watching everyone, I hope my video helped someone with their choice or technical issues) Spare parts.
Since the rear suspension module does not secure anything, the spring will be easily removed. To remove the rear pillar boot, simply pull the piece up and remove the special tab or buffer from the stem with one hand movement. All removable parts of the VAZ-2112 are carefully checked, if damage is found, a replacement is made for a new element.
Additional recommendations
Before you begin assembling all the components of the VAZ-2112, you need to do a few additional manipulations:
- process kerosene with all included elements;
- Before direct installation, carefully examine each, even a new element, to ensure its integrity and quality;
- Final fixing of the mounting bolts must be done after the jack has been removed;
- After assembling all components, it is recommended to perform a special camber check.
If for some reason a motorist has difficulty replacing the rear racks on a VAZ-2112, you can get additional information from the video lesson at any time. On the site, recommendations are given by professionals in their field, all work is carried out step by step with photographs.
There is a special offer on our website. You can get a free consultation with our corporate lawyer by simply submitting your question in the form below.
Source: https://autotexnika.ru/kak-pomenjat-zadnie-stojki-na-vaz-2112/
Rack installation methods
Very often, a loaded VAZ-2112 catches on the reverse wheels when moving and rocking on a bad road. Mechanics have found an original solution and attach so-called “spacers” to the rear struts, placing them between the beam and the car’s shock absorber.
After the manipulations have been performed, the characteristics of the machine change as follows:
- The angle of the headlights changes.
- The castor position (wheel angle) changes.
- In contour brakes (rear), the direction of the pressure regulator changes.
If the car's headlights can be adjusted independently, the direction of the front wheels and the angle can only be corrected at a service station.
Possible causes of knocking
- If you hear a characteristic knocking sound in the rear pillar while driving over uneven roads, the shock absorbers are most likely due to deterioration and should be replaced as soon as possible.
- Wear on the rear suspension struts is also the main cause of problems with the car's rear strut.
- A sagging spring is also a cause and requires replacement.
- Severe wear of the bushings that were mounted in the lugs.
- Problems with the compression stroke of the car's rear strut.
- Problems with axis coaxiality due to possible deformation.
THIS IS INTERESTING: Replacing a ball joint in a Chevrolet Cruze
In a VAZ-2112 car, replacing rear struts without spring tensioners cannot be properly adjusted.
To better identify the problem, empty the trunk of any cargo.
If you nevertheless decide to replace the rear struts, the price that you will see on car markets will pleasantly please you, since it is much cheaper than the prices for a new generation foreign car.
Scheme of work
Replacing struts on a VAZ-2112 with your own hands must be strictly observed:
- Install the shock absorber stock at the top.
- Pull the beam using available tools or a lever.
- Install the bottom fastener into the very base of the beam.
- Secure the rack fasteners.
- Install the wheels.
- Remove the car from the lift.
In terms of time, the entire replacement will take only 3-4 hours, but you will immediately notice the car’s behavior on the road.
Tasks of the rear pillars
Beam structure diagram
As a result, racks affect comfort and safety. There are several main tasks of these elements.
- They are responsible for wear on the chassis and help shock absorbers when the body “bounces.” After all, if the car jumps, at that moment the wheels do not contact the surface, the brakes do not work, and lateral forces act on the body. It is not safe.
- Increases driving comfort. The lack of effective cushioning negatively affects comfort. Especially when it comes to uneven road sections.
- Properly installed shock absorbers minimize braking distances and prevent the body from oscillating when bouncing.
https://youtube.com/watch?v=S4mHSyZI8fo
If the struts are poorly installed, the braking distance will increase noticeably, the body will sway to the sides when bouncing, which will lead to wear on the chassis, tires and other elements of the car.
You should approach this issue wisely, study the replacement procedure in a video, consult with specialists, and be sure to review the operating manual for your car.
Knocks occur for various reasons from the rear, so this should be looked into in more detail.
- If knocking noises are observed when driving on uneven ground, the shock absorbers have apparently failed. The only solution is to replace with new ones.
- If you see that the rubber bushings of the levers are worn out, change the suspension.
- When the spring settles, it must be replaced.
- A knocking sound is likely a sign of a loose shock absorber or worn rubber eye bushings.
- When the rear suspension is overloaded or damaged, knocking noise also occurs.
- If the bushings of the suspension arms are destroyed, the rear axle moves and a knock appears.
- When knocking is observed from the suspension arms, it is recommended to replace them with new ones.
- Knocks can also be determined by how busy the rear part is. Empty the trunk and do not seat anyone in the second row. This makes it easier to figure out what the reason is - shock absorbers or springs.
Unfortunately, the rear pillar wears out quickly, especially if you regularly drive the car on country roads with a loaded trunk and interior.
Before starting the repair, it is important to note that the springs should also be replaced at the same time. The work is carried out simultaneously, so let’s consider the whole process as a whole
The procedure is as follows.
- Remove the trim from the trunk. This will allow you to access the rear pillars of your ten.
- Remove the trim carefully near the wheel arch to gain access to the upper shock absorber mounting assembly.
- The upper assembly is held on by a nut, which you can unscrew with a spanner. At the same time, hold the rod in the same position, so arm yourself with an open-end wrench of 6 in advance.
- Having released the top knot, move to the bottom one. Raise the rear of the car on a jack, remove the rear wheels, from where you can see the rack. Be sure to secure the vehicle in place with a parking brake and additional chocks under the front wheels.
- The lower unit is secured with a 19 nut. Unscrew it and remove the bolt of the lower unit.
- Remove the entire rack structure completely. In addition to the shock absorber, you will remove the spring. Remove the old rubber gasket between the machine body and the spring, replace it with a new one.
- Remove the spacer from the upper shock absorber rod. It may be suitable for a new shock absorber, since it practically does not wear out and lasts a long time. If there is no bushing, the rear strut will break the seat.
- Apply silicone grease to the entire rod, which will significantly extend the service life of the structure.
- Replace the old elements with new ones, and begin the reassembly procedure.
- Be sure to secure the upper assembly gasket to the body using adhesive tape.
- Place the rear strut assembly in its seat. The spring must be in a stretched state.
- Attach the bolt to the lower strut assembly, but do not need to tighten it.
- Install a support between the car body and the rear beam. Gradually begin to lower the car, directing the rack rod into the mounting hole on the fender liner.
- Make sure that the tip of the rod appears in the trunk. After this, the nut is fixed and tightened.
- All that remains is to remove the jack, remove the additional support, tighten the nut of the lower unit and check the quality of the repairs.
Now you know how to remove the rear pillar of a VAZ 2110 car. The task is really not as difficult as it might seem
The main thing here is caution and accuracy in your actions, plus the use of high-quality spare parts so that subsequent replacement will not be required soon
Recommendations for changing front springs
- You need to disassemble the front wheel. The side where the spring needs to be replaced is disassembled.
- The wheel is removed.
- The steering wheel turns in the direction opposite to the removed wheel.
- The cotter pin is removed.
- The nut connecting the steering rod and the strut is unscrewed.
- The finger is being removed. For this type of work you need a puller. If it is missing, there is no need to completely remove the nut. It is enough to make the fastening weaker and remove the finger with light blows of a hammer.
- The brake hose coupling is removed.
- The upper part of the guide post rests on a rubber plug. It must be replaced.
- The shock absorber rod mount is unscrewed. To prevent the nut from turning, you need to firmly clamp the opposite part.
- Before releasing the bolt holding the strut, you need to mark the mounting bracket and the bolt itself.
- The nut tightening the upper bolt is unscrewed. There should be no scrolling. If necessary, it must be firmly secured.
- The washer is removed. Using a drift, the bolt is released. The lower bolt is removed using a similar method.
- The steering wheel tip is released. There should be no sagging of the brake hose. Its tense position is not allowed.
- The upper support is secured with three nuts. Each one needs to be unscrewed with a 13 key.
- The stand is removed, the ties are installed at the same level on the springs. Typically five turns are attached.
- The tie screws are turned until the spring is completely free. The spring is removed.
Knock or it's time for replacement
VAZ 2110 knocking rear struts
This often happens. The car runs about 30 thousand km and nothing, and then suddenly the wheel bearings start knocking at the rear. So it becomes necessary to replace the rear struts. In fact, the knocking sound of the rear suspension is a kind of signal indicating the need for replacement. At the same time, it is still unknown which part should be replaced. After all, a knock does not necessarily indicate a breakdown of the rear suspension, but can only indicate defects. Therefore, it will be relevant to touch upon the topic of determining the cause experimentally and professionally. Therefore, let’s consider the main causes of knocking from behind, in order to know what’s what:
- If the car is moving on an uneven road and a knocking sound is heard, then the cause is most likely faulty shock absorbers that need to be replaced with new ones;
- If it is clearly visible that the rubber bushings of the suspension arms are worn out, then the problem is in the suspensions themselves, which need to be replaced;
- If the spring has settled, then it also needs to be replaced;
- A knock may indicate weak fastening of the shock absorber itself or wear of the rubber bushings of the eyes (all worn elements are replaced with new ones, and the nuts and bolts are properly tightened);
- A knock may also appear when the rear suspension is overloaded or due to its breakdown, which is possible due to the destruction of the compression stroke buffer;
- Sediment or breakage of one of the suspension springs also requires replacement;
- A knock can also occur when the rear axle of the VAZ 2110 moves due to destruction of the suspension arm bushings;
- If the knocking comes from the suspension arms, then they simply need to be replaced with new ones;
- The knocking can also be determined by unloading the trunk (passengers are not seated behind the car and thus the cause of the knocking is determined, which most likely lies in the shock absorbers or springs).
How to determine the malfunction?
The shock-absorbing unit of the rear beam of the VAZ 2112, although it is distinguished by its simplicity of design, has some “cunning” in terms of detecting malfunctions. Since it does not experience the same loads as the front suspension, the rear shock absorber lasts longer - up to 50 thousand km. The “cunning” of the rear pillar of the VAZ 2110-12 is that there are only 2 clear signs indicating the need to replace the part:
- traces of oil flowing down the element body;
- a dull knock when driving over bumps or small potholes.
The second sign does not always indicate a breakdown of the VAZ 2110 shock absorbers themselves; the rubber bushing of its lower mount knocks much more often; the issue is resolved by replacing these rubber bands. And only when the struts are too loose, a change in the car’s behavior on the track is felt, which is expressed in vibrations or skidding of the rear end during sharp turns of the steering wheel.
Motorists who constantly operate their cars with a full load or with a trailer are recommended to check the condition of the rear springs and struts after each long trip. An immediate inspection of the unit is also carried out after a strong blow to the shock absorber from a wheel that has fallen into a large hole. If an oil leak appears on the body or the behavior of the car changes dramatically, then most likely the rear shock absorber has become unusable. Too strong a blow often leads to bending of the rod, causing the car to start to pull to the side when driving.
Since the rear of the car does not initially bear much load, you can try to check the struts by rocking. By sharply pressing the corner of the trunk from behind, you should make sure that the shock absorber immediately extinguishes the vibration. If the body swings a second time after pressing, then the element does not cope with its task.
Disassembly and assembly of the unit
Replacement of the rear pillars of the VAZ 2110 is carried out on any flat area on the street or in the garage; an inspection hole is not needed here. To disassemble the unit, you need to prepare the following tools and devices:
- jack;
- wooden stand of the required height;
- curved spanner wrench size 19 mm for unscrewing the rod;
- a set of open-end wrenches of standard sizes;
- standard plumbing tools (pliers, hammers, screwdrivers);
- wheel key;
- aerosol lubricant WD-40;
- gloves, rags.
It is better to carry out assembly and disassembly work with gloves to avoid minor injuries when loosening or tightening threaded connections. Replacing the rear struts 2110 begins with disassembling the luggage compartment side of the car. It is necessary to remove the rear seat fasteners and unscrew the seat belts, as well as dismantle all interfering decorative panels. Stuck threaded connections are sprayed with universal lubricant WD-40. The further sequence of work looks like this:
- The upper support of the rear pillar is unscrewed. To do this, unscrew the nut using a 19 mm curved spanner wrench, and hold the rod with a special or open-end wrench. In VAZ 2112 cars it is possible to unscrew the nut with a 19 mm open-end wrench.
- The wheel bolts are loosened, the car is jacked up and the wheel is removed. Don’t forget to secure the car with available anti-roll bars.
- A wooden support is placed under the bottom of the VAZ, and the jack is released and installed under the rear wheel hub.
- Using 17 and 19 mm wrenches, the lower support of the rear pillar is unscrewed, the bolt is removed and it is removed together with the spring.
To replace the shock absorber, the unit will have to be completely disassembled. You will need to remove the spring, the upper support washer, the boot with the upper cover and the compression stroke buffer. Then all these parts are rearranged onto the new rack. The rubber spacer also changes regardless of whether it knocks while driving or not.
Reassembly does not cause any difficulties. Only at the beginning you need to show dexterity to bring the rod back into the upper hole. Then the lower rack mount is aligned along the holes by pressing the hub from below with a jack. The bolt is put in place and tightened, after which the rest of the assembly is done.
Sometimes old racks can be restored and can serve as a backup option in case the new ones break down. Repair of the shock absorber is possible if it has not received mechanical damage to the body, the rod is not bent, and very little oil has leaked from it. The movement of the rod must remain free, without jamming, otherwise the shock absorber must be discarded. Remember that restoration rarely gives a good effect; about half of the repaired racks fail quite quickly.
In any car, including the VAZ-2110, important elements, the main purpose of which is based on the absorption of energy transferred to the body during driving, are struts.
Both rear and front struts help reduce vibration when driving on uneven roads. And since the condition of the road surface in our country, unfortunately, cannot be called satisfactory, these elements are subjected to heavy loads, which damages the rack.
Experts under no circumstances recommend continuing to operate a car with worn struts, since the analyzed element is responsible not only for a comfortable ride, but also for safe movement. Among the most basic tasks that racks must perform are the following:
- Extending the performance characteristics of the vehicle's chassis.
- Act as shock absorbers while driving.
- They help create comfortable conditions for drivers and passengers, especially if the trip is on uneven road surfaces.
- If the repair and installation of shock absorbers is carried out correctly and the springs are installed correctly, car owners will be able to independently minimize the braking distance and prevent the body from swaying when the car bounces.
How to change rear struts on a VAZ 2112
How to replace the rear struts of a VAZ-2112
If a VAZ-2112 car needs to replace the rear struts, then this process can be completed independently, if, of course, the owner of the car has little knowledge of car repairs.
What tool do you need to prepare?
In order to replace the rear struts for a VAZ-2112 car correctly, and to simplify the work process, you should prepare the following tools:
- spatula for installation work;
- special tools called ratchet and crank;
- keys for 19, 17, also open-end and ring types of keys;
- machine lubricant;
- key for fixing the rack rod.
What reasons will indicate that the rear struts need to be replaced?
Replacement of rear shock absorbers should be carried out in the following cases:
- If traces of oil are visible in the area of the racks.
- If damage is visible on the outside of the shock absorbers.
- Corrosion begins on the piston rod.
If the car struts are faulty, the brake system and chassis of the car may soon fail. The wheels of the car will begin to wear out very quickly, driving a vehicle will become quite difficult, because the coordination of the car’s movement will be completely disrupted.
How to replace rear struts step by step
As mentioned earlier, replacing rear struts is not a very difficult process when it comes to repairing a VAZ-2112; the main thing is to carry out all operations step by step, taking into account expert advice:
Replacing the rear struts of a VAZ 2110 in detail
Enjoy watching everyone, I hope my video helped someone with their choice or technical issues) Spare parts.
Source: https://vivauto.ru/kak-pomenjat-zadnie-stojki-na-vaz-2112/
Rear suspension of the VAZ 2110 - main components
The wheel axles along with the brake mechanisms are attached to them. In front of the levers there are bushings 16 with rubber-metal hinges 1; bolts are threaded through them, which are connected to brackets 2, which, in turn, are attached to the body side members. Springs 11 are located at one end in the shock absorber cup 9, at the other - in the support through the rubber gasket 10, which is welded to the inner arch of the body.
Double-acting telescopic shock absorbers. They are attached to the bracket with bolt 9. The rod is attached to the upper support 5 of the spring through rubber pads 6 and a support washer 3. A thrust bearing 12 is installed in the hub 13. It is similar to the front one, but is smaller in size and, unlike the front one, where the inner ring is installed with an interference fit, bearing 12 on axle 14 has a transitional fit. During operation, it does not need to be adjusted or lubricated; any play that occurs cannot be eliminated by tightening the nut, only replacement.
It is not recommended to disassemble the hub if the bearing is in good condition, since it is destroyed when pressed out.
Replacing springs on a VAZ 2110 (front)
In a classic way, we begin the replacement process by loosening the nut that secures the strut in the car's glass. There is no need to unscrew it completely. Jack up the front of the car and remove the wheel. Don’t forget about insuring the jack as in the previous section. Then everything is done simply and point by point:
- 1. Take penetrating lubricant in your hands and pre-wet the nuts securing the steering tip and the swing arm to the front pillar of the VAZ 2110;
- 2. Next, armed with one 17 and one 19 wrench, unscrew the above-mentioned nuts;
- 3. It is convenient to remove the steering end from the ball joint using a special puller. You can, of course, do it the old-fashioned way, with the help of a guide and a hammer. But in the latter case, you should be extremely careful not to damage the tip itself;
- 4. We knock out the bolts of the swing arm using the adapter. After which you can move the stand and brake disc assembly with the VAZ 2110 caliper to the side;
- 5. Don't forget to also remove the brake hose from its engagement with the strut;
- 6. Return to the top of the strut and use a 13mm wrench to unscrew the 3 nuts securing the shock absorber support, and the entire strut structure along with the spring is no longer held in place under the hood of the car. You can immediately begin disassembling the shock-absorbing module.