The VAZ 2190 car is initially equipped with an alarm system. Unfortunately, in the Lada Granta the door switch is installed only near the driver. This creates inconvenience when boarding and disembarking passengers at night, since the interior lighting does not turn on. Also, the absence of an additional signal will not allow you to detect a car thief or thief when trying to open the back door of the Lada.
Characteristics of door limit switches Grants
Apart from the driver's side, there are no door limit switches on the Lada Granta in other opening structures. There aren't even any buttons or standard wiring. The operation of these mechanisms determines the activation of the door open lamp, which lights up on the dashboard. Moreover, the interior light and car alarm react to the actions of the driver or passenger. The average cost of limit switches starts from 150 to 200 rubles. Article 1118-3710199 is the original number and its price is lower than its analogues. The Lada Granta has this device, but it all depends on the modification:
- The “Norma” package implies the installation of this device in all door structures.
- The “Standard” package does not imply the presence of limit switches on the seats. There they are replaced with plugs.
- The “Lux” package will delight the buyer with a full set of sensors, even a rear one.
The activation sensor transmits information using light indicators.
Reviews
| № | Positive |
| 1. | Kirill: I knew about the problem of freezing tips initially when I bought the machine. I immediately bought silicone grease and lubricated it on the inside once a quarter. It's been a year now that I haven't had any problems. |
| 2. | Vasily: after the first winter the sensor jammed several times. I took the cap off, cleaned it, and lubed it. Works properly, no comments. What happened is also my fault, since I did not carry out preventive measures in a timely manner. |
| 3. | Konstantin: I bought Grant at a dealership six months ago, the activation sensor works properly, the light comes on without delay, and an indicator lights up on the dashboard. |
| 4. | Ignat: a year has passed since the purchase, I have not made any investments, there are no comments on the mechanisms. Once there was a malfunction of the sensor. Moisture got inside, after drying the defect was eliminated. |
| 5. | Sergey: I agree with the majority of positive reviews, the limit switch works properly, the workmanship is good. Every month I lubricate the rubber tip with silicone. |
| 6. | Vladimir: It’s been the second year since I bought the car, I haven’t made any investments other than scheduled maintenance. I heard about the “disease” of the sensors on Grant, but I can’t confirm it. |
| 7. | Ivan: once in the winter the limit switch jammed, I didn’t buy a new one, I cleaned the old one. It still works fine. |
| Negative | |
| 1. | Victor: I can’t speak positively about the activation sensor, since this is the second time in a year that I change it at a service station. The doors of the Lada Granta locked themselves twice. |
| 2. | Vyacheslav: after the winter the sensor jammed, the doors were locked, the keys remained in the cabin. I called a service station technician to open it. |
| 3. | Alexey: I can’t recommend factory door activation sensors, as their quality is poor. Comrades advised installing from Opel, they say that the diameter is identical. |
Conclusion Limit switches on a car should always be in good working order. Provided proper maintenance and lubrication, the service life is at least two years. It is necessary to regularly analyze the condition of the limit switches in order to notice and prevent malfunctions in time. You should also adhere to the operating instructions.
| Video – Granta Liftback – Refinement of door switches | Video - Lada Granta - door switches freeze? 3 solutions to the problem. |
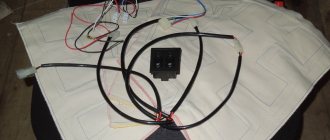
Installation of limit switches on Lada Granta
An activation sensor in all doors will provide additional comfort. To carry out the installation procedure, you will need special equipment and available materials: lubricant, rubber tips, screwdriver, rag.
Step-by-step algorithm of actions:
- Remove the rubber tip.
- Open the housing and remove the limit switch.
- Remove the block with wires and disconnect.
- Install a new sensor.
- Reassemble.
After the basic steps, you need to check the functionality of the device. To connect the limit switch to the power circuit, you will need to connect two terminals: first “+” and then “-”.
If you need to replace the trunk limit switch, then the instructions are identical, you just need to open the trunk lid.
Trunk limit switch
Standardly, a limit switch is installed in the trunk to activate the backlight in it; on cars with a standard alarm system, it also serves to control opening during active security. The limit switch can also be used by the standard central locking, blocking locking if the trunk is not slammed shut.
If we are talking about a cheap car with a minimum configuration, then you will have to connect the trunk limit switch yourself when installing the alarm. It’s easiest for owners of those cars where more expensive equipment includes a standard trunk alarm switch: as with doors, here it is enough to install the original part in the designated place. Otherwise, alas, you will have to drill a hole and install a universal one. Increasingly, the switch is not installed as a separate part in the trunk, but is built into the lock itself, as is the case with the doors.
Sometimes this leads to serious problems: for example, on the Renault Koleos, a failure of the trunk locking mechanism has become a “trademark disease”, and in the author’s practice, the “anti-record” is only a week after purchasing a new car. The lock, not locking, did not allow the built-in limit switch to operate, and this, as on other cars on similar platforms, blocked the locking of the central locking as a whole; due to the non-locking trunk, the owner could not lock the doors. In such cases, it was necessary to tightly block the trunk lock in a locked state until a new one arrived for a warranty replacement.
Finalization of the scheme
The installation or modification scheme will require special equipment to test the electrical circuit. The first place on the list of accessories is a tester and a soldering iron. You will also need a screwdriver, additional wires, electrical tape and a new sensor. When connected, the driver can use the button in the threshold or the door lock contacts.
To do this, you first need to open the sensor housing with a screwdriver and remove the element, remove the block with wires using a screwdriver. Then replace the wire and solder. Insulate the ends and assemble the structure in reverse order. The process is carried out in parallel so that the process involves elements that go to the working positions of the door.
To measure the circuit resistance with a tester, you need to alternately press and release the spherical protrusion.
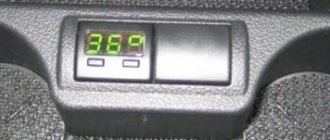
Programming the duration of control pulses
Even if the alarm is connected correctly, it is not a fact that the owner will be able to control the locks from the key fob. The point is that it is necessary to correctly select the duration of the control pulse (for locking and for opening). There is no need to make it too large so as not to overheat the actuators.
See what exactly the manufacturer Starline offers. We can set the pulse duration to 0.7 s, which should be enough. The value “3.6” will be redundant at the same time.
The “Lux” package has the following property: after 15 minutes of inactivity, the electronics “fall asleep”. It may take an extra boost to wake her up. So, try to use the option that provides for a double pulse. The main thing is not to activate the “comfort” option, which uses a 30-second duration. To connect the signaling with “comfort”, you need to install an additional unit in Grants (AvtoVAZ does not produce it). We wish you success.
Design solution to the problem
When replacing or connecting, you only need to restore the originally designed circuit. If no modifications are carried out, then the need to disassemble the locking mechanism and use insulating materials is immediately eliminated. Step-by-step instruction:
- Open the hood.
- Loosen the bolt connections and disassemble the device.
- Unscrew the terminals.
- Connect the wires from the battery.
- Pull the limit switch out of the hole.
- Pull out the switch.
- Stretch the wires and connect them.
- Bring the ends out through the hole.
It is important that the wires are no shorter than ten centimeters.
- Strip the wires.
- Stretch the wires to the threshold to the installation site.
Preparing the car before connecting
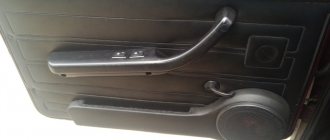
What controls the central locking? A special block to which the lock actuator wires fit. There are also two wires connected to it, connected to the driver's door microphone. More precisely, this wire is used alone in “Grant”, it has a brown sheath, and the second contact from the “micrik” is connected to ground.
The “micric” itself is located inside the actuator. So, the first piece of advice: after removing the left front door trim, you need to find the cable going from the actuator to the 7-pin connector.
Depending on the configuration, under the trim you will see the following:
- There are 6 wires suitable for the connector (from 2 microphones and a drive);
- The cords from the electric drive (pins “2/7”) are not connected, but there is still a brown wire connected to pin “1”;
- Only those wires that, according to the diagram, should be connected to contacts “4/6” are missing.
Connecting the signaling means that the wires from contacts “2/7” are still connected to the central locking control unit. The cords coming from the three actuators are always connected to the standard unit. You need to connect a fourth one, if this is not done by the factory. You may have to lay a two-wire cable from the door to the central lock control unit:
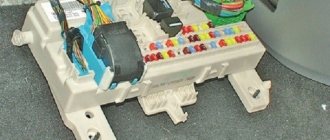
The central locking control unit is located under the fuse block, it is designated BUBD-2190.
Here's how one of the car owners coped with the task:
The cords that come out of the door are connected to the wires of the standard terminal block. The following connector pins are used: “3” and “4”. The main thing is not to confuse them. Take another look at the diagram to see what exactly we are talking about.
Troubleshooting
Drivers may encounter various types of malfunctions. Even though the sensor is protected, it is not as reliable as the manufacturers claim. In addition to silicone lubricant, other measures can be used:
- Install the spring under the rubber cover. If this element is elastic, it will protect the mechanism even at very low temperatures.
- Remove the protective caps for the winter, but there is a danger that the element will quickly become clogged with dust and dirt.
- Treat with protective liquid.
Often drivers replace their original limit switch with a part from another manufacturer or install a boot. In this case, the body of the new element is inserted into the standard connector and secured with a self-tapping screw.
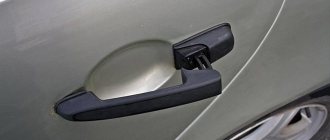
Door switches: where they are located, connection, checking
The site employs an auto electrician-diagnostician, a certified StarLine specialist. If you have questions about car alarms, ask them at the end of the article in the comments or on Vkontakte. When applying, please indicate the make of the car and the model of the alarm.
Initially, limit switches were installed on the doors to automatically turn on the interior lamp. Their connection scheme was the simplest - everything was connected in parallel, that is, it did not matter which door was open. In budget car configurations, only the driver's door switch was often installed.
How to extend service life
Craftsmen are constantly coming up with new ways to extend the service life of factory elements. Some people put coins under the rubber band, fasten the parts with tape, or insert washers. To prevent the switch from freezing or becoming deformed, there are several effective techniques to consider:
- Spring insert.
- Replacing standard caps with elements from foreign manufacturers.
- Silicone Grease.
You should not assume that these actions will grant immortality to the limit switch, but these measures will significantly increase its service life.
Review of Manufacturer Prices
| Name/article | Price, rub.) |
| Limit switch with cap 1118-3710199 | from 160 |
| 11190-3710200 | —/— |
| Rubber cap 11190-371020600 | from 35 |
| 104035756 | from 175 |
| Dello 3094705636N0 | —/— |
| Hans Pries 104035756 | —/— |
| 11190-371020000 | —/— |
*prices are current as of 10/07/18.
The service life of factory rubber caps is limited, only 1.5 - 2 years. The reason lies in the low quality of materials. In winter, drivers often encounter freezing of the limit switch and hardening of the rubber cap. As a result, lighting activation is delayed. The central lock often blocks the doors due to unstable operation of the limit switch. There are several ways to troubleshoot the problem, which we will discuss below.