Malfunction of reverse lights on VAZ 2114. Maintenance and prevention
What are reverse lights?
These are white road lights that turn on in reverse gear, guaranteeing safety while driving. If the reverse lights are not on, then the possibility of the driver getting into an emergency increases; it is very difficult to park in the dark when the road is not visible, and passengers will not be able to predict the actions of vehicles, which can lead to unpleasant consequences. The frog signal device is a necessary device. As they say “in the language of a motorist”: everything that is in the car must function properly, the safety of vehicle traffic depends on it!
So, at the slightest breakdown or short circuit of the reverse light, you need to immediately begin repairing it. This can be done both at service stations and at home, quickly and very simply. And this theoretical basis will be a great help!
Causes of reverse gear malfunction
What could cause the lack of illumination to the rear headlights?
- The light bulb has burned out and you simply need to replace it by checking the contacts.
- The fuse has failed, which can disrupt the functionality of the complete circuit of contacts.
- Lack of mass on the board, which is located under the lamp.
- Plaque and oxidation have formed on the contacts.
- If the wiring is broken, you can check it visually and also make a call.
- The contact on the headlight film burned out.
- Malfunction of the gearbox mechanism.
- The reverse frog of a VAZ 2114 is broken.
This is why the reverse lights on the VAZ 2114 do not light up!
There can be many reasons, which means that every driver should know how to properly eliminate such malfunctions.
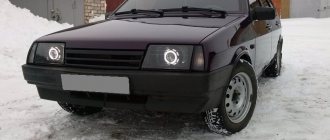
How to make overlays
To make LED headlight covers for a VAZ 2114 with your own hands, you will need the following tools, devices and consumables:
Recommended literature on repair and maintenance of the VAZ 2114:
If you have everything you need, you can start tuning. These instructions are suitable for installing LED overlays, both home-made and purchased. The procedure is as follows:
- completely cover the taillights with masking tape;
- Apply fiberglass fabric to the same adhesive tape (it is in it that the LED overlays will be mounted);
- treat the fiberglass with epoxy adhesive liquid (apply it in 2-3 thin layers);
Blanks for overlays
Blanks for overlays before and after sanding and priming
At this point, the tuning of the VAZ 2114 car can be considered complete.
Removing the backplane board
First you need to remove the rear lights on the VAZ 2114, and for this you will need:
- Open rear trunk
- Remove unnecessary things
- Remove decorative trim
- Unscrew the plastic casing
- Take out the back panel
Now you have access to the socket and lamp of the rear license plate lamp, which also needs to be removed. The frog mounting pins are removed and the flashlight is already in your hands. The main thing is not to confuse it with the speed sensor, which is also located on the gearbox.
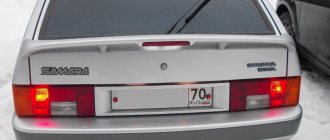
What kind of lamps are in the rear lights of the VAZ 2114
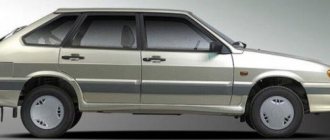
The five-door hatchback VAZ-2114 (LADA Samara) is a restyled model of the VAZ 2109, and therefore the rear lights and lamps in them are practically no different from each other. In both modifications of the VAZ, only two types of light bulbs are used in the rear lights - P21W (A12-21-3) and T5W (A12-5). The first has a power of 21, the second 5 W.
P21W and T5W lamps used in the rear lights of the VAZ 2114
P21W bulbs signal the turn signals, brake lights, reverse lights and rear fog lights. T5W lamps are in size. You will see the location of these lighting devices and their purpose in the photo.
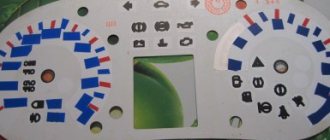
Location of lamps in the rear light of a VAZ 2114 (in the photo is the left light board)
The numbers in the photo indicate:
- stop signal;
- reverse indicator;
- fog light;
- side light;
- turn indicator.
How to check the functionality of the frog?
The contacts from the sensor are removed and clamped together, after which the ignition is turned on. If there is light, then you need to replace the sensor. And if not, then the problem is in the circuit, but the frog is fine.
When the reverse lamp does not light up, it is often necessary to replace the old sensor with a new one.
What should be done:
- place the car on the overpass;
- install the handbrake;
- remove protection;
- remove the contacts of the old sensor;
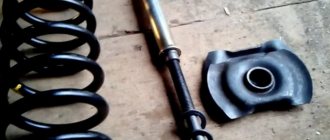
- place the container and remove the frog;
- Unscrew the faulty device and replace it with a new one.
Then let it sit for a while and check the oil in the gearbox. Fill it up to the required level and put the entire structure back together.
Attention, the price of a new sensor is within 250 rubles.
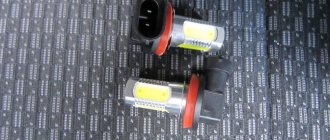
The next option is if the reverse light does not light up on a VAZ 2114, then the problem is in the light bulb. To replace it, you need to disconnect the wiring block, remove the plastic contact panel from the flashlight, while squeezing the side fixing elements.
We rotate the light bulb counterclockwise and, pressing slightly on the socket, remove it. Now we install a new one, check the contacts and put the entire unit back together.
We visually assess the condition of the wiring; if necessary, we strip the wires, check for breaks using the ringing method, and check the contacts on the headlight film.
Why aren't the reverse lights on yet?
A blown fuse is a common cause, which means you need to know exactly where they are located and how they change.
The products are located in the fuse box, which can be found under the steering wheel on the left side. It can be easily removed with just one touch of your hand. There is no need to unscrew anything.
When the reverse light does not light, you need to check the condition of the fuses. How to do this? You can visually look at the fuses and determine the breakdown - the integrity of the middle part.
But the burnt jumper is not always so clearly visible, so you need to turn on the dimensions and, without removing the fuses, check the voltage; if one end is lit and the other is not, the device is faulty.
Attention: when such a breakdown often occurs, you need to check the entire electrical wiring system, which causes such malfunctions in the car.
To replace the product, you don’t need tools, just take tweezers, remove the old unit and install a working one.
Key conclusions and recommendations from professionals
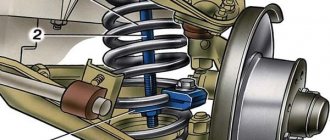
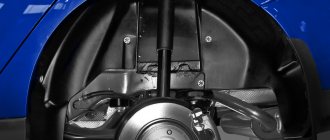
You can find out where the VAZ 2114 reverse sensor is located very simply by looking up at the gearbox, and if the driver cannot get under the car, then the hood opens and thus the condition of the frog is checked.
To completely verify that the brake gearbox is damaged, you need to turn the wheels to the left and look at the gearbox from the driver’s side. There is a protection with contacts inside on the side, remove it, close the contacts on the DZH and turn on the ignition. When everything is in order, a white light appears.
What and how can you change the standard lights?
The easiest way is to change the appearance of your car - replacing the light fixtures with more original ones. The range of flashlights for the VAZ 2114, of course, is not particularly wide, but there is plenty to choose from. And the simple way is because all tuning comes down to “removing the standard ones, installing the purchased ones.” Let's wander around the shops and see what we can find for our VAZ 2114.
Osvar flashlights are the most popular option among car enthusiasts. They are relatively inexpensive and finding them is not a problem. The only thing is that the manufacturer uses ordinary light bulbs in it, but if desired, you can replace them with LED ones yourself. Although for most car owners this is not relevant.
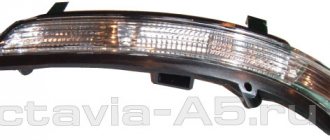
Tail light “Osvar” on VAZ 2114
Skyline style . Also a “lamp” option, but it looks completely different.
Tail light Skyline style for VAZ 2114
ProSport RS-02020 . This is already an LED option. True, the light bulbs responsible for the different signals in them are clearly not in their places, which may not please other road users, and the traffic police inspector will definitely not understand you.
Tail light ProSport RS-02020
ProSport RS-02020-T . The same “ProSport” with mixed up signals, but with tinted windows. A real gift to the traffic police!
Tail light ProSport RS-02020 with tinted glass
ProSport RS-07490 . Option with light bulbs. Same manufacturer, same misunderstanding - the turn signal is located between the marker and the brake light. You can't make it up on purpose.
Tail light ProSport RS-07490
"Zigzag" 0013L . This LED miracle is offered by manufacturers from Togliatti, the birthplace of the VAZ car. Here at least the signals are more or less in place.
Tail light "Zigzag" 0013L
We'll finish our shopping trip here, although there are still many miracles there. Just watch a short video about a flashlight with red turn signals and move on to the next point.
How to remove tail lights
It's time to figure out how to remove the stock lights to install new ones. To work, you will need an 8 socket wrench with an extension and a Phillips screwdriver. We open the trunk door, use a Phillips screwdriver to dismantle part of the upholstery so that, by bending it, you can gain access to the entire rear part of the lamp.
The upholstery is attached to the body using self-tapping screws
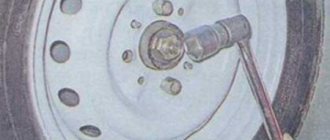
We find 4 nuts around the perimeter of the light fixture and unscrew them with a wrench
The lamp is secured with four nuts
Carefully remove the connector by pulling it towards the central axle of the car. We don’t swing it, we just pull it, trying not to twist it!
Removing the power supply
Pull the light from the outside of the car toward you and remove it.
Now the lamp can be removed
We install the new light fixture in the reverse order.
How to troubleshoot?
The most common reasons that the brake light on the VAZ 2114 does not work are the following factors:
- Fuse failure.
- Broken wires in one of the sections of the circuit.
- Limit switch faulty.
- Bulbs burn out.
- Oxidation of contacts in lamp sockets.
- Damage to the contact board.
The most common and at the same time the most easily removable of the above reasons is a blown fuse. To identify such a malfunction, you need to examine the fuse box. A 10-amp fuse F3 is responsible for the brake lights, which also protects the ignition switch, computer and interior lighting.
Malfunctions in the operation of the latter may also indicate a malfunction of the stop fuse (and in this case, troubleshooting should begin with the block). If it turns out that the fuse has blown, then you should replace it with a new, similar one.
A new fuse installed in place of a failed one must be designed for exactly the same maximum current. If it is less, the fuses will blow more often, and if it is more, the protected device itself may burn out.
The problem may also be in the fuse block itself - sometimes the tracks on its printed circuit boards burn out or the contact legs oxidize. In order to check its serviceability, it is enough to measure the voltage at the contacts of the newly installed fuse.
Another common reason why the brakes of the VAZ 2114 do not light up is a malfunction of the limit switch that turns on the signals. It is located on the brake pedal bracket and is always in working order, regardless of whether the car engine is turned on or not.
It works automatically when you press the pedal. In order to check its serviceability, it is enough to see whether the power supply is suitable for its contacts (on one of the contacts the presence of power must be constant). In addition, if you press the pedal and thus turn on the limit switch, you can measure the voltage at its connectors.
Malfunction of the lights themselves
If during the check from the fuse box to the limit switch no problems are found, then you should move on. Now you should test the wiring from the second limit switch connector to the stop connectors with a tester. If it is working, then you need to check the board. The printed circuit board on which the taillights are mounted is not ideal, and is one of the biggest problems of all VAZ cars.
Its tracks often burn out or peel off, causing the lights to stop working. This problem can be solved in two ways - either re-solder the tracks (which can be done with a regular soldering iron, although not in road conditions) or replace the board with a new one (most motorists choose the second option).
Another reason why the VAZ 2114 brake lights do not work may be oxidation of the lamp sockets. In order to eliminate this problem, it is enough to clean all contacts from oxides that have appeared on them.
This is best done in one of the following ways:
- small grit sandpaper;
- WD-40 solution;
- kerosene;
- purified gasoline (“galosh”).
You should absolutely not use gasoline or other solvents to clean contacts.
The last option for faulty stops is the light bulbs themselves. It makes no sense to give any detailed advice here - you just need to replace the burnt out light bulbs with new ones.
By following all the tips listed above, the car enthusiast gets the opportunity to check the entire electrical circuit of the brake lights, starting from the fuse box and ending with the bulbs in the lamps. Thanks to this, the guarantee that the fault will be accurately detected and eliminated is 100%.
Additional Tips
Before each trip, especially over long distances, you should check the functionality of all lighting equipment, including brake lights. In order to reduce the likelihood of breakdowns along the way, you need to periodically check the condition of the sockets and bases of the rear light bulbs, and periodically clean them of oxides and dirt.
In case a breakdown does occur, you should always have an additional set of light bulbs and 10 amp fuses in your car, as well as a multimeter to check them.
VAZ 2114 is one of the most popular domestically produced hatchbacks. However, the appearance of the car, as well as the technical characteristics, optics, and interior are far from ideal, so the owners are trying to improve various elements. With the advent of affordable LEDs, tuning of domestic cars reached a new level - car enthusiasts began to decorate the interior, doors, trunk and, of course, the front and rear optics of their cars with them.
Replacing light bulbs
Now let's replace the rear light bulbs. We lift the trunk and look for a valve in the upholstery located opposite this device.
On the trunk side the lamp is covered with a Velcro flap
We open the valve (it is on Velcro) and observe the back of the flashlight with the power supply connected to it.
Rear part of the lamp VAZ 2114
We pull out the block by pulling it towards the central axis of the machine.
Important! The mating part of the block is a metallization applied to a flexible circuit board. We remove the block carefully, since if the pulling is unsuccessful, the entire board will have to be replaced.
We release the latch located on the side of the lamp that is located closer to the center of the machine, and remove the board along with the lamps.
Removing the board with lamps
We unfold the board with the bulbs facing up and observe the picture shown in the photo in the first section of the article. All lamps are removed in the same way - by turning them counterclockwise. We find the burnt out lamp and replace it with a new one.
Replacing the reverse indicator lamp