We cut off part of the pipe.
Mark all the necessary elements on a metal sheet, outline the pipe and the bearing.
Marking out future details
We cut out the parts with a grinder and grind them to meet the exact parameters.
Cut parts
We drill holes for the bolt in the obtained washers.
Drilling holes for bolts
How to make a two-jaw wheel bearing puller: video
Making a bearing puller with your own hands is not at all difficult - you don’t need either expensive materials or specific skills. Using the instructions, you will easily cope with the task and get a useful tool for car repair.
Changing valve stem seals with your own hands
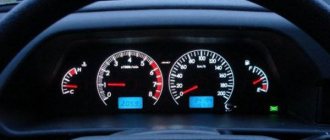
Hi all! As the owner of products from the domestic automotive industry, there was a need to replace valve seals, since, judging by all the signs, they began to leak - increased oil consumption, spark plug threads in carbon deposits, smoke from the chimney during startup.
The car already has a decent mileage and requires constant investments, so I decided to save money and replace the caps with my own hands without resorting to service, at the same time combining this with replacing the worn camshaft and cams, so as not to have to climb ten times.
The necessary tools and materials were purchased in advance: a set of caps, a camshaft with rockers, a pair of springs and crackers, just in case. Among the tools, we will need a set of wrenches and sockets, a torque wrench, a hammer, a magnetized screwdriver or tweezers, narrow-nose pliers for removing caps, a valve sealer, a tin rod, a piece of heat-shrinkable tubing, if the seal kit does not include an installation sleeve.
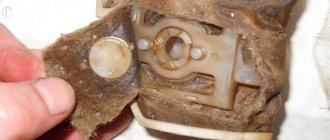
The package arrived promptly with a mandrel for hammering in the caps.
It is a piece of metal rod, bored to fit the shape of the oil seal - simple and reliable.
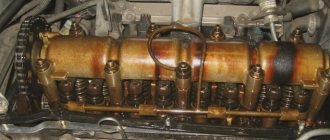
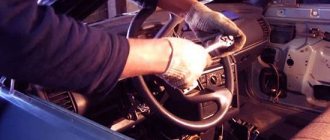
So let's get started. We turn off the engine and let it cool. We remove the valve cover and set the timing marks at the Top Dead Center of the 4th cylinder (TDC).
In this position we can replace the caps on the 1st and 4th cylinder. We remove the camshaft sprocket and connect it to the chain so that the chain does not jump and the marks do not get lost, since we will still need to turn the crankshaft.
Now, using a flashlight, we make sure that the pistons of cylinders 1 and 4 are in the upper position. Let's start the replacement from the first cylinder, remove the springs and rocker. We put them aside according to the numbering of the cylinders, so that later during assembly we can put each one in its place.
We insert a tin rod into the spark plug hole under the valve on which we will replace the cap, put on the desiccant and push through the plate with the spring, removing the released crackers, remove the valve springs, as well as the lower plate of the small spring, since it will interfere with us.
That's it, access to the oil seal is open. Now, using narrow-nose pliers, carefully, so as not to damage the valve guide, remove the old oil seal upwards.
We wipe the seat from oil, put an installation sleeve on the tip of the valve so as not to damage the new oil seal on sharp edges, and carefully put on the cap, lubricating the working edge with oil. We remove the bushing, put on the mandrel and, with gentle blows of a hammer, press the oil seal into place until it stops.
Since it seemed that the recess for the valve stem in the mandrel was not long enough, I first drilled the hole a little with a drill, since the metal is quite soft. I also sanded the sharp edges with sandpaper.
Now we put the springs and desiccant back and dry the valve, after that we take out the rod and apply several gentle blows with a hammer to the valve stem to make sure that the desiccant are securely in place.
Similarly, we change the oil seals on the second valve and on the valves of the 4th cylinder, then rotate the crankshaft 180 degrees and replace the oil seals of the 2nd and 3rd cylinders. Before installing the rockers and camshaft, we once again carefully check the “dryness” of the valves and put everything back together.
After installing the camshaft, we adjust the valve clearances.
Since I was changing the caps for the first time, the work took all day. Unfortunately, the replacement didn’t help much, since when checked, the valve guides also turned out to be worn out. But valuable experience has been gained and, I think, in the future, if you have to change these guides, it will still be useful.
Also, before work, I recommend that you prepare thoroughly and find instructions for replacing the caps for your specific car, since there are many nuances that could not be included in this review. And it is still advisable to have a similar collet cap puller instead of pliers https://www.avtoall.ru/s_emnik_kolpachkov_maslootrajayushih_5_6mm_avtom-959842/ - it will save a lot of time. Well, a short video below, maybe it will help someone, replacing the caps with your own hands is not that difficult.
Replacing valve seals
Let’s take, for example, the “good old” VAZ eight-valve engine, which has not undergone any fundamental changes since the appearance of the 2108 to this day.
The valve stem seals used in this engine have the most common design today. Therefore, the recommendations regarding their replacement will also be useful for other motors. The valve stem seals are mounted on guides inside the springs, so replacing them is impossible without loosening the valves. Without the spring preload that holds them in the closed position, the valves will fall into the engine. Since replacing valve seals without removing the cylinder head is much faster (no need to dismantle the timing drive and drain antifreeze, no need to replace the cylinder head gasket), it is worth resorting to a trick that allows you to keep the valves in the guides.
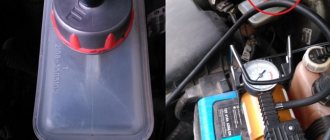
You can set the piston to the dead center and insert a flat-head screwdriver or other rod into the spark plug hole, which will stand upright under the valve plate. On eight-valve engines, where the spark plug holes are located to the side, this is convenient. On sixteen-valve engines, deep vertical wells of spark plugs will require the use of a long hook. Use a strong balloon or fingertip: carefully insert it into the combustion chamber, inflate it with a compressor and squeeze it to prevent the air from escaping. Under air pressure, the rubber shell will stretch neatly over the surface of the combustion chamber, pressing all the valves at the same time.
To access the valve stem seals, first remove the valve cover and camshaft. Therefore, the first thing we do is remove the timing belt from the camshaft pulley to prevent accidental oil from getting on it. Having removed the timing belt cover, loosen the belt tension roller and pull the loose belt off the pulley. The camshaft is pre-installed according to the mark.
Next, the interfering parts are dismantled (for example, the throttle cable bracket on injection engines), and the valve cover, held at the edges by two shaped nuts, is removed. On carburetor engines, the distributor is removed.
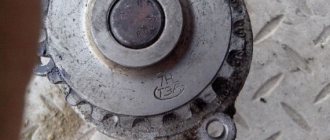
Next, unscrew the bolt securing the camshaft pulley and carefully remove the pulley from the journal, pointing the shaft with the key upward so as not to lose it during disassembly. After this, we begin dismantling the camshaft beds. A total of 10 nuts hold them in place. By unscrewing the nuts, the beds can be lifted up along the studs. After this, nothing prevents the removal of the camshaft.
After removing the camshaft, you can use pliers or narrow-nose pliers to pull the valve lifter cups out of the head. The removed glasses, together with the adjusting washers, are laid out on the workbench in the same order in which they were on the engine, so that after reassembly you do not have to readjust the valve clearances.
Something else useful for you:
Use a special tool to loosen the valves. It consists of a longitudinal rail attached to the bed fastening studs, and a lever moving along it with a pressure plate on it, or it has a hook for installation on only one stud. Positioning the lever of the device opposite the desired valve, place the pressure plate on the valve plate and press to compress the spring. In this case, the valve plate will release the crackers holding it under the action of spring preload. After removing the crackers with tweezers or narrow-nose pliers, release the lever of the device and pull out the valve plate and its springs.
How to properly replace, trim and process valve seats
Valve seat - a small ring with a bevel on the inner surface.
It is installed in the holes of the cylinder head intended for installing valves and distilling the air-fuel mixture and exhaust gases through them. The part is pressed into the cylinder head at the factory.
Performs the following functions:
- hole tightness;
- provides the necessary air flow when the mechanism is open.
transfers excess heat to the cylinder head;
Replacing the valve seat is required when it is not possible to restore its tightness using mechanical processing (numerous treatments in the past, burnout, severe wear). You can do this yourself.
Part repairs are performed when:
- plate burnout;
- after replacing the guide bushings;
- with a moderate degree of natural wear;
- if the tightness of the connection between the ring and the plate is broken.
Correcting worn and damaged saddles at home is done using cutters. In addition, you may need a welding machine or a powerful gas torch, a standard set of wrenches necessary for dismantling and disassembling the cylinder head, lapping paste, and a drill.
Replacing seats
The replacement procedure consists of two important procedures: removing old parts and installing new ones.
Removing old planting elements
Replacement of valve seats is carried out on a dismantled cylinder head with a disassembled gas distribution mechanism. You can remove the old ring using a welding machine, if the material from which it is made allows this.
To perform the procedure, a valve seat remover is made - an old unnecessary valve is taken, the plate of which must be machined to the size of the inner diameter of the seat.
After this, the resulting tool is recessed into the seat, 2-3 mm short of the edge, and “grabbed” by welding in 2-3 places. Afterwards, the valve along with the metal ring is knocked out from the back side with a hammer.
Important! The welding procedure may cause some deformation of the seat. In this case, standard saddles will have weak fastening, which can lead to their spontaneous dismantling during engine operation. Rings of increased diameter are required, which are not sold in stores, but are made to order.
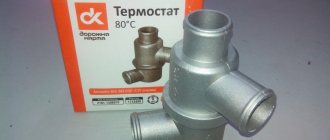
Valve seats made from non-weldable metals can be removed by screwing a piece of pipe into the seat as a valve seat remover. To do this, a thread is cut on the inner surface of the ring. A similar thread is applied to the outer surface of a metal pipe of suitable diameter.
An old valve is taken and first welded to the end of the pipe in the reverse position. In this case, the valve stem is inserted into the hole intended for it, the pipe is screwed into the thread, after which the element is removed by tapping the stem.
Installation of new saddles
Before starting the installation procedure of new saddles, the seats under them are cleaned of dirt. After the cylinder head should be heated evenly to a temperature exceeding 100˚C. At the same time, the metal expands, allowing the ring to be pressed in.
The mounted part is cooled using liquid nitrogen. In its absence, you can use a combination of ice and acetone, which allows you to reduce the temperature of the metal to -70˚C. The dimensions of the parts are selected in such a way that the difference between the diameter of the seat and the ring is no more than 0.05-0.09 mm on cold parts.
The valve seat is pressed into place using a special mandrel or a piece of pipe of suitable diameter. The part should fit into the seat with little effort. It is important that the ring fits without distortion.
After pressing in and cooling the cylinder head, you should check whether the element is loose in the seat. If there is no gap and the replaced element is held tightly in place, the replacement procedure can be considered complete. Next, you need to trim the valve seats using cutters.
Important! During the standard replacement procedure, the valve plates of all valves are set quite high. However, some experts recommend processing the chamfers so that the exhaust valves sit slightly deeper than the normal position. The intake valve seat is left in its normal position.
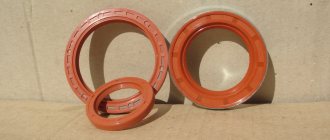
What are the caps made of?
Let's look at what they are made of:
- On early VAZ cars, valve stem seals were made without reinforcement, the material for them was fluoroplastic
- Now the caps are made of rubber; its edge is pressed against the valve stem by a steel bushing. This reduces the risk of misalignment in the assembly during engine operation.
- The use of fluorine rubber and acrylate as materials in modern conditions increases the vehicle mileage to 150 thousand kilometers