Components and malfunctions of the suspension
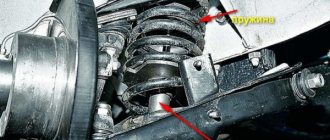
The front suspension design of the VAZ 2110 is quite complex. Its main element is the stand. It is this that ensures a comfortable ride on domestic off-road conditions. Thanks to a rotary cam mechanism consisting of a bolt and an eccentric washer, the camber of the wheels is adjusted. Also installed on the rack:
- special spring;
- a polyurethane buffer that limits the compression process;
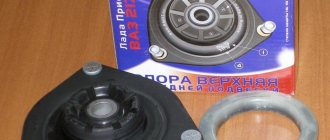
- upper support attached with nuts;
- a bearing designed to rotate the stand together with the wheel;
- shock absorber, where there is a plunger, as well as another spring.
Tuning a VAZ suspension includes modifying or replacing all these parts, after which the mechanism will work much more efficiently.
A ball joint connects the front suspension arm of the VAZ 2110 to the steering knuckle. The extensions located along the bottom, the lower arms and the supports on the cross member are connected using rubber-metal hinges and bolts. Special gaskets (washers) regulate the longitudinal inclination of the rotary axis. The wheel hub is mounted with a radial contact non-adjustable bearing. An important role is played by the cross member, that is, the rod connecting the lower arms. In the center it is attached to the car body through rubber pads.
You can repair the front suspension of a VAZ 2110 yourself, but this requires certain skills. The VAZ 2110 front suspension diagram will also help the car owner. If you are not confident in your abilities, it is better to entrust the work to the experts at a car service center.
The most common defect of this important car part is knocking noises. If they are heard when driving even on a smooth road surface, then the reasons for this may be:
- front suspension strut wear;
- loose fastening of the cross member to the body;
- defects that have appeared in the rubber parts of the suspension, especially when the knock is clearly metallic;
- broken spring (there are several of them in the suspension);
- worn hinges;
- wheel imbalance.
If the cause of the knocking noises is determined correctly, you can deal with them by replacing the worn part yourself or tightening the fastener.
It happens that when driving in a straight line, the car tends to slide to one side. This may occur due to the fact that any spring installed in the suspension has lost its elasticity (its compression ratio has changed). A spring that has failed must be replaced immediately.
VAZ 2106 ground clearance
You can see a lowered “six” on the road quite often. Especially when the driver is a young guy. There are several reasons why the clearance on the VAZ 2106 is lowered. The original idea to reduce ground clearance appeared in regular car racing: rally or circuit racing, drifting and similar competitions. To achieve this effect, the suspension is “clamped,” which lowers the center of gravity, making the car more driven and responsive.
The unusual appearance and position of the car, the popularity of motor sports forced many to tune their cars in a similar way. Over time, this became fashionable and was recognized as one of the ways to stand out from the standard image of the VAZ six. At the same time, a noticeable disadvantage of driving a low-slung car is the unevenness of domestic highways and artificial road barriers (“speed bumps”).
There are quite a lot of ways to lower a VAZ 2106 yourself, from expensive to budget ones. The easiest thing for a car owner will be to purchase and install ready-made lowering kits for “classics” or to independently adjust the springs by cutting them to the desired height.
Return to contents
Preparatory work for suspension tuning
The static suspension of the “six” is not adjustable and has constant height and stiffness parameters. The static suspension best meets the requirements of city driving for cars whose landing is within “reasonable” limits. Its advantage is the relative cheapness of installation, and the disadvantage is the need to change elements without the possibility of regulation.
Whatever option the VAZ 2106 owner decides to use to lower his car, he needs to carry out preparatory work. They require taking tools, a grinder and a blowtorch. After this, the following steps are carried out.
- They conscientiously wash the space between the wheel arches from dirt, freeing up free access to the suspension and its parts.
- All wheels of the car are removed. The caps are disconnected (if any), the bolts are unscrewed, and the wheel rims are removed from the hub. The nuts are twisted in pairs, so that one of them is opposite the other diagonally.
- Use your hands to pull the wheels towards you, removing them from the hub. It is wise to check the brake pads and rotors at the same time. If they are worn or defective, they are immediately replaced with new ones.
- On the classic VAZ 2106, special spacers are sometimes installed that increase the height of the car. They are removed immediately. If they are installed at the top or bottom of the springs, then they are simply removed. When these elements divide the spring in two, it is replaced. It is advisable to take into account the factory recommendations when purchasing new ones.
After first unscrewing the fastening bolts, carefully remove the strut along with the spring from the wheel arch, the car is ready for work.
Return to contents
Installing a ready-made set of elements
If the owner decides to use a ready-made set of elements, after preliminary preparation of the car, you can begin installing it. The modern car market provides a huge selection of parts and manufacturers, hard and soft springs and shock absorbers, to suit any lowering. The problem is that not everything fits the VAZ “classic”. But you can find it. The main thing is to clearly decide how much you want to lower the car and in what conditions the car will be used.
Professionals recommend 50 mm as optimal, taking into account the standard of the car. What's good about this option:
- the machine is given sufficient rigidity;
- The car's suspension remains working, the car will not jump over uneven roads.
When selecting finished parts, you should take into account the number of turns of the spring. Fewer turns means lower height, which is important when lowering a car. There are sports sets that have the appropriate characteristics. Among them it is quite possible to choose the right one.
In addition to purchasing a ready-made kit, there is the option of ordering parts with the required characteristics from a specialist. After installing the updated suspension, all components are assembled in the reverse order.
Return to contents
Method of sawing off springs
A cheaper, quick and easy way to lower a VAZ 2106 is the method of sawing off the springs. After preliminary preparation of the machine, the springs are cut down with a grinder into the required number of turns so that the landing of the machine becomes the required height. You can use either the stock version or use springs from a different brand of car. It is often recommended to use Niva springs for these purposes, since they are stiffer and more durable.
Before walking with an angle grinder, you should make the necessary height calculations so that the front and rear bumpers of the car are the same height (or the rear is slightly higher). Professionals advise cutting the springs by a maximum of 2 turns. This will help lower the VAZ 2106 enough so that it is both visually visible and the suspension retains its properties at least partially. After cutting, it is recommended to install a Panhard rod. This will allow you to correct the rear axle in the center, because after landing the axle often “leads” to the side.
You can successfully combine a ready-made set of shortened shock absorbers and cutting the springs. This will be a more expensive method than simply cutting the coils, but also safer.
Return to contents
Other ways to reduce your car
In addition to the methods listed above, the car is lowered by several centimeters if the owner removes some parts of the car.
| Details | Work and result |
| These elements include rising rubber pads located under the springs. | Removing them helps remove these few centimeters. |
| An important part that affects heights are shock absorbers. | Old VAZ models have elongated (still collapsible) elements, and you can also find shock absorbers from Moskvich on older cars. They are also longer than the latest developments and visually lift up the car from behind. Changing this part will also help reduce the fit. |
| Some owners are experimenting with smaller discs. | Low profile tires are hung on them, which also reduces the height. |
| More experienced professional drivers allow centimeters of ground clearance to be trimmed. | This is done by transferring the fastening points of the car suspension on the “six”, or hubs. |
Some operations require not only special knowledge and skills, but also the accuracy of preliminary calculations. And not every car will survive such experiments.
expertvaz.ru
Suspension design and characteristics
On VAZ-2107 cars, the suspension is the most loaded element. It takes on almost all mechanical loads while driving
Therefore, it is important to promptly pay attention to the condition of this node. After all, the “Seven” suspension is responsible not only for safe movement, but also for driving comfort. The front suspension is more reliable than the rear
The manufacturer understood that the main burden would fall on it (this is typical for rear-wheel drive cars), and it has fewer parts, therefore, repairs are less expensive
The front suspension here is more reliable than the rear. The manufacturer understood that the main load would fall on it (this is typical for rear-wheel drive cars), and it has fewer parts, therefore, repairs are less expensive.
The VAZ 2107 suspension is a collection of units made from various parts and rotating mechanisms. In this regard, it is necessary to carry out timely repairs and modify them, whenever possible installing more durable and functional elements.
Chief among them are:
- elastic parts - they are especially noticeable when driving on uneven terrain;
- guide parts - responsible for the trajectory of the wheels;
- shock absorbers - prevent the car from “swaying”, maintaining a smooth ride when moving, especially on rough terrain.
The front suspension mechanism of the VAZ-2107 is called “independent” due to the presence of a double-lever device and a cylindrical spring, a telescopic shock absorber, and a stabilizer with a special lateral stability function.
Method of sawing off springs
A cheaper, quick and easy way to lower a VAZ 2106 is the method of sawing off the springs. After preliminary preparation of the machine, the springs are cut down with a grinder into the required number of turns so that the landing of the machine becomes the required height. You can use either the stock version or use springs from a different brand of car. It is often recommended to use Niva springs for these purposes, since they are stiffer and more durable.
Before walking with an angle grinder, you should make the necessary height calculations so that the front and rear bumpers of the car are the same height (or the rear is slightly higher). Professionals advise cutting the springs by a maximum of 2 turns. This will help lower the VAZ 2106 enough so that it is both visually visible and the suspension retains its properties at least partially. After cutting, it is recommended to install a Panhard rod. This will allow you to correct the rear axle in the center, because after landing the axle often “leads” to the side.
You can successfully combine a ready-made set of shortened shock absorbers and cutting the springs. This will be a more expensive method than simply cutting the coils, but also safer.
How to lower a VAZ 2106 with your own hands, three sure ways
In this article we will talk about such a common tuning as lowering a car with your own hands, and most importantly, how to do it correctly with less harm to your car.
Let's first look at what methods exist to lower your car.
- 1. The simplest is sawing the springs.
- 2. Special suspension with lowering.
- 3. Air suspension.
Of all these methods, we will consider the first and partially the second method since they are the simplest, fastest and cheapest, although not entirely correct, since after this the suspension will lose its, therefore, not the best properties. So, for the first method (regular sawing of springs) you will need a minimum of tools, namely a wrench for unscrewing wheels, springs (sold in many car stores and auto markets) and a grinder.
With their help you will have to make understatements. I think there is no need to explain to you how to work with all this tool, since there is nothing complicated here, you just need to remove the springs from the car and cut them straight, try so that after sawing the springs, the front and back of the car are as smooth as possible same height.
First way
Why is this method the worst available? With such a lowering, your suspension will not work quite correctly, since you still have old shock absorbers that are longer than your sawn springs, and if you get into a nice hole, the length of the spring is not enough to properly handle the unevenness; in other words, when lowering, you need to do this so that the length of the spring and shock absorber is as equal as possible.
Second way
This is where the second method comes to our aid, but partly because we only need lowered shock absorbers, and not the entire set, which also includes lowered springs. As a result, we get a third option that combines the first and second and will be correct, albeit more expensive than the first option.
In this case, we will take -70 shock absorbers and cut our old springs to their length and even get a very good lowered suspension that will cope well with uneven asphalt and, most importantly, please your eyes, as well as the eyes of passers-by.
We also recommend that after lowering you make an adjustable panhard rod so that you can adjust the rear axle in the center, since when lowering the axle goes to the side, good luck. If you have any questions, ask us in the comments, and also join our VKontakte group.
Didn't find the information you are looking for? on our forum.
We recommend reading:
Installation of the HDT on the VAZ 2107, instructions for the VAZ 2101 -2107
Cooling system for VAZ 2110, 8 and 16 valves, principle of operation, main malfunctions
Exclamation mark on the VAZ instrument panel
Wiring diagram for VAZ 2106, color, with description, in good quality
Gasoline consumption is ok. City, highway, mixed cycle
Replacing the throttle cable on a VAZ 2115
VAZ 2115 rear seat back lock
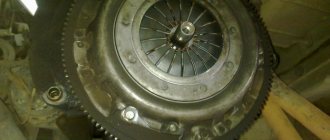
How to install the clutch disc correctly on a VAZ 2106
We underestimate according to our minds. Rear suspension. — logbook Lada 2106 Native 1990 on DRIVE2
It also came to the suspension. I started from the back. It was decided to install Tehnoressor - 70 and stock shock absorbers with modifications, and in advance - Tehnoressor - 50 and shock absorbers immediately lowered or stock (depending on the condition; let’s analyze it and see). So, the first thing I did was buy springs. Beautiful, green. And I'm glad)
Here they are! =)
Started installing. The first spring was removed using zip ties. But without them it’s much easier - you jack it up higher and the spring comes out.
What was to be expected - there were reinforced rubber spacers for the springs. That's why the car was like a jeep))) I bought standard thin ones. The difference between them is approximately 2 centimeters. This allows you to turn one chip. More on this later.
On the right is reinforced, and on the left are standard spacers
I clearly show the difference between factory springs and technosprings - 70: the difference is 2.2 turns.
But it is worth considering that the rigidity is different. Therefore, if you cut the springs for such a number of turns, the understatement will be more than - 70, because The stock springs lose their rigidity when cutting and sag greatly. My subjective opinion)
The shock absorbers turned out to be quite working. Recently replaced, judging by the well-preserved sticker. "Ober Kraft" - I've never even heard of these.
The new spring fits in generally easily, because... Briefly speaking. Immediately put a spacer on top. Then we place the second jack under the rear axle (where the torque rod is attached) and lower the car. The spring will press the spacer and snap into place. The main thing is to align the ends of the spring with the grooves in the lower cup and the upper rubber pad.
And we lower the car
In my case, the new thin spacers did not fit into place. The soap solution didn't help. I had to trim them slightly from the inside.
New spring in place:
Now comes the fun part. To prevent the car from being a stool, you need to maintain full travel of the shock absorbers. When lowered - 70 mm, we see that the shock absorber reduces its stroke by about 9 cm in my opinion (I’ve already forgotten, I’m describing the August events))). In general, this distance must be compensated in order to maintain a working soft suspension. I marked this distance in the photo with a red line:
And it is not necessary to buy special ones with an understatement. The desired effect is achieved by so-called “houses” or brackets for transferring the shock absorber mount. In general, they are used for inflating, but if you turn this product upside down, then they are also suitable for understating.
Native classic ones will fit without problems with minimal modifications. But, firstly, I didn’t find them, having traveled all over the city, and secondly, they give a small increase for such a lowering - about 4-5 cm. That is, the shock absorber remains compressed by a couple of three centimeters. Ideal when lowering to -50 mm, but I lower by all of 70 mm))).
The second option remains - to use houses from the eighth family. But you will have to suffer with them: they do not hold firmly and can turn. With some modifications this can be avoided and you can get 100% effect, as well as the ability to adjust the shock absorber stroke!
A friend fitted old, but good-quality brackets made of thick metal, which inspire confidence in contrast to store-bought ones, which seem to be made of foil. To adapt the alien “house” for my shaytn, I took up a grinder: I made two cuts on the sides to such a height that the “house” would fit into the standard place for attaching the shock absorber and so that the mounting holes on the “house” and the mounting location would align. You also need a cut from the end of the “house” so that it does not touch the jet thrust. The first time I went too far and cut off a lot. The second time it turned out great. The photo will make it clearer:
Why bother so much, you ask? After all, you can simply cut out the whole thing, as in the photo:
But in this way we get rid of the “ears” in the corners that DO NOT ALLOW our “house” to turn! I need to leave these “ears” - I’ll be able to perfectly keep the bracket from turning.
And no welding is needed.
Clearly
Then you need to select the internal bushings to match the width of the house. They will not allow the “house” to bend from being tightened. And we will have to tighten it tightly. Bushings from large reaction rods are excellent; at the very least, you can saw a long bushing from the lower mount of the rear shock absorber.
jet bushing
Tighten the bolts and nuts. We have this look.
Now about the bonus - adjustment. Firstly, by installing reinforced spacers instead of standard thin ones, I can lower them - 50mm instead of -70mm, because their thickness is just 2 cm more! And look at the last photo - the upper hole in the “house” exactly corresponds to the understatement of -50 mm! If we use the lower hole, the shock absorbers will knock on sunbeds and other uneven surfaces.
Let's say I wanted to change the configuration and lower it by 70 mm. Then I take and place a thin rubber spacer under the spring, get the drawdown to the 2 cm I need, and then twist the shock absorber mount from the top hole of the “house” to the bottom. The result is a working lowered suspension! Moreover, the shock absorber will still have about 1 cm of power reserve, which is to our advantage. Again, there will be no knocking on bumps.
This feature is only possible when using eight-nine “houses”.
Naturally, I tried all these options. I rearranged the springs about five times! “Houses” are like that ten times!) I settled on a lowering of - 70 mm. As a result, I have a lowered rear suspension with the working stroke of the original shock absorbers. It feels like you're driving stock. And as you know, the standard suspension of Zhiguli cars is very comfortable and soft. And these properties can be preserved even by lowering the car. And with a minimum investment!
Thanks to all! Comment! Ask if something is unclear!
PS And lastly (the front is stock!):
PPS There was no need to install an adjustable Panhard rod, the bridge remained in place! =) This happens too)
www.drive2.ru
Features of amplification
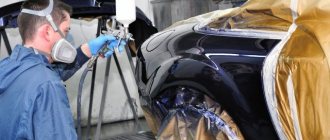
First of all, body strengthening can be done by handymen, those same garage workers who like to tinker independently and successfully, realizing their creative ideas for cars.
Competent body strengthening
True, the strengthening process may not go very smoothly if the homemade product is considered unauthorized interference in the design of the car.
Several options for amplification are considered the most common today.
- Using a good welding machine. As you know, all basic factory welds on modern bodies are made by spot welding. In this case, reinforcement will imply normal welding all the way through using metal overlays along the seam lines. A welding machine will also be needed in combination with other common methods of strengthening the frame, for example, when installing jumpers, spacers, rods, and so on.
- Installation of spacers, rods, jumpers and everything that strengthens the car body. As a rule, reinforcing structures of this type are made either removable or welded. Removable options look more universal, as they are attached to welded lugs with bolts; they can be easily removed at any time.
It will be useful to know that in most cases the front of the car is strengthened. The reason is the high sensitivity of this area of the body to the influence of external forces. The result of strengthening the front of the frame during maneuvers, cornering, etc. becomes especially noticeable.
Front strut bars are just about the most popular upgrade option. The benefits of this method of hardening include sufficient ease of installation, low cost, and aesthetics. But the installation of a tubular frame is regarded as a more complex method.
Most modern manufacturers produce ready-made strengthening kits. It is better to use them in the modernization process, since they do not contradict the original design. The owner can also be confident that the manufacturer has tested and approved the reinforcement elements in practice.
Rigidity frame
You can modernize the car frame by contacting any tuning center. By entrusting the work to specialists in the field of modernization, you can be sure of a high-quality result. Of course, you should not trust some Uncle Petya, but only trusted and recommended centers.
Installing a ready-made set of elements
If the owner decides to use a ready-made set of elements, after preliminary preparation of the car, you can begin installing it. The modern car market provides a huge selection of parts and manufacturers, hard and soft springs and shock absorbers, to suit any lowering. The problem is that not everything fits the VAZ “classic”. But you can find it. The main thing is to clearly decide how much you want to lower the car and in what conditions the car will be used.
Professionals recommend 50 mm as optimal, taking into account the standard of the car. What's good about this option:
- the machine is given sufficient rigidity;
- The car's suspension remains working, the car will not jump over uneven roads.
When selecting finished parts, you should take into account the number of turns of the spring. Fewer turns means lower height, which is important when lowering a car. There are sports sets that have the appropriate characteristics. Among them it is quite possible to choose the right one.
In addition to purchasing a ready-made kit, there is the option of ordering parts with the required characteristics from a specialist. After installing the updated suspension, all components are assembled in the reverse order.
Reinforced front stabilizer
The front stabilizer of increased rigidity is a means designed to significantly improve the quality of vehicle handling.
Its main difference from the standard part is the harder rubber bushings located at the attachment points.
The nuance of using such an element is that it helps improve the ride on smooth asphalt areas, but if you have to drive on a bumpy road, vibrations in the steering wheel will become a real punishment.
Even the slightest impact will be completely transmitted to the steering wheel, which will significantly complicate the driver’s life.
A reinforced stabilizer is quite expensive, and we consider the need for its installation doubtful.
Perhaps, only sports car models that take part in road competitions require it. The average car enthusiast does not need this modification, especially when tuning the VAZ suspension.
Some bad decisions
When a person decides to tune his VAZ 2107, he must be prepared for the fact that he will have to change the characteristics of other parts of the car. In this case, it is imperative to lower the suspension, as it will help maintain stability on the road.
Inexperienced owners use a rather primitive method of how to do this. They simply shorten the spring by about 2-3 turns
. Yes, indeed, the clearance in this case becomes smaller, but such a procedure carries with it a number of negative aspects.
When cutting the springs, there is a high probability that the car will become not just stiff, but super-stiff. In addition, its handling will deteriorate significantly. At the same time, we should not forget about the wear of the chassis, which also increases significantly.
Thus, if a car enthusiast decides to do such tuning on his own, then he has to look for alternative methods that do not have such a detrimental effect on the car.
Effect of Caster Angle on Handling
The size of the tire contact patch with the road depends on the wheel camber. The purpose of camber adjustment is to achieve maximum contact area. Wheel camber affects mainly the wheels located on the outside of the turn, which bear the main load. The caster angle provides a change in the camber of the wheels during a turn. The wheels lean into the turn and are in better contact with the road, counteracting the buoyant centrifugal force.
The smaller the deviation of the wheel's turning axis from the vertical, the more pronounced the car's steering is; the maximum possible steering is achieved at zero caster angle. This is explained by the fact that when the steering wheel is turned, the wheel turns to a larger angle. At the same time, the suspension works as efficiently as possible, because all the levers move up and down in a vertical plane. The shock absorbers also operate at maximum efficiency, better absorbing road imperfections.
With a small caster, there is a possibility of the car's front axle drifting when accelerating out of a corner. This happens because the center of gravity shifts back during acceleration, the front axle is unloaded, and the wheels grip the road worse. Also, a low caster angle impairs wheel self-centering because the force forcing the wheels to remain straight is reduced.
Large caster threatens to demolish the front axle when coasting or braking at the entrance to a turn, since the wheels deviate less to the side. At the exit of the turn, on the contrary, the understeer improves, because The wheels lean more towards the inside of the turn, increasing the contact patch with the road.
Steering wheels for VAZ 2113 – 2115
The VAZ 2113 – 2115 models are created on the basis of modern cars, which ensures comfort and convenience when driving it. The body and chassis are more perfectly designed. Such cars are often left as is, that is, when buying a steering wheel, they choose classic options, with imitation wood and rich leather.
Steering wheel for VAZ 2113, 2114, 2115, option No. 1
Steering wheel for VAZ 2113, 2114, 2115, option No. 2
Some people decide to decorate the interior in a racing style, in which case they choose the most modern models, here you only need to focus on the price, that is, how much you are willing to pay for a new steering wheel for your car. Modern manufacturers produce a huge assortment of car steering wheels, so there is simply no point in describing each of them; there are certain main differences between the models, but in general, any of the proposed steering wheels can be installed on any car produced by VAZ.
The best way
In order to achieve your goal, you definitely need to think about purchasing only high-quality spare parts
, which are created specifically for tuning. They were listed in the tools and materials section. This is the only way to reduce the harmful effects on all parts of your steel horse.
If we talk about other classic models of the domestic automobile industry, then here all the work is carried out in a similar way. Experts also advise using exclusively special parts and not cutting springs.
As for the actual process of installing new springs
, then it is standard, that is, no additional innovations are required. Everything is done in accordance with the rules of standard assembly of the vehicle chassis. Moreover, each individual part is always equipped with a manual, which you need to study in order to do everything really well.
Do not forget about the negative aspects that this procedure brings. The most important thing is that the car becomes much stiffer. This is felt throughout the body. There are also undeniable advantages.
We also recommend reading our article: “Do-it-yourself modifications to the VAZ 2107.”
Do not forget that after carrying out the work, the brake force regulator on the rear axle must be adjusted. If this is not done, the car will consider that it is overloaded. The rear wheels will skid during heavy braking.
Thus, there are two main ways to lower a VAZ 2107. As you can see, simply trimming the springs is ineffective
, as it leads to a decrease in the performance of the machine. It is better to use special spare parts for tuning, since only they can truly replace original components with high quality.
Diagram of the anti-roll bar on the VAZ-2112
The stabilizer is an important part, but you can drive without it. The absence of a stabilizer is not a reason to remove the car from service.
Stabilizer and traction rod
The unit consists of a rod and two rods. Articles:
- 2110-2906050 – rod or stand;
- 2110-2906010 – assembly;
- 10516870 – spring washer;
- 2110-2906040 – pillow;
- 10519601 – washer;
- 2108-2906042 – bracket;
- 2110-2906016 – rod;
- 2110-2906078 – upper rod bushing;
- 15971321 – M10 screw;
- 12164711 – nut M10;
- 16104111 – self-locking nut M8;
- 2108-2906079 – lower rod bushing.
To get rid of the stabilizer, remove the parts shown in the list.
Create an account
Register a new account in our community. It's very simple!
So it’s time for me to look for and weld holes in the body. For almost 30 years, the car went without major body repairs; minor dents and scratches don’t count. I started with what was, in my opinion, the simplest thing - a bathtub under the spare tire. I’ll just say right away that it’s almost impossible to find auto body parts for a penny (only on order and not a fact that they will be delivered). I took the six-wheeler, it’s “almost the same,” but it took half a day to fit it in place. While I took a photo of how I cut out the old one.
cut out with a grinder (welding points are still on the body)
I cleaned up the welding points and found a hole in the wing with a screwdriver...
I had to cut this piece out.
cut it out - made a patch on this piece and already welded it.
We continue the fight against rust and unevenness.
I adjusted and welded the bathtub from 2106 - it’s a little different and doesn’t quite fit, but I inserted it and primed it with filler primer.
Then I took care of the front fender, there was a dent on the edge.
Here is a dent that is slightly disguised with putty.
and two cm of putty at the junction with the door
Such a thick layer, I was too lazy to straighten it, so I just covered it up. The wing tapped from the inside
Somehow it happened and I welded up the holes from the previously installed additional turn signals
the rib is bent, you need to tap.
a little rusty...
Now I tapped and pulled everything out, all with just a hammer and available tools.
The rib is like new, well almost, taking into account the age of 30 years and a couple of accidents. Then I replaced it with a new one anyway, it’s too difficult to weld repair inserts and adjust crooked iron.
Installation of an electric sunroof on a VAZ 2106
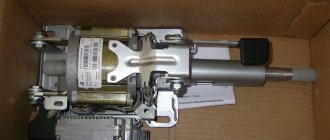
The sliding El was taken as a basis. sunroof from Renault Safrane Task: install an electric sunroof in the roof of a VAZ 2106.
Power steering gearbox (column) for VAZ 2101-2107
Razgon front strut extension for VAZ 2105, 2107
In this article we will write about strengthening the body of VAZ 2101, 2102, 2103, 2104, 2105, 2106, 2107 cars, that is, the so-called VAZ “classics”.
During daily use, any car experiences loads while driving, which over time cannot but affect the geometry of the body. And the older the car, the more noticeable this is. And the once cheerful car suddenly turns into a “loose trough.” Such a “tired” body noticeably reduces the precision of control when turning and gets on your nerves when you hit potholes or other road irregularities. Due to constant pressure on the body, its rapid aging may occur, traces of corrosion may appear, and welds may even come apart. So we have a not very rosy picture. How to be? The answer to our question is precisely the strengthening of the body and chassis of the car.
- reaction rods;
- front suspension arms;
- rear suspension arms;
- engine support cushion;
- propeller shaft support;
- Of course, everyone’s favorite stretching of the front struts.
In addition, strengthening the body has a number of advantages:
- low cost;
- ease of installation and dismantling;
- increase in body life;
- improving car handling.
If you are still wondering whether you need to strengthen the body, then in our opinion the choice is obvious. Of course it's worth it! Moreover, for many people this must be done.
Power unit
Refinement of the dozen would be meaningless without engine modernization. Professionals recommend starting with it. First you need to replace all worn parts and components.
You can also take care of increasing the engine displacement from 1500 to 1600 cubic centimeters.
Replacing the crankshaft
The main method of increasing engine power up to 1.6 liters is by optimizing the piston stroke from the factory 71 mm to 74.8 mm. This procedure is performed by replacing the crankshaft and the pistons themselves. There are different options for replacing pistons:
- installation of forged pistons with dimensions of 82.0, 84.0, 82.5 or 82.4 mm - they can be T-shaped or regular;
- installation of standard machined pistons;
- installation of used pistons 21213 with mechanical modification, which involves replacing the connecting rods for a floating piston pin.
In addition to the popular 74.8mm stroke crankshaft, you can purchase the little-used 75.6mm stroke crankshaft, allowing displacement up to 1,862cc. All configurations fit into a standard block, but the torsional resistance of the motor may be reduced. For this reason, it is better to limit the engine volume to no more than 1.6 liters.
Camshaft replacement
Replacing this part allows you to increase engine power, increase overall technical characteristics and acceleration dynamics. In this case, one factor must be taken into account: replacing all camshaft elements with modernized or sports ones must be replaced as a set. That is, replacing one thing will not give any results.
To remove the camshaft, proceed as follows:
- remove the plastic protection of the alternator belt;
- open the cylinder head cover;
- remove the timing belt, holding the camshaft with a mounting rod (to avoid damaging the cylinder head, you need to place a wooden plate under the mount);
- unscrew the camshaft mounting bolt;
- remove the key with the gear wheel.
Experts recommend numbering the main bearing caps to avoid confusion during reassembly. You can also mark the disc tappets if you are replacing them too. The new upgraded camshaft is installed in the reverse order.
After installing a sports camshaft, the engine will no longer “knock your toes” as before.
Replacing the control unit
This work is also usually classified as general tuning of the VAZ 2110. At the factory, the cars are equipped with old Bosch units, which experts recommend replacing with new ECMs from General Motors.
Self-adjustment
Many car owners, trying to improve the driving performance of their cars, independently change the caster angle. As practice shows, this step is often justified, especially when it comes to domestic cars. It is not uncommon for a new VAZ car to have corners on the left and right that are very different from each other. Even if the discrepancy is within acceptable limits, controllability suffers greatly from this.
On rear-wheel drive Zhiguli cars, for example, VAZ-2105 or 2107, the angle is 3 degrees 30 minutes, plus or minus 30 minutes. On front-wheel drive models, for example, Priora, VAZ-2109, VAZ-2110, this angle is smaller, only 1 degree 30 minutes, plus or minus 30 minutes. If the caster of one front wheel of a VAZ-2105 is 3 degrees exactly, and the other is 4 degrees exactly, which is the norm by factory standards, the car will inevitably pull to the side.
Adjusting the caster angle is done by removing or adding washers on the suspension braces. The maximum number of washers allowed is two in the front and four in the rear, with the addition or removal of one shim changing the caster angle by 19 minutes. When adding washers, it is necessary to turn them over with their chamfers facing the thrust end of the stretcher.
Of course, this procedure cannot be carried out in a garage. Adjusting the caster angle is carried out only in conjunction with adjusting the camber and toe of the wheels, otherwise the suspension settings will be disrupted and the car may behave completely unpredictably.
To increase it, tuning enthusiasts remove the standard strut supports and install SS-20 supports instead. on front-wheel drive VAZ cars, including Priora, such a replacement, coupled with installing the maximum number of washers, allows you to increase the angle to 3 degrees. At the same time, the controllability of the car changes noticeably, the overall effect is positive.
Often, to improve handling, it is enough to simply replace the strut supports with the same ones. Despite the fact that the caster angle will not change significantly, the result will be, as they say, obvious. It's all about physical wear and tear. A signal that the supports need to be replaced is a low, thumping sound that occurs when driving on an uneven road at low speed. You can confirm the diagnosis by rocking the car and seeing if the struts dampen vibrations equally on the left and right sides. If not, you need to change the supports.
When choosing new strut supports, you should not choose the cheapest ones. It's better to buy either standard ones or SS-20. The latter are much more expensive, but they will also last much longer, and due to the fact that replacing supports is a complex and time-consuming task, the overpayment may be completely justified.
Didn't find the information you are looking for? on our forum.
We recommend reading:
The VAZ 21124 engine gets hot in traffic jams, reasons, signs of an overheated engine, what to do
VAZ 2114 does not click the fuel pump relay, how to diagnose a breakdown, pump repair, catalog numbers
Crankshaft damper pulley VAZ 2110
How to connect an alarm system to a VAZ 2107
BC Multitronics for VAZ 2114, why is it needed on the car, connection
The heated rear window of the VAZ 2110 does not work, what is the reason?
How to improve brakes on a VAZ 2110
Electrical circuit, fuses and relays VAZ 2101
↑ Elements of the front suspension of the VAZ 2106
- 1 – hub bearings;
- 2 – hub cap;
- 3 – nut;
- 4 – steering knuckle axle;
- 5 – cuff;
- 6 – hub;
- 7 – brake disc;
- 8 – protective cover of the upper ball pin;
- 9 – upper ball pin;
- 10 – bearing (liner) of the upper support;
- 11 – upper lever;
- 12 – compression stroke buffer;
- 13 – spring insulating gasket;
- 14 – shock absorber;
- 15 – shock absorber mounting pad;
- 16 – axis of the upper arm;
- 17 – rubber bushing of the hinge;
- 18 – outer bushing of the hinge;
- 19 – adjusting washers;
- 20 – suspension cross member;
- 21 – stabilizer bar cushion;
- 22 – stabilizer bar;
- 23 – axis of the lower arm;
- 24 – lower arm;
- 25 – clip for fastening the stabilizer bar;
- 26 – spring;
- 27 – rubber bushing of the shock absorber spring;
- 28 – lower spring support cup;
- 29 – steering knuckle;
- 30 – lower ball pin race insert;
- 31 – lower support bearing;
- 32 – lower ball pin.
The front suspension is independent, double wishbone, with a coil spring, telescopic hydraulic shock absorber and anti-roll bar.
Upper and lower arms
The axis of the lower arms is secured with two bolts to the cross member, which in turn is attached to the front side members. Between the axle and the cross member, two packages of spacer washers and shims are installed, which set the angles of longitudinal and transverse inclination of the front wheel turning axis.
The axis of the upper arms is a bolt passing through the mudguard strut. The levers on the axles rotate on rubber-metal hinges. The steering knuckle is attached to the arms on ball joints. A wheel hub with a brake disc is mounted on the steering knuckle axle on two tapered roller bearings. The right wheel hub nut has a left-hand thread and is marked in the form of dots on the end.
Springs and shock absorbers
The front suspension springs are of a cylindrical type; their upper end rests against the mudguard strut through a support cup with a rubber gasket, and the lower end rests against the support cup of the lower arm.
The shock absorbers are located inside the springs and are attached by the rod to the body through rubber pads, and by the eye of the body to the lower arm through a rubber-metal hinge.
The anti-roll bar (spring steel torsion bar) is designed to reduce the lateral roll of the car when cornering. It is attached through rubber cushions with the central part to the front side members of the body, and the ends to the lower suspension arms.
Preparing for replacement
But there are certain features in the replacement. The fact is that all silent blocks are installed in the holes of the levers with interference, that is, they fit very tightly and are not easy to remove. For this purpose, special pullers are used to press out and press in the hinges.
Additionally, a ball joint remover may be required.
There are many methods for performing the operation without these pullers, and we will consider one of them using the example of a VAZ-2107 car.
Tools you will need:
- Set of spanners and sockets;
- Mount;
- Heavy hammer or small sledgehammer;
- WD-40;
- Jack;
- Wooden stands;
- Soap solution;
- Nigrol.
A few words about the selection of silent blocks.
They need to be selected according to the car model. At the same time, the market offers two types of these hinges - some use rubber as a damping spacer, and others use polyurethane.
The latter are more reliable and have a longer service life, but also cost more. Which type to choose is up to the car owner to decide.
Adaptations.
The method that will be described below requires the presence of a puller for silent blocks, but it will only be needed to replace the hinges of the upper arm.
At the same time, you don’t have to buy the device; you can make it yourself.
To do this, you will need a long bolt with a nut, two wide washers and two pieces of thick-walled pipe of different diameters.
One size should be larger than the circumference of the silent block (used when pressing out).
The second segment along the inner diameter should correspond to the circumference of the hinge, but so that the pipe wall rests against the metal side of the outer ring (used for pressing).
How to properly lower a VAZ 2101, 2106, 2107
I welcome you, dear readers, to the website about tuning and repairing VAZ cars, or, more simply put, . In this article we will talk about such a common tuning as lowering a car with your own hands , and most importantly, how to do it correctly with less harm to your car. Let's first look at what methods exist to lower your car .
- 1. The simplest is sawing the springs.
- 2. Special suspension with lowering.
- 3. Air suspension.
Of all these methods, we will consider the first and partially the second method since they are the simplest, fastest and cheapest, although not entirely correct, since after this the suspension will lose its, therefore, not the best properties. So, for the first method (regular sawing of springs) you will need a minimum of tools, namely a wrench for unscrewing wheels, springs (sold in many car stores and auto markets) and a grinder.
With their help you will have to make understatements . I think there is no need to explain to you how to work with all this tool, since there is nothing complicated here, you just need to remove the springs from the car and cut them straight, try so that after sawing the springs, the front and back of the car are as smooth as possible same height. Why is this method the worst available? With such a lowering , your suspension will not work quite correctly, since you still have old shock absorbers that are longer than your sawn springs, and if you get into a nice hole, the length of the spring is not enough to properly handle the unevenness; in other words, when lowering you need to do this so that the length of the spring and shock absorber is as equal as possible. This is where the second method comes to our aid, but partly because we only need lowered shock absorbers, and not the entire set, which also includes lowered springs. As a result, we get a third option that combines the first and second and will be correct, albeit more expensive than the first option. In this case, let’s say we take -70 shock absorbers and cut our old springs along their length and even get a very good lowered suspension that will cope well with uneven asphalt and, most importantly, please your eyes, as well as the eyes of passers-by. I also recommend that you do this after lowering , so that you can adjust the rear axle in the center, since when lowering, the axle goes to the side, good luck. If you have any questions, ask us in the comments, and also join our VKontakte group.
portalvaz.ru
How to raise or lower the suspension of a VAZ car with your own hands
Sooner or later the time comes to modify the car’s suspension, or, more simply, the motorist is ready to tune the suspension of his VAZ
It doesn’t matter what the reasons are that the motorist decided to raise or lower the car’s suspension: both suspensions are possible, or only the front or rear
You need to understand what responsibility the motorist will have if he decides to lower or raise the car’s suspension. Technologically, lowering or raising a car's suspension is not that difficult, even if the driver has little experience as an auto mechanic. The meaning is different.
How to lower the suspension of a VAZ car
Tuning a car's suspension has some features. Before you lower or raise your car's suspension, you need to think about what the results will be after modifying the suspension. You need to understand that changing the factory standard parameters of the car will lead to a change in the physical properties that were originally included in the design.
Lowering the suspension not only improves the vehicle's handling, but also changes the appearance of the car. There are some peculiarities in lowering the suspension. When lowering, the motorist reduces the ground clearance (clearance). You also need to understand that when the suspension is lowered, the car will not drive on German autobahns and European roads.
There are potholes on our roads, and you will also have to cross tram rails. First, to lower the suspension, you must first diagnose the suspension and calculate the installation gaps between the wheel arch and tires.
It should also be taken into account that the tires will have to be changed to low-profile with high-profile
This is important to consider
Before raising or lowering the suspension, it is worth taking into account popular experience, which shows that all suspension components need to be changed at the same time. If you change suspension elements selectively, this will give the opposite results
How to raise the suspension of a VAZ car
If the car suspension is raised, then you need to make sure that the car does not lose its characteristics. The main suspension components need to be replaced:
- Shock absorbers, when replacing there is no need to do anything on your own. In the catalog you need to select those shock absorbers that the manufacturer offers for a specific car model.
- But to raise the suspension, stiffer and shorter shock absorbers are chosen.
- Anti-roll bar. It is better to change the stabilizers together with the struts.
- The springs are chosen to be stiffer and shorter.
The suspension of a VAZ car is raised for several reasons. As a rule, car owners decide to raise the suspension in 2 cases: to increase load capacity and increase ground clearance (cross-country ability). Most often questions arise about how to properly raise the rear suspension. There are lift kits on the market today for different car models. These kits allow you to raise the suspension to a certain height.
We must not forget that an increase in vehicle clearance is accompanied by some changes in the physical properties of the car. For example, the center of gravity increases. This may negatively affect the vehicle's performance when cornering at certain speeds.
The important thing is that before you raise or lower the suspension yourself, you need to take into account a very important value - weight redistribution, which matters when turning the car
Weight redistribution is affected by lowering the center of gravity and increasing the distance between the wheels. Increasing the distance between the wheels is done by switching to wider tires. But this method is limited by the dimensions of the car. Lowering the vehicle's center of gravity can be achieved by installing short struts. This reduces the suspension travel. The racks must be chosen sufficiently rigid.
If the motorist is not ready to calculate all the relationships between parts, physical properties of the car and suspension components, then in order to raise or lower the suspension, you need to choose the second option - purchasing a complete suspension package for a specific car model. On request, as a rule, there are various proposals for modifying the suspension. Specialists will select components for the VAZ based on their preferences and the requirements of the car owner.
But you will need to install them yourself. If you think that raising or lowering a car’s suspension is just a matter of replacing springs and shock absorbers, then this will be a big mistake. Suspension tuning requires making changes to the type of tires and wheels, calculating how the behavior of the car will be affected by changing the suspension. This is provided that the result of the modification is necessarily positive.
xenon-kiev.com.ua
How to properly lower a VAZ 2101, 2106, 2107
01/04/2015, Category suspension |
I welcome you, dear readers, to the site about tuning and repairing VAZ cars, or, more simply put, how to build a cramp yourself. In this article we will talk about such a common tuning as lowering a car with your own hands , and most importantly, how to do it correctly with less harm to your car.
Let's first look at what methods exist to
lower your car .
- 1. The simplest is sawing the springs.
- 2. Special suspension with lowering.
- 3. Air suspension.
Of all these methods, we will consider the first and partially the second method since they are the simplest, fastest and cheapest, although not entirely correct, since after this the suspension will lose its, therefore, not the best properties. So, for the first method (regular sawing of springs) you will need a minimum of tools, namely a wrench for unscrewing wheels, springs (sold in many car stores and auto markets) and a grinder.
With their help you will have to make
understatements
.
I think there is no need to explain to you how to work with all this tool, since there is nothing complicated here, you just need to remove the springs from the car and cut them straight, try so that after sawing the springs, the front and back of the car are as smooth as possible same height. Why is this method the worst available? With such a lowering , your suspension will not work quite correctly, since you still have old shock absorbers that are longer than your sawn springs, and if you get into a nice hole, the length of the spring is not enough to properly handle the unevenness; in other words, when lowering you need to do this so that the length of the spring and shock absorber is as equal as possible. This is where the second method comes to our aid, but partly because we only need lowered shock absorbers, and not the entire set, which also includes lowered springs. As a result, we get a third option that combines the first and second and will be correct, albeit more expensive than the first option. In this case, let’s say we take -70 shock absorbers and cut our old springs along their length and even get a very good lowered suspension that will cope well with uneven asphalt and, most importantly, please your eyes, as well as the eyes of passers-by. I also recommend that after lowering you make an adjustable panhard rod so that you can adjust the rear axle in the center, since when lowering the axle goes to the side, good luck.
If you have any questions, ask us in the comments, and also join our VKontakte group. vazkorch.ru
Front suspension - complete assembly
The photo shows what the right disc suspension looks like. It is easy to recognize the telescopic post 6, as well as the lever 3. Both of these parts form the basis of the assembly.
Suspension parts assemblies
We list the main parts in ascending order of number: 1 – anti-roll bar; 2 – stabilizer rod; 3 – suspension arm; 4 – ball joint; 5 – steering knuckle; 6 – suspension strut; 7 – stretch (saber); 8 – extension bracket.
The photo does not show the swing arm, but here it is attached to the shock absorber, that is, it is part of it.
The main part is a strut with a shock absorber
Everything that is indicated above by the number 6 consists of several parts. Let's list them.
Strut
The numbers indicate the elements:
- 2108-2901056 – metric nut M14;
- 2110-2902760 – cup;
- 10519601 – washer;
- 16105021 – self-locking nut M12;
- 2110-2902816 – bump stop;
- 2110-2905003 and 2110-2905002 – shock absorber left and right;
- 2110-2902826 – body;
- 2108-2901052 – washer for screw;
- 15540931 – M12 screw (before 07.2001);
- 2108-2901051 – lower screw (after 07.2001);
- 2110-2901054 – cap;
- 2110-2902842 – washer;
- 2110-2902830 – screw;
- 2110-2901032 – washer;
- 2110-2902820 – upper support (pillow);
- 2112-2902712 – suspension spring;
- 2112-2901031 and 2112-2901030 – left and right rack;
- 2110-2905681 – boot;
- 2108-2901050 – screw with eccentric;
- 16104111 – self-locking nut M8;
- 2108-2902840 (-01, -02) or 2110-2902840 (-01) – support bearing.
Some station wagons and sedans have racks 2110-2901030 and 2110-2901031. But then springs 2108-2902712 are used. But the parts marked with the number 21 are interchangeable.
Dismantled rack
Rounded fist
Let's consider one important unit, consisting of a minimum number of parts.
Steering knuckle with hub bearing
From the appearance of the unit it is clear what and how it is attached to. Let's list the articles:
- 2108-3103020-01 (-02) – wheel bearing;
- 2108-3103068 – sealing ring;
- 2108-3001060 – dirt lining (internal);
- 2108-3103012 – hub;
- 2108-3103079 – bearing element (washer);
- 2108-3103032 – retaining ring securing the bearing;
- 2108-3001061 – dirt protection pad (external);
- 2110-3103065 – decorative cap (after 01.2003);
- 2108-3103065 – decorative cap (until 01.2003);
- 2108-3001015 and 2108-3001014 – left and right fist;
- 2108-3103061 – hub mudguard;
- 14044271 – self-locking nut M20.