How to remove the windshield on a VAZ 2109, glass removal and installation
How to remove and install rear window
Removing the rear window is similar to the front fragment, only removing the rubber seal should begin not from the middle, but from the edges in the upper part. After the tape is pulled out along the top layer, the auto glass is removed in or out. The rear window is installed on a VAZ model 2109 using a rope or cord. Algorithm of actions:
- The rope is inserted into the frame to the middle, into the groove, which will be closer to the outer glass part.
- On the other side, a similar operation is carried out. The rope cords must cross. Drowning into the groove until it stops.
- The auto glass is placed in the opening. The structure is slightly pressed: not inward, but downward.
The finish is the removal of the rope. It should not be pulled vertically, but horizontally. The seal is being installed. It should first be wetted so that it becomes soft. After drying, the material will harden and fix the edges of the glass.
Required Tools
First you need to select a new canvas. Craftsmen recommend choosing double glass with a polymer layer or single-layer tempered stalinite. Required equipment and related materials:
- nylon cord - about 5 meters;
- rubber hammer;
- slotted screwdriver;
- sealant;
- anti-corrosion agent and primer.
Preparation involves choosing a comfortable room for work; you also need to select equipment, purchase new glass and dismantle the old fragment.
You can put the old seal on the glass or purchase a new element to make the job easier.
Installing new glass
Let's figure out how to correctly insert the rear window on a VAZ- 2109 . You will need strong rope and a screwdriver. Insert the center of the cord into the middle of the upper half of the seal.
Subscribe to our feeds on social networks such as. VKontakte, Instagram. Yandex Zen, and Telegram: all the most interesting automotive events collected in one place.
Removing the seal
Before installing a new one, the old windshield of the VAZ 2109 must be carefully dismantled. To do the replacement yourself, you will need a slotted screwdriver with a slot width of 10–12 mm. If you plan to reuse the seal, make sure the screwdriver is relatively dull so as not to injure its blade. Before replacing the windshield, it is recommended to remove the windshield wipers. Even bent, they create interference.
READ Temperature sensor VAZ 2109 injector where is it located
Start dismantling the windshield on a VAZ 2109 from inside the cabin, from the middle of the top edge. In profile, the seal resembles the letter “H”. Between the lower halves of the legs of this letter is the edge of the windshield, and between the upper halves of the legs is the edge of the frame, smoothly turning into the roof of the body. You must carefully press the upper leg of the letter “H” closest to you and push it out of the body. Both legs of the upper part of the seal profile will be on the outside of the frame, and you will see the exposed metal of the edge of this frame.
After pushing out the first section of the seal, expand the area step by step. The most difficult step is the first, then the seal goes out almost without resistance. With a little luck, you can push the edge of the seal out without damage. Expand the removal area gradually in both directions from the center until the upper corners of the windshield are free.
If you are replacing the side glass of a VAZ 2109 located behind the rear door, start from the middle of the long side.
Replacing the rear side glass on a VAZ 2101-VAZ 2107
Welcome! The rear side window of a car - it can break in different situations, for example, it can break if you hit it with a ball or if you just slam the door hard, besides, there are a lot of thieves and different people walking along the streets of our cities, trying to take possession of anything strangers stealing it from the first car they come across, but in order to get into the car they basically break its windows, or if a more experienced person, then use a special hook and sleight of hand to open the car.
Note! In order to change the side window of a car door, you will need tools with which you will remove parts to get to it, these tools include: A set of wrenches and two different types of screwdrivers!
Note! We will give you advice for the future so that you then know what to do in that situation when a crack appears in the glass, namely, have you ever noticed that after a crack appears on the glass, over time it goes a little further until it reaches the end of the glass, so So that this doesn’t happen and you don’t have to immediately go to a service center or garage and replace the glass with a new one, you can extend the life of the old glass, to do this, using a cutter used to cut glass, make a strip across which the previously formed crack will rest against, and thereby She won’t go any further all over the glass!
How to replace the rear side glass on a VAZ 2101-VAZ 2107?
Removal: 1) At the beginning of the operation itself, you will need to get to the window lift mechanism, because in order to remove the glass itself from the car, you must first loosen the window lift cable and remove the glass groove, but in order to loosen the cable and remove the groove, you first need to get to them by removing To do this, cover the trim from the car door on which you are replacing the glass. (For information on how to remove the trim from the door, see the article using the example of removing the trim from the front door; you can see this example in the article called: “Replacing the front glass on a car”, see points 1-4)
Note! Before you start removing the trim, unscrew the button that locks the car door by hand or using a screwdriver (see photo 1), and when the button is unscrewed and removed, unscrew the screw that secures the window sill trim in the front part (see photo 2 ) if you have it of course!
2) Then, when the trim is removed from the door, you will need to remove the protective film, which you may or may not have at all, this film covers the entire window lifter mechanism from dirt getting on it, and this protective film is attached to the adhesive tape by peeling it off , you can easily remove the film from the car door.
3) Now proceed to removing the window sill, there are only four plastic holders that secure it, disconnect all these holders from the door using a screwdriver and then you can remove the window sill from the car door.
4) Next you will need to remove the rear glass groove, to do this, first disconnect the plastic clamp from it (It fits into the hole) that attaches the rod to the groove and after the clamp is disconnected (see photo 1), pick up a wrench and use it to completely unscrew the nut and bolt that secure the rear channel to the car door and then remove it (see photo 2).
5) After removing the groove, insert a handle with which you can lower and raise the window of the car, but only the trim and rosette of this handle do not need to be installed, just put one handle in its place and, holding the glass with your hand, lower it to the very bottom until it stops .
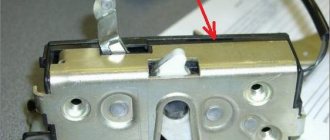
6) Next, unscrew the two screws that secure the pressure plate (Indicated by the red arrow), which in turn firmly fixes the cable and does not allow it to go anywhere.
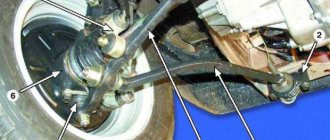
7) When the screws securing the plate are unscrewed and the plate itself is removed, use a wrench to slightly loosen the nut that secures the tension roller (see photo 1), and after loosening the roller will move and thereby the cable itself will weaken a little; after the cable has loosened, you will need to remove it from the tension roller and from the lower roller which is indicated by the red arrow.
 Now use a screwdriver to pry up the chrome inner glass trim and then remove it so that it does not interfere with the removal of the glass; you need to remove it through the top of the car door.
9) And to finish removing the glass, first unscrew the screw that secures the fixed glass to the car door (see photo 1), then completely or just a little (at your discretion) remove the upper seal of the sliding window as shown in photo 2, then tilt the fixed glass forward and remove it and finally lift the sliding glass to the top and tilt it inward, also remove it from the car door (see photo 4).
Installation: Installation of the new glass and all previously removed parts is carried out in their place in the reverse order of removal, but there is only one But! Namely, after installing the new glass and assembling the entire mechanism (assembling the mechanism includes putting the cable on the tension roller, installing the rear groove, etc.), check how your glass works, how it rises, if necessary, adjust the position of the glass groove , and also tighten the cable by moving the tension roller tighter.
READ Replacement of rear brake pads of Opel Zafira
Side glass replacement process
To change the side glass on a VAZ 2109, you need to prepare a screwdriver, as well as size 8 and 10 keys. The rear left door consists of an armrest, a window sill, side and turning glass, a window lifter handle, as well as a handle for the internal lock drive. Now let’s pay attention directly to the list of necessary work, without which it is impossible to change the glass:
- Before starting the process, the glass must be set to its upper state. Using a screwdriver, pry off the upper plugs of the upper fixing screw of the armrest.
- The three fastening screws of the armrest are unscrewed, after which the element itself is dismantled.
- Using a screwdriver, bend the socket of the handle of the installed window lifter from the upholstery.
- The cladding slides along the handle, which is subsequently dismantled.
- The window lifter handle with socket is removed.
- Use a screwdriver to pry up the lining of the handle of the internal lock drive.
- The door trim is pryed with a screwdriver in the area where the holders are located, then it is removed.
Note! The upholstery is attached to the door using 7 plastic holders.
- The protective film is turned upward and pressed against the side glass.
- Remove the two fastening screws of the glass chute. The gutter cannot be removed separately as it is attached with a seal.
Replacement of rear side windows of VAZ 2109
- Unscrew the fastening nut of the front chute, after which it is dismantled.
- Put on the window lifter handle (see How to install a window lifter on a vase yourself), then lower the glass down into the stop until it stops.
- Remove the two screws from the glass pressure plate, carefully removing the pressure plate.
Note! The glass is placed on the limiter in the same position.
- The fastening nut of the window lifting cable tension from the roller is weakened.
- The branches of the cable are compressed, its tension is weakened, and the cable located on the guide roller below is dismantled.
- The glass is removed from the stopper and lowers down, moving forward by 10 cm.
- The lower edge is slightly tilted towards itself, the glass is carefully moved through the door trim and removed downwards.
- New glass is first installed in prepared seals, and only then in the door frame.
- It is leveled and lowered into the limiter, secured with a screw from the pressure plate. Install the cable on the previous rollers.
Side rear window of VAZ 2109
- The front gutter is mounted so that the fasteners engage well with the guide element of the turning glass.
- The rear chute is mounted so that its upper part, together with the nut, easily fits under the side door frame.
- The side glass is placed in the gutters. The fastening screws of the rear gutter are screwed together with the fastening nut of the front.
- The window lifter handle is turned as far as possible in the direction of lowering the glass. The cable is tensioned well, the tension roller moves and its fastening nut is tightened.
Replacing the side one on a VAZ 2109
- The remaining parts that were removed to replace the glass are mounted in the opposite sequence.
Note! The window lifter handle should be placed so that with the glass raised to the limit, it deviates from the vertical to approximately 45 degrees forward.
Add a commentAdd a comment We recommend readingHeated rear window of a VAZ 2110: design and repairReplacing the rear window of a VAZ 2109: how to do it correctlyRemoving the windshield of a VAZ 2109:how to do it correctlyVAZ 2109: replacing a window lifter on your own
Glass (side, windshield and rear) is an invariable attribute of every car. Their main purpose is to provide the motorist with the necessary visibility and protect them from negative environmental influences (rain, cold, heat, hail, and so on). In fact, it is thanks to the glass that complete comfort in the cabin is ensured.
Cons of glass
But glass (especially side glass) has a big drawback - it is sensitive to mechanical stress. Thus, even a small stone hitting one of the side windows can lead to a crack or complete destruction of the surface. In such a situation, the only way out is replacement. Many car enthusiasts go to a service station and shell out considerable sums for the work of a master. What for? Replacing the front or rear windows on the doors of VAZ-2108-21099 cars is not difficult. The main thing is to strictly follow the instructions and have the necessary tools at hand.
We replace the front windows on a VAZ-2108-21099 along with a window regulator
The first thing to start with is to buy replacement glass. It is advisable to give preference to the product for your car model (this point can be clarified with a consultant in the store). In this case, the damaged glass must be removed as carefully as possible.
Before you start disassembling the glass, be sure to remove the door trim and remove the rear view mirror (it will interfere with operation). Then proceed in the following sequence:
- Remove all seals from the glass (both external and internal).
- Remove the latches of the protective film and remove the latter (this can be done using a screwdriver).
- Pull the top of the seal off the glass.
- Raise the window using the handle until the window lifter slider mounting bolts are accessible. After this, unscrew the bolts and hold the glass.
- Lower the glass to the very bottom until it stops.
- Unscrew the nuts that secure the window regulator.
- Remove the middle mounting nuts that hold the lift guide in place.
- Unscrew the nut holding the lower part of the guide mount.
- Unscrew the nut holding the upper part of the guide mount. At the same time, hold the window regulator.
- Carefully remove the window regulator from the doorway.
- Turn the glass a little and remove it through the top of the opening.
- Immediately pay attention to the quality of the clip. If the glass surface does not fit tightly or there are obvious signs of damage on the frame, then it is better to immediately make a double replacement (that is, change both the glass and the frame).
If you are planning to change the window regulator, be sure to look at the markings on the bracket. Usually this place indicates which vehicle the device is intended for. For example, on the window regulator for the “eight” there will be VAZ-2108, and on the “nine” - VAZ-2109 and so on. In addition, after the main inscription there will be two more numbers - they indicate the type of glass (right or left).
- Install the new glass and window regulator in reverse order.
- Check the functionality of the device. Make sure that the glass opens and closes normally, without excessive force or distortion.
We replace the rear windows on a VAZ-2108-21099 along with a window lifter
When replacing rear windows, the sequence should be as follows:
- Lower the glass to the very bottom, all the way.
- Remove the trim from the door on which the glass is being replaced (the principle here is the same as on the front door).
- Remove the glass seals (top and bottom). The sequence doesn't matter.
- Remove three fasteners (two of them are located at the top, and one at the bottom). A screwdriver is enough to remove them. Remove the protective film from the door.
- Unscrew the two mounting bolts that secure the glass frame to the window regulator slider. Hold the glass while performing this work.
- Unscrew the three lift guide fixing nuts (two located slightly below, one above).
- Unscrew the nuts that hold the window lift mechanism.
- Carefully remove the window regulator from the door so as not to damage the mechanism. Inspect it. If there are defects, replace them.
- Remove the seal located on the outside of the glass (without this, further work will not be possible).
- In the same way, remove the seal located on top of the door.
- Turn the surface of the glass and carefully remove it through the top. If it is damaged, be very careful (it may fall apart when dismantled). It's better to wear gloves to avoid accidentally hurting your hands.
- Make sure that the glass is pressed tightly against the frame and that there are no obvious gaps. If there is obvious damage to the clip, it is best to replace it immediately along with the glass. Otherwise, after the first rain and detection of a leak, you will have to remove the glass again.
- Install the glass on the car, return the window regulator and seals to their place. Screw all the screws into place and then check the operation of the mechanism (before installing the casing).
If necessary, treat the window lift cables with a special lubricant (in case of replacing any of the front or rear side windows).
Inspect the quality of the glass rise, the absence of distortion, and the tightness of contact with the frame. If there are no complaints, then you can safely finish the work and be proud of your achievement.
Conclusion
Changing the side windows in the front and rear doors and replacing (if necessary) the window regulator is a matter of a maximum of 30-40 minutes per glass. At a service station they may ask for 1,000-2,000 rubles for such work. Thus, when replacing it yourself, the savings are significant. All that remains is to decide on this step, buy replacement glass, prepare a minimum set of tools and act. Good luck.
Home•Vaz•2109•Body
In order to remove the rear door on a VAZ 2109, follow these steps:
Open the door and remove the two bolts securing the limiter bracket to the B-pillar
Unscrew the two bolts securing the upper and lower door hinges to the B-pillar and remove the door. Installation of the VAZ 2109 rear door is performed in the reverse order of removal. Before final tightening the bolts securing the hinges to the B-pillar, close the door and position it so that the gaps in the openings around the entire perimeter are the same. Then carefully open the door and finally tighten the fastening bolts.
Replacing the window regulator and glass on a VAZ 2109
In order to install the rear door glass on a VAZ 2109 or replace the window regulator, follow these steps:
Lower the window all the way down and remove the rear door trim in the same way as removing the front door trim. The photo shows the location of the rear door trim mounting pins
Remove the inner lower glass seal
Remove the three holders, two on top and one on the bottom, using a screwdriver. Remove the rear protective film from the door
Unscrew the two bolts securing the glass frame to the window lifter slide, holding the glass. Carefully lower the glass down
Unscrew the two lower and one upper nuts securing the window lifter guide
Unscrew the three nuts securing the window lift mechanism
Remove the window regulator from the door
Remove the outer lower glass seal
Remove the upper seal of the rear door of the VAZ 2109
Turn the glass back and remove it from the door
Check the tightness of the glass in the frame. If the clip does not fit tightly, replace the glass along with the clip. Installing the rear door glass of a VAZ 2109 with a window lifter is performed in the reverse order of removal.
Replacing the rear window on a VAZ-2109
The rear window of a car is a real assistant for the person behind the wheel. It is through it that you can see everything that is happening from behind and correctly assess the situation. But glass is a very fragile material and if a stone or other heavy object hits it, it can crack or crumble into many tiny pieces. As a temporary solution, you can seal the opening with thick film. But this, of course, is not a solution. In the future, the rear window still needs to be replaced.
Many car enthusiasts put off this work until later, fearing serious costs. In fact, all that is needed is to find money to buy new glass and glue. The rest of the work can be done with your own hands within 1-2 hours.
Replacing the rear window on a VAZ-2109
After this, prepare the necessary tools. To work, you will need new glass (this is logical), special glue (the best option is a 2-component composition), a new rubber seal (you will have to throw away the old one), a string for cutting glass, special suction cups (necessary for holding and lifting the glass). In addition, you will need tape, a knife, sandpaper and solvent.
It is advisable to work in a well-lit room with sufficient space for maneuver. If the weather is good outside, you can set up right next to the garage. The help of a partner when replacing the rear window is very desirable. It is extremely difficult to cope with such work on your own.
So, after carrying out the preparatory activities, you can proceed directly to the work. Here you need to go through three stages:
- Remove old glass. This work is done in the following sequence:
When performing work, be very careful and try not to touch the car body (otherwise you will have to restore it as well).
- Prepare the opening for installing new glass
Once the old glass has been removed, do not rush to immediately “sculpt” a new one. It is advisable to perform several useful manipulations:
Before installing the lock, it is advisable to pull it a little. Otherwise, its length may not be enough. The wedge is installed as follows. Install the long section first, followed by the short section. If some part of the wedge remains unused, then it is better to cut it off. Otherwise, it will interfere with further work.
When might it be necessary to install new glass? There are two options here - the old glass is damaged or you decide to apply tint. In the first case, everything is clear - you can’t do without a replacement. If we are talking about tinting, then it is better to do this work without dismantling. As practice shows, it is almost impossible to remove the rear window without damage.
Before installation, prepare a thick piece of rope. The length should be such that the rope completely encircles all sides of the rear window. Pay special attention to the quality of the rope - it should be tight. If it breaks during work, it will be extremely difficult to remove the torn piece from the seal.
So, the sequence of actions is as follows:
The final shrinkage of the glass occurs within 3-4 days. This is facilitated by vibrations that are inevitable during movement.
That's all. With the help of such simple instructions, you can install the rear window on a VAZ- 2109 and save a considerable amount. Good luck.
Removing old glass
To begin replacing the rear window in cars, the vases follow from the sealant grooves. To do this, you will need a flathead screwdriver to pry out the sealant seal from inside the glass. After that we'll just pull it out.
Then, using a screwdriver, press the frame seal as far as it will go on the outside of the glass. After this, we do the same on the inside of the frame. Having freed the glass, we move on to the extrusion process. For what we call help a friend who is smoking on the sidelines and ask him to keep the glass outside. They themselves squeeze (push gently, but with force) the rear window from the inside.
An easy way to remove glass
Even a schoolboy can handle the trunk lid.
window replacement
on the trunk lid 2109.
You will not be able to release the glass from the frame the first time. Despair and hysteria are not worth it, but will once again be suitable for a screwdriver on the seals. Then try squeezing the glass again. He will continue to resist, but eventually he will pop out. Briefly rejoicing at this circumstance, we proceed to install the new glass.
Replacing the windshield on VAZ 2108, VAZ 2109, VAZ 21099
Welcome! Most people who periodically use their car have their windshield deformed from time to time, most often this happens from a stone hitting it, a bird flying past, or an accident. The windshield of a car plays a very important role; it creates additional rigidity for the car body, which has a very positive effect in the event of a collision.
Note! It is not recommended to leave a car without the glass removed for a very long time, because if the windshield is missing for a long time, the car body may become distorted; of course, you won’t see anything by eye, but this will make itself felt when installing a new glass!
What other glasses can be replaced using these instructions? Using this article, you can replace other fixed windows on a Samara family car in exactly the same way, since their replacement is carried out in the same way; fixed windows include:
How to replace the windshield, also known as the windshield, on a VAZ 2108-VAZ 21099?
Note! The glass on the Samara family car is secured with a rubber seal and therefore it is much easier to remove, unlike more modern cars, for example the VAZ 2110, on which the windshield is directly glued into the body!
1) First, in order to successfully remove the old windshield, remove the wipers from the car. (How to remove wipers, read the article: “Replacing windshield wipers”)
2) Now use a screwdriver to unscrew the screws that secure the side pads on both sides.
4) Now tuck the edges of the rubber glass seal behind the body.
Note! After the edges are tucked in, press the upper corners of the glass from the interior and gently push it out. The blown-out windshield should be taken care of by an assistant standing outside!
Note! Before installing new glass, inspect the rubber seal for defects and, if possible, replace it with a new one. But installing a new seal on the glass will be much more difficult, because as a rule, the old seal is more elastic, and therefore can be installed on the glass much easier!
1) At the beginning of the operation, rinse the grooves of the rubber seal with water and then blow it with compressed air, thereby drying it completely from water.
2) After this, put the rubber seal on the windshield.
Note! After the seal is installed, lubricate the seal groove with WD-40 or something similar, or with soapy water!
3) Then use a strong cord or rope, and then, by hand or using a screwdriver, insert it all the way strictly into the first groove of the seal, which is located closer to the inside of the glass. (If you don’t understand which groove we’re talking about, then play the video below, and you’ll find out everything in detail)
Note! When the rope is completely recessed into the first groove, be sure to close it so that the ends of the rope overlap at the very bottom of the glass!
4) Next, install the glass together with the rubber seal in the opening in its place. When installing, make sure that the ends of the rope are inside the cabin.
5) Next, ask an assistant to lightly press the glass from the outside to the opening, while you gradually pull the rope out of the seal from the inside.
Note! When you begin to pull the rope, make sure that the edge of the seal is pulled over the edge of the opening. For greater confidence, you should press with your hand from the outside the place where you are pulling the rope from the inside!
Additional video materials: Removing the windshield from the car is not difficult, but installing new glass in this place will require some effort. Below we have prepared a video that describes in detail the entire process of installing new glass.
READ Replacement of Rear Axle Gearbox of VAZ 2106
Important! To avoid various injuries, it is best to remove the windshield together with an assistant!
How to reinstall a VAZ element
- flat screwdriver;
- blanket;
- nylon cord 5 m;
- soap solution, brush.
Also read about repairing a crack in a car windshield and replacing a rear engine mount.
This is the process for the Six. And here's how to replace glass on a VAZ 2109. We remind you that this car has a fifth door at the back. To carry out the work, again with an assistant, take the following:
- flat screwdriver;
- white spirit, rags;
- tight rope 5 m;
- soap solution.
By the way, replacing glass on a VAZ 2114 happens in exactly the same way, only there may no longer be a lock. The same applies to changing the rear window of a VAZ 2110, however, you do not need to remove the windshield wiper - it is missing. But when replacing glass on a VAZ 21099, you will also have to install a lock. Although it can be inserted after installing the glass.
What to do with the same part of foreign cars
- screwdriver;
- awl;
- knife;
- string;
- gluing kit;
- masking tape.
This car has a glass element glued into the body, so we proceed as follows, again with an assistant.
- We detach the interfering decorative elements.
- We pierce the glue seam with an awl.
- We insert a string into the hole formed.
- Next, together with an assistant located inside the cabin, we pull the string along the entire perimeter of the window.
- Carefully remove the dismantled part.
- Cut off the old seam, leaving about 1 mm of glue.
- Next, we treat the edge of the window and the edge of the opening with the activator, and then with the primer from the kit.
- We install rubber pads around the perimeter.
- After waiting half an hour, apply the adhesive composition to both edges.
- We install the window in its normal place.
- We glue it with masking tape until the glue dries completely (about 3 hours).
- Remove the tape. We install decorative elements.
- Turn on the heating. By the way, we automatically replace the broken rear window heating, since the new part is already equipped with working heating threads.
At this point the procedure can be considered complete. As you can see, it is radically different from the technology described for the VAZ. It's all due to the method of fastening. By the way, it is also used by Daewoo Matiz.
At the same time, replacing the rear window washer nozzle on such cars is often carried out simultaneously with reinstalling the window, since the washer is located directly on the wiper. By the way, the windshield wiper must be removed before removing the window.
It should also be added that in the case of replacing a broken rear side window, in the absence of a door, you need to act using the principles of the described technologies.
Price of glass works
Here are the prices for work for VAZ cars. Of course, a particular car service may charge a little more, but the difference is unlikely to be strong. If the work is carried out with glued elements, then the cost approximately doubles.
So, the instructions that were given in the article should help the car enthusiast if he nevertheless decides to carry out the procedure on his own with an assistant.
Now look at how to repair a heated rear window with your own hands and what has changed in the ban on car tuning in 2017.
How to insert a rear window
- Rear view glass for a car, screwdriver, rubber seal, elastic lock, 2 m cord.
The rear window for a car is selected strictly according to the modification of the car, since the shape of such glass is different for all cars. Before you begin, inspect the new rear view glass for chips, cracks, or other defects. First, you need to remove the old glass to replace it with a new one. Take a flat head screwdriver. This tip will help you pry off the seal on the inside and outside of the glass, which all VAZ cars are equipped with.
Using a screwdriver, first push out the outer seal around the entire perimeter, then the inner one. This way you will free the rear window from its rubber support. Then you need to squeeze it out. Push the glass with force from the inside; on the other side, someone should support it so that it does not fall and break.
If the glass does not squeeze out, it means that you have not bent the rubber seal on all sides well enough. Repeat the procedure of moving the seal away with a screwdriver again around the entire perimeter and try to squeeze out the glass again.
Apply new rubber seal around the entire perimeter of the rear window. Insert the elastic lock into the corresponding groove. To make it different from a regular seal, it is produced shiny. Now take a two-meter cord. It must be placed on the top and sides of the seal. Do not lay the cord below. Both ends of the cord of the same length should be in your hands.
Carefully take the new glass with both hands and insert it into the lower groove on the seal, as if rubbing it into it. Do not press hard, but confidently on the glass (it is better to do this with someone together), while pulling the cord at both ends, first on one side, then on the other. In this case, the cord will help the seal to disconnect. In the end, you will have a cord in your hands and the glass will accurately fit into its place in the grooves of the rubber seal.
- how to replace rear window in 2017
Glass replacement
It is better to buy glass and a glass holder as a set for replacement.
To replace, you need an extension, a wrench, an 8 and 10 mm socket and an assistant.
The side glass is blocked with a screwdriver to prevent it from falling out. The door trim is removed. A felt-tip pen marks the places where the glass frame is attached to the door on the frame and on the door. The bolts securing the glass frame to the window regulator are turned out.
The window regulator bar must be fully raised. The cable on the roller from the bottom of the glass is dismantled. Then the seals (velvet covers) are carefully removed.
Hold the glass during this time so that it does not fall out. After removing the seals, the glass is lowered down about 10 cm, tilted to the side and removed from the groove.
The new glass is installed in the reverse order. Apply WD-40 or a similar lubricant to the glass frame, insert the glass and leave to dry. After the grease has dried, the glass is installed in the door. New glass is installed in the seals.
If the seals have become unusable, new ones are cut out of rubber, while the old ones are used as patterns.
The glass with seals is inserted into the groove, aligned and lowered into the stopper. The window lifter handle is lowered to its lowest position. The glass is fixed with bolts and the cable is installed in its original place.
The operation of the window regulator is checked and, if necessary, the cable tension and the position of the seals are changed.
Replacing the rear window of a VAZ
If you have ever watched a specialist change the glass on a VAZ, no matter the rear or windshield, changing the rear window yourself will not be difficult. And if you’ve never seen it, that’s okay too.
By replacing the glass yourself, you will acquire a skill that will be useful in the future. For example, your friend will ask you to change the glass. And you will do this to him out of a friendly disposition. If a friend or stranger asks you, you can even earn money.
Removing and replacing the windshield on a VAZ 2109
To change the windshield on a VAZ 2109 , you need to purchase a new transparent element, prepare equipment, study the instructions for dismantling the old blade and installing a new one. Replacement of this automobile element will be required after an accident, as well as in the presence of numerous microcracks or deformation of the body part. to insert glass with your own hands, if you take into account the main nuances of the process.
Removing the seal
Removal of the sealing element will be required when replacing the windshield frame or the most transparent part. Removal is carried out from the passenger compartment, strictly according to the instructions:
- The windshield wipers are removed.
- Use a slotted screwdriver with a width of 10–12 mm to pry off the seal. The tool should be used carefully so as not to damage the rubberized material if you plan to use it in the future. You should start from the middle of the top edge. By pressing the top part with a screwdriver, the glass can be easily removed.
- When part of the sealing fragment is removed, the auto glass will already be movable. It is necessary to expand the area between the metal and the seal.
When you manage to remove most of the rubber, it will be possible to pull out the glass structure.
Important points
Gluing a windshield with your own hands is a process that needs to be approached with all responsibility and where it is important not only to strictly follow the instructions, but also to choose a high-quality part.
It is almost impossible to glue glass that is deformed at the factory. In this case, it is better to supply another part and return the defective one to the supplier. The original windows are inserted tightly without forming large gaps. However, the cost of the original often exceeds 90,000 rubles and is inaccessible to the average driver.
The result of replacing car glass in a garage is no different from the work of professionals, if there were no gross violations of technology in the process.
Drivers often make mistakes:
- do not follow recommendations for applying sealant,
- do not get rid of old adhesive well,
- ignore the restrictions specified in the instructions,
- turn on the music after pasting and wait for the composition to harden,
- They begin to actively drive after replacement, not allowing the glue to set.
Severe violations negatively affect the crystallization of the glue, which dries completely only after a day. In this case, as a rule, the result is not the best, and you won’t have to wait long for rust, leaks, or squeaks to appear.
If there is room for replacement, but there is no assistant or any tools, then you can order the installation of auto glass with qualified employees on site. Professionals will check the correctness of the preparatory work and indicate where to change the rubber band or add primer.
Replacement principle
When replacing the windshield on a VAZ 2109 , it is necessary to take into account its dimensions. When purchasing, it is important to compare the auto glass article number with the data indicated on the factory element. The size of the frontal fragment is standard, as on all VAZ models. Rules and nuances of replacement:
- The rubber seal should fit tightly in all corners, and the structure itself should fit into the side, top and bottom sides of the frame.
- Installation of glass requires the installation of an internal lock. The locking mechanism is an important element during installation; it is shaped like a wedge. It needs to be installed in the center, but the wires should be routed around the entire perimeter.
- Careful removal of the structure is required first. It is important not to damage the frame.
- If the size is slightly off, it can be easily corrected with a rubber mallet.
- Anti-corrosion treatment of the element and frame is also necessary. It is recommended to use a rust modifier and primer. After drying, sealant is applied to the frame, then sealing material is installed. The external and internal grooves of the frame are lubricated.
The length of the nylon cord is equal to the size of the car glass. It is better to purchase this material with a diameter of at least 4 mm. The quality of the cord is checked by touch; it must have a slippery surface. The nylon fits into the grooves of the seal.
Removing old glass
To understand how to remove a VAZ windshield, you should refer to such a device as glass holders. A device with vacuum suction cups will allow you to carry out the process in an accelerated mode. This tool is installed on the sides of the glass. After fixation, a jerk is made upward. You can't do this without an assistant. If the glass holder is not found, a screwdriver will help.
Using a slotted screwdriver, the remaining sealant is pushed out. An assistant must hold the glass to prevent it from falling out of the frame. If the work is carried out alone, then you can play it safe by laying soft material on the hood of the car. Then the glass is pushed out of the cabin.
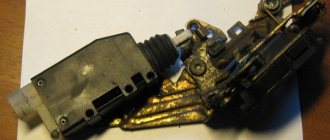
Replacing the trunk lock
In a specialized store, this part is sold complete with larvae. However, some forethought is required here. You cannot remove the key from the cylinder, because the mechanism may fall apart and reassembling it, most likely, will not be possible.
In order to gain access to the trunk lock, you first need to remove the panel, which is secured with plastic rivets (hedgehogs). If you hook these devices under your hat, they can be easily pulled out. Hedgehogs often break, so it is best to buy them too when purchasing a lock. You need to remove all the rivets to easily and conveniently remove the panel. Once the replacement is complete, the rivets can be inserted by pressing them with your finger.
After the socket is removed, you need to unscrew the nuts on the old lock, and then remove the lock itself. After this, a new one is inserted into the free space and the nuts are tightened. All that remains is to put the socket in place and insert the hedgehogs.
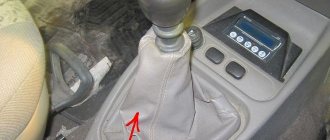
Latch setting
If the lower part of the trunk lock and the latch do not change, then no adjustments are needed. Otherwise, when replacing, the new latch must be adjusted for ease of opening/closing the trunk.
To adjust, loosen the two bolts at the front and then close the luggage compartment. As a result, the latch should adjust itself. After this, you need to open the trunk and tighten the bolts.
It happens that after adjustment, the latch selects a crooked position. In this case, you will have to check whether the trunk closes well. If everything goes smoothly, there is no need to touch anything. Otherwise, you need to independently find the best place for the latch by moving it.
Required Tools
First you need to select a new canvas. Craftsmen recommend choosing double glass with a polymer layer or single-layer tempered stalinite. Required equipment and related materials:
- nylon cord - about 5 meters;
- rubber hammer;
- slotted screwdriver;
- sealant;
- anti-corrosion agent and primer.
Preparation involves choosing a comfortable room for work; you also need to select equipment, purchase new glass and dismantle the old fragment.
You can put the old seal on the glass or purchase a new element to make the job easier.
Sources:
https://vaz-russia.com/remont/zamena-zadnego-bokovogo-stekla-na-vaz-2101-vaz-2107.html https://ru.megasos.com/wiki/zamena-zadnego-stekla-na -vaz-2109 https://vaz-russia.com/remont-vaz-2108/zamena-lobovogo-stekla-na-vaz-2108-vaz-2109-vaz-21099.html https://autofluids.ru/remont -i-servis/kak-vstavit-zadnee-steklo.html https://infokuzov.ru/remont/steklo-lobovoe-vaz-2109