The instrument panel on the Lada Vesta turned out to be functional and attractive in terms of design. It was developed virtually from scratch and is significantly different from previous AvtoVAZ production cars. In 2021, an updated version of the panel was released - the first one turned out to be somewhat unfinished, and the developers decided to fix everything along with the restyling of Vesta. Owners of cars purchased before the upgrade can use the firmware to update the dashboard.
Functions and features of the Vesta panel device
The instrument cluster on the Lada Vesta is completely different from those used on the Priora, Grant and Kalina. It is now a completely redesigned multifunctional device.
The speedometer is located in the central well - this is the main element of any “tidy” in a production car. The scale implies acceleration to 200 km/h, although in fact the stated maximum speed of Vesta with the current engine is no more than 185 km/h. Next to the speedometer there is a small on-board computer display, on which the driver can see all the necessary information about the operation of the engine and other vehicle systems.
Inside the speedometer scale there are various indicators that inform the driver about different parameters: the hazard warning lights are on and the direction indicators are on, the brake pads are critically worn, the engine is malfunctioning and the engine oil level is low. On the left is the tachometer well, the scale of which is marked from 1 to 7 (1000-7000 rpm). The engine allows you to “spin” up to 5500 rpm - this way there is no harm to the motor. After this mark there is a red zone; prolonged operation of the power unit at such high speeds is not recommended. The tachometer also contains information indicators.
On the right side there is a well in which there are two indicators. One of them informs about the engine temperature, and the second – about the fuel level in the tank. In Grant, the temperature indicator was removed to reduce the cost of the car, but in the climatic conditions of Russia and the CIS countries, it is extremely important for the driver to know the current temperature of the engine oil in order to prevent possible overheating due to various malfunctions.
The fuel tank indicator shows a scale of “full tank”, “half tank” and “empty”. You can see an arrow near the gas pump icon; it is needed to indicate to the driver which side the fuel filler neck is located (the indicator points to the right). There are also warning lights in the right well.
In general, the instrument panel has an attractive design; the scales are backlit in green and orange with white numbers. The only drawback is the poor design of the arrow indicators. The intermediate divisions of the scales are not informative, and you need to get used to them. With a quick glance while moving, it will not be easy to read the readings.
How to set up the on-board computer on the Lada Vesta?
An on-board computer (OB) is installed on most modern cars. It can be standard (built in from the factory) or additional. The main task of the BC is to read information from sensors and the control unit and display it on the screen. Standard BCs are mainly built into the dashboard. Additional bookmakers are purchased separately and installed as a separate block.
The on-board computer makes life easier for motorists. It constantly keeps all the necessary information before the driver's eyes.
Of course, an on-board computer is not necessary; many drivers do just fine without it, but with it, driving becomes safer and more comfortable.
Basically, BCs show a lot of data: the total mileage of the car, the distance traveled since the last reset, average consumption, speed, etc. Bookmakers often show error codes and malfunctions.
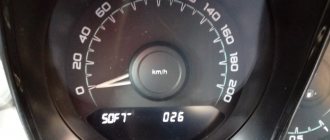
On Vesta, the standard on-board computer does not show error codes. But it shows a lot of other useful information. Here are all the readings of the standard BC: on-board voltage, remaining range on fuel in the tank, current fuel consumption, average fuel consumption, fuel consumed, travel time along the route, average speed along the route, hours, total mileage, outside air temperature, tips gear shifting (with or without sound). If the car is equipped with AMT, the gear engaged and the mode – auto or manual – are displayed. On a car with cruise control, there is an indication of the current cruise or speed limiter settings.
The on-board computer display starts when the ignition is turned on. The Vesta BC is controlled using two buttons on the end of the right steering column switch. Using them you can scroll through the BC readings, configure it, set the time and reset the readings.
At first, controlling Vesta's computer seems difficult. But you just have to figure it out and get used to it. Use the up and down keys to navigate between the readings in the top line of the second value:
Here the readings of the on-board network voltage, power reserve, current fuel consumption, average fuel consumption, fuel consumed per trip, travel time along the route, and average speed along the route change. Simply by pressing the “up” key we change these values, by pressing “down” we change them in the reverse order. What we stop at showing is that the BC will always show in this window, even the next time the ignition is turned on. That is, we expose ourselves to the information we need - and it will always be before our eyes.
If you briefly press both keys at the same time, the time readings change to the ambient temperature and the total mileage to the mileage along the route (since the last reset).
Now about the computer settings. By long pressing the “up” key, we get to the bookmaker’s settings menu. Here you can set the time, reset the route mileage, average consumption and average route speed.
Briefly press “up” to scroll between values. Long press "up" - reset the value or set the hours and minutes.
The first value is the mileage along the route.
The second (bottom) is time: hours and minutes.
And the third (above) is resetting the average speed, travel time and average consumption along the route.
If you scroll further, the gear shift assistant indication will turn on. You can turn on the sound indication in addition to the graphic one (an additional icon appears) or turn off the sound. By default, the sound is turned off.
Exit bookmaker settings – press the “down” key. You can exit at any stage of the settings. Here is the basic circuit for controlling the on-board computer and resetting mileage values, etc.
There is also a secret menu of BC Vesta. There is no description of it at all in the user manual. In this menu you can configure the sound of the turn signal clicks. Press and hold both “up” and “down” keys. We get to the additional menu. We turn on the emergency lights in order to hear the sound, and customize it for ourselves.
Use the “up” or “down” keys to change the values, and the sound of the turns changes. By simultaneously briefly pressing both keys, we move to the next menu item. Maybe some people just don’t like the stock sounds. Someone may have hearing problems, then you can adjust the sound to suit you.
The values of P1 and d1 are the sound and tone of the first click of turns.
Thanks for subscribing!
The values of P2 and d2 are the sound and tone of the second click of the turns.
If you hold down both keys for a long time on the “SET” inscription, the sound settings will be reset to the standard settings.
The main settings scheme in the bookmaker's secret menu:
That's it, Vesta's on-board computer is sorted out. Nothing complicated, just a matter of habit.
Next, we will consider the possibility of self-diagnosis of the Vesta dashboard. This is necessary if there are any malfunctions in the operation of the instrument panel (the arrow does not work, the indicator does not light up). Then you can carry out this diagnosis. In some cases, after self-diagnosis, everything miraculously begins to work. Sometimes it doesn't help. But during self-diagnosis, you can see whether the arrow itself, the indicator, is working, or whether the problem lies further, in the wiring or in the sensors. You can also look at and find out what kind of indicators are present on the car. For example, does the cruise control indication work on cars without it?
Running self-diagnosis is very simple - you just need to hold down the “up” button on the right steering column switch. The same button that is used to navigate the on-board computer. Without releasing the button, turn on the car ignition.
After turning on the ignition (the button can be released), all indicators light up, and all pointer indicators move to the maximum reading and back several times. After this, the indicators go out, leaving those that always turn on when ignited.
Finally, a video showing control of the on-board computer on Vesta, a hidden menu, and self-diagnosis of the dashboard.
Features of the updated panel
In favor of AvtoVAZ, we can say that the manufacturer constantly modernizes all its cars, even new ones. Increasingly, engineers are listening to ordinary car enthusiasts (surveys on social networks, meetings with representatives, communication on forums). At the request of customers, the dashboard of the Lada Vesta has been modified. The changes include:
- the numbers have become noticeably larger, reading readings while moving has become much easier;
- the backlight is used regardless of whether the lighting is on or not, the backlight is on on all scales at any time;
- instead of white backlight, red is used;
- a voice alert now warns of an unfastened seat belt; the audio also includes a GPS connection and much more;
- the volume of sound notification and voice guidance has increased (information and warning signals);
- the time on the display is now synchronized automatically by satellites of the ERA-GLONASS navigation system;
- The warning indicators have been changed (low tire pressure and unfastened seat belts front and rear).
Export models supplied to Germany and Hungary were the first to be equipped with the updated dashboard. Since 2021, the “tidy” has become available for the domestic market. A function such as adjusting the backlight level has not yet been implemented.
Replacing the dashboard backlight
During such tuning, there are several important points to consider:
- take your time so as not to damage the conductive traces of the board;
- observe the polarity (SMD LEDs have a bevel on one side, install a new LED in the same position);
- do not overheat the LEDs; high temperatures may cause them to fail;
You can verify that the installed LEDs are working properly using a multimeter in “tester” mode, bringing the probes to the LED according to the polarity (red probe is plus). In general, the process is no different from illuminating the Granta or Kalina 2 panels.
By the way, to change the color, it is not necessary to solder the LEDs; you can do it easier - stick a colored film (for example, electrical tape) onto the instrument panel cover.
A film is glued to the display of the on-board computer, this allows us to invert the screen. To do this, you just need to turn the film over to the other side, which will make the background white and the numbers black.
Before reassembly, you can additionally paint the wells. After reassembling and installing the instrument panel, we test it.
By the way, there are ready-made kits for tuning the instrument panel
, are called KIT from AMC.
Let us remind you that since you had to remove the dashboard, modify it so that it does not creak in the future. Read also how to make the panel backlight turn on with the ignition.
Keywords: instrument panel Lada Vesta | interior lighting Lada Vesta
0
Share on social networks:
Found an error? Select it and press Ctrl+Enter..
Lada Vesta dashboard malfunctions
If the instrument panel is faulty, it is immediately noticeable; the following signs may indicate a problem:
- The contact of the instrument panel with the on-board electrical network is broken. The reason may be a broken wiring or damaged connectors or contacts.
- Sensor malfunction. The dashboard displays incorrect information if the crankshaft position sensor, speed sensor, or fuel level have failed.
- Mechanical damage, for example, exposure to constant vibrations or a strong impact in an accident.
- Faults related to the electronic microcircuit.
- Burnt-out indicator lights - in this case, the backlight disappears.
These malfunctions are obvious, but there are also those whose causes are not easy to understand.
Arrow indicators do not work
If the arrows on the instruments do not work, this may indicate a failure of the sensors responsible for these readings:
- The tachometer does not work. If the tachometer needle does not move, the cause of the malfunction is the device itself. If the crankshaft position sensor or electronic control unit fails, the engine cannot be started.
- The speedometer does not work. If the device is working but does not indicate speed, the cause is a faulty speed sensor. This will also be indicated by the ABS warning light.
- There is no antifreeze temperature reading. The temperature sensor is faulty and transmits incorrect readings to the control unit, which are displayed on the instrument panel.
- No fuel level readings. The unit with the fuel pump is faulty, the ECU does not receive a signal.
Main 11 faults of the Lada Vesta instrument panel
While operating the car, problems may arise with the functioning of the instrument. An approximate list of main faults looks like this:
- Poor contact of the panel with the on-board network due to damage to the connector or its contacts;
- Failure of one or more sensors supplying information to the panel;
- Mechanical damage to the shield due to strong vibrations or strong impact;
- Lack of lighting due to burnt out light bulbs;
- Failure or malfunction of the main motherboard - if the motherboard fails, there is no point in removing or disassembling the instrument panel. You cannot repair this part yourself. It is better to entrust this matter to service station specialists;
- Burnt-out warning lights - There is a simple test to make sure the lights are burnt out. When you turn the ignition key, all devices start and all lamps light up. At this time, the operation of the lamps is checked. Particular attention should be paid to the red lamps, which indicate critical problems with the vehicle;
- The arrow indicators do not work - this may occur due to a failure of either the device or the sensor. Operation is checked with the engine running;
- The tachometer does not work - the reason is in the device itself;
- The speedometer does not work - the speed sensor has failed. This is indicated by the ABS lamp;
- The antifreeze temperature does not change - the reason is a malfunction of the temperature sensor;
- The fuel level is not displayed - the unit with the fuel pump is faulty.
Removing the instrument panel
If the malfunction of the devices is definitely related to the failure of the “tidy” elements, you can begin to dismantle it. To work, you will need a screwdriver (curly and flat), as well as a hex wrench. The procedure looks like this:
- Open the hood and disconnect the terminals from the battery. This will de-energize the on-board network and prevent a short circuit in the dashboard.
- Using a screwdriver, unscrew the two screws securing the tidy.
- Pull the top part towards you until it clicks. The instrument panel assembly can then be removed.
Now you can begin to disassemble the instrument cluster. The same tools are needed for this. There are fastening screws on the left and right - unscrew them. Now, without touching the wires, you should pull the combination towards you and disconnect the wire block in the upper right part. When installing, do not confuse the pinout. Now the instrument panel has been completely removed, you can inspect it for burnt parts.
Signal indicators are checked with a multimeter.
To reinstall the panel, you need to repeat all the steps in reverse order. Removal can be done with your own hands, without the help of specialists. But in the absence of appropriate skills, it is better to entrust the diagnosis to professionals; the approximate cost of such a service will be 1000-2000 rubles. During dismantling, you can glue the dashboard so that the panel does not creak.
Dashboard firmware
After the not entirely successful first “tidy” of Vesta, an updated one was released, with the defects corrected. The question arises - what should the owners of the first generation Lada Vesta do? In order for the backlight to work in the daytime without turning on the headlights, you can reflash the “tidy”. If the car is equipped with cruise control not at the factory, but by the owner, the corresponding indication on the old panel without firmware will not light up.
Without the skills and knowledge, installing software yourself can do more harm than good. The tailoring must be used strictly for the specific dashboard. It is not allowed to install updated software from a new device to an old one and vice versa.
Solution
Due to numerous requests to resolve the issue with the lack of instrument lighting in the Lada Vesta, which were sent to AvtoVAZ, the Russian plant produced new firmware. After this, already in the last days of June, all the necessary materials were sent from the factory to the dealership centers to update the firmware of the Lada Vesta dashboard.
And from the first days of July, dealership centers received new firmware. This software is marked with the index 35, while the previous version, which is installed on many sedans, is indicated with the index 26. Software 35 is focused on turning on the backlight of Vesta’s instruments when the daytime running lights are turned on.
The video demonstrates the backlight at PO 35
The firmware changes quite quickly - usually no more than a quarter of an hour. In addition, as reported by Ladnaya Mechanics, this service is paid and costs about 600 rubles.
It's much more comfortable to drive with the lights on.
Do-it-yourself firmware
You need to be aware that all actions are performed at your own peril and risk. No one can guarantee that after installing the firmware yourself, the device will work correctly. To prevent this outcome, it is recommended to update the panel either at an authorized dealer or at specialized service stations.
There is no need to confuse the panel firmware with the multimedia firmware - these are different devices.
The cost of such a service varies from 1,500 to 2,500 thousand rubles. This is much cheaper than buying a new shield to replace a damaged one yourself. For dismantling and reflashing, the warranty may be revoked if the procedure is not carried out by an authorized dealer. If you decide to update the software yourself, you will need to make a backup copy of the standard firmware, then prepare the necessary tools:
- A device for flashing Usbdm OSBDM V4.95 - can be ordered on AliExpress, the cost is approximately 600-700 rubles.
- Install drivers and software for Windows from the disk included with the programmer.
- Dismantle the instrument panel, peel off the factory seal, and remove the cover from the back.
- Open the programmer and move the checkbox to the 3.3V position - at this voltage you will not need an external power source.
- Connect to the dashboard and PC.
- On a computer or laptop, open the HCS12 Programmer program, select and click on the “Detected” item.
- Go to the “Target” item and select the folder with the location of the firmware, check the box next to the “Auto Reload” item, then click on “Detect Chip”. The programmer will determine the chip type automatically.
- Go to the “Security” tab and check the “Unsecure” box.
- In the “Advanced” tab, check the “Enable” box.
- In the “Device Operations” section on the “Target” tab, select the “Erase Selective” item - only the firmware will be replaced, the immobilizer data and mileage will be saved.
Refinement of the instrument panel
Tuning the instrument panel on the Lada Vesta is no different from upgrading it on other VAZ models, although technologically it is a completely different panel. The main idea is to improve the backlight by replacing standard SMD LEDs with alternative ones. Decorative overlays and lighting modifications without firmware are also used.
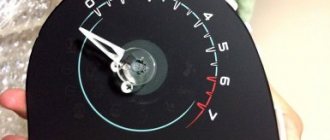
Replacing backlight LEDs
Before you begin, you should take into account that you will have to work with a soldering iron; without knowledge of soldering technology, you can lose the backlight at best. At worst, the instrument panel will fail completely. To work, you will also need to purchase LEDs with a brightness of 3 to 15 lumens, depending on the level of desired brightness. During the tuning procedure, you need to follow some recommendations:
- be careful and careful not to damage the traces of the microcircuits;
- When soldering, observe the correct polarity of the LEDs;
- Do not hold the soldering iron tip for too long - the LEDs will fail due to overheating.
To make sure the LEDs are working properly, you will need a multimeter. The tester probes are connected to the “legs” of the diodes - a working diode will indicate the integrity of the circuit (a sound signal).
If you are satisfied with the brightness level of the backlight, but would like to change the color, it is not at all necessary to solder the LEDs, you can purchase a special overlay for the instrument cluster or make it yourself - the drawings are freely available. Color film may be used. Before assembling the instrument panel, you can additionally paint the wells.
Connecting the backlight to work with DRLs during the day
This can be done using firmware or a jumper directly on the electronic board. Any tampering with the electrical system will void the vehicle's warranty. In the absence of skills and experience, such actions can lead to failure of the instrument cluster.
The main task of the procedure is to solder a jumper from the contact of the LEDs responsible for illuminating the panel to the contacts of the LEDs responsible for illuminating the display of the on-board computer (lights up when the ignition key is turned). Any suitable piece of wire can be used as a jumper. At first glance it may seem complicated, but for experienced VAZ car owners such modifications are standard practice. Rarely do such requests come to specialized centers. The replacement of LEDs is not carried out by an official dealer, nor is the installation of all kinds of overlays.
Where is PWM installed and how to adjust the brightness of the dashboard backlight
The equipment is fixed to the back of the instrument board with double-sided tape. The contacts themselves are soldered directly into the board according to the diagram below.
Adjusting the dashboard backlight on the Lada Vesta is configured using two channels:
- First: when the ignition is activated, the arrows of the tachometer, speedometer, fuel level sensor, and coolant temperature light up. After two seconds, the instrument panel lights up.
- Second: the brightness of the instrument panel dims by 25% when the high beam and daytime running lights are activated.
Reviews of the Lada Vesta instrument panel
Owner opinions are mixed. Apparently, the impression of the “tidy” models before the update is having an effect.
Yuri, Saratov: “The Vesta panel is “so-so”, even on the Priors the readability of the readings is much better. We tried to make a temperature indicator like in foreign cars, but in the end it goes from 50 degrees to 90 in a couple of minutes and doesn’t move anymore. It is impossible to understand what the real antifreeze temperature is; it may already be critical and in the red zone, but the arrow stubbornly points to 90.”
Alexander, Volgograd: “The design is poor, it feels like the panel was made by craftsmen in a garage. Some kind of collective farm tuning. The “tidy” is already located under a canopy in a certain tunnel, why then we also need wells, it is not clear, they have no functionality. On sunny days they block the view. The panel should be informative, not flashy and beautiful with a bunch of plastic. The display is clearly copied from Granta - we wanted the best, but it turned out the same as always, only more expensive.”
Semyon, Voronezh: “I found out that an updated panel had been released, contacted the dealer, they said they would replace it, but the price was 23,000. In the end, I reflashed it myself, expecting more. Yes, she became beautiful and pleasant, her information content improved, and that’s all. The arrows remain the same, the instrument scale remains the same, the functionality has not changed.”
The dashboard of the Lada Vesta can be called an attempt by AvtoVAZ to create something new. It turned out to be unfinished, but the manufacturer tries to follow the wishes of car enthusiasts and refines the elements of the mechanisms as far as possible. Considering that previously VAZ cars were produced for decades without any significant modifications, then the Lada Vesta and the entire X-style line are already a significant step forward in the domestic automobile industry.
The Vesta instrument cluster has a unique design and modern lighting, which is based on LEDs. To prevent the sun from interfering with reading readings, all indicators are hidden in three large wells. On the other hand, in cloudy weather they may, on the contrary, leave some areas in the shade. In this case, a backlight is needed, but during the day it does not work with DRLs. What to do?
If the Vesta dashboard lights turn on only together with the low beam headlights and do not work during the day along with the DRLs, then reading the readings may be difficult. You can change the way the backlight works in several ways:
Attention! Tampering with the car's electrical system on your own will void the warranty. The author is not responsible, you do all actions at your own peril and risk.
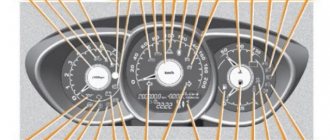
Description of the instrument panel
The instrument cluster includes the following control and measuring devices:
- speedometer
- tachometer;
- engine temperature indicator;
- fuel level indicator in the tank.
All this is located in three “wells” above the steering wheel.
The central instrument is the speedometer. Its scale is marked up to 200 km/h, although the Lada Vesta does not accelerate to this mark with any of the engines. There are also several indicators on the speedometer:
- unlocked trunk;
- open hood;
- alarm;
- unlocked doors;
- Cruise control;
- speed limiter
- direction indicators.
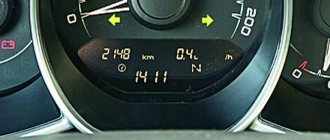
Below the speed scale there is a small on-board computer screen that displays the following information:
- mileage (including mileage per trip);
- current time and travel time;
- average speed;
- voltage in the on-board network;
- fuel consumption;
- checkpoint operation;
- ambient temperature;
- cruise control operation.
In the left “well” there is a tachometer with a scale from 1 to 7. “Red zone” means that the engine produces more than 5500 rpm. The indicators located here may indicate the following:
- pedal adjustment;
- safety belt;
- airbags;
- brake failure;
- accumulator battery;
- engine malfunction;
- emergency oil pressure;
- ABS;
- transmission malfunction;
- electric power steering.
On the right side there are two scales at once: engine temperature (top) and fuel level (bottom). Here you can see indicators such as:
- immobilizer;
- ESC;
- fuel level;
- lighting work.
The instrument panel is made in a modern style, everything is illuminated and there is no feeling of clutter. However, some car owners are dissatisfied with the ease of reading information, especially at speed, so they tried to adjust the brightness of the instrument lighting themselves.
Connecting interior lighting
If the Lada Vesta model is not equipped with LED lighting in the niche on the control panel, the car owner can easily install it himself.
To do this you will need wires, a plastic corner, double-sided adhesive tape, and LEDs.
Algorithm of actions
Secure the LED to the plastic corner using double-sided adhesive tape. Secure the corner into the recess on the front panel so that the LED faces the cigarette lighter. Remove the side cover of the recess in the center. To do this, just unscrew one mounting bolt. Connect the LED to the cigarette lighter socket. To replace or install a new interior lamp, first remove the old lamp, then install a new one in its place. The algorithm of actions is identical to the algorithm for installing the lamp in the rear part of the cabin. No additional measurements or stencil making are required.
What has changed in the new dashboard of Lada Vesta
It is known that cars going for export will be the first to receive the update, however, the Russian market should also be replenished with such versions of Vesta in 2021.
In the front part, the changes affected the following:
- font increased;
- daytime instrument lighting appeared;
- The scale backlight color turned orange.
In theory, changing the instrument lighting will correct problems with reading readings. In the photo of the Lada Vesta instrument panel you can see that it has become much more presentable.
The new instrument panel is illuminated at the proper level at night and during the day.
There are also several useful functionality improvements:
- added voice accompaniment;
- the volume of sound signals has increased;
- the time is now automatically synchronized with the satellite (the driver only needs to set the time zone);
- “Unfastened passenger seat belts” and “Low tire pressure” indicators appeared.
It is still unknown whether backlight brightness adjustment will be implemented.
How to remove the dashboard of Lada Vesta
It is assumed that the new version of the panel can be purchased and installed on a torpedo. Its price will be approximately 8,000 rubles.
The procedure for removing the dashboard involves the following steps:
- Disconnect the negative terminal of the battery.
- There are two bolts at the top of the panel that hold it in place. They need to be unscrewed using the T20 socket.
- Now you can remove the instrument panel by pulling it towards you so that the latches release.
- Using the T20 socket, unscrew the exposed screws that secure the devices.
- Now you can pull the panel towards you and disconnect it from the wires.
Installation is in the reverse order. The connection diagram should not change.
Room lighting
Lighting for the Lada Vesta number is provided by two light bulbs. Lamps often burn out, so drivers must be able to fix this problem themselves and replace the lamps.
The procedure is not complicated and does not require special skills or abilities.
Sequence of events
Use a sharp object to pry the lid of the lantern. Take it out. Remove the lamp and install a new one in its place. A 5V light bulb is built into the lantern. Reinstall the flashlight in reverse order. When removing the flashlight, pry it with a sharp object from the left side.