Instructions for replacing the air filter on a Lada Granta yourself + photos and videos
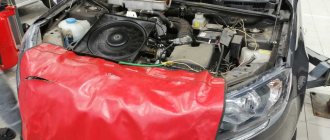
The air filter is located in the front right part of the vehicle's engine compartment, next to the battery and expansion tank. First, open the hood and determine its location.
1. Using a screwdriver, unscrew the 4 mounting screws (shown in the photo) on the cover of the air filter housing.
2. Open the lid by simply grabbing it from above.
3. Pull out the old filter and put it aside.
4. Using a damp cloth or sponge, carefully wipe the inside surface of the box body and filter cover, removing dirt and dust. It is important to prevent them from getting inside the air intake.
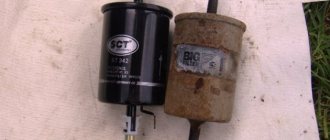
5. Install a new air filter, having previously inspected it for mechanical damage.
6. Close the lid and tighten the screws.
As you can see, the process of replacing the filter is very simple and will not take much of your time. Don't forget to change the air filter every 10-15 thousand km.
Why you need to change your air filter promptly
If the air filter cannot catch dust, then grains of sand will begin to seep into the working chambers of the engine and melt in them. Melting products will settle on the engine parts and reduce their service life.
Signs of a clogged air filter:
- significant loss of car power: it is more difficult for air to penetrate into the working chambers of the internal combustion engine;
- Gasoline consumption increases. In real terms, with a clogged filter, consumption increases by an average of three liters;
- difficulty starting the engine even in warm weather;
- the engine pulls poorly and is not able to develop high speeds;
- fuel detonation increases.
Driving with an outdated air filter results in a sharp increase in spark plug wear; Additionally, malfunctions in the operation of the electronic engine control unit will occur. Often, a clogged air vent is the reason for the Check Engine light to turn on.
It is also necessary to change the filter element in a timely manner because it purifies the air entering the cabin from the environment.
What is the function of the cabin filter?
The purpose of the cabin air filter is to remove harmful particles that enter the cabin through the air ducts of the ventilation system. Naturally, it is impossible to purify all the air entering the car cabin. The filter installed in the ventilation system removes exhaust gases from the vehicle in front, since it is these gases that exceed the permissible limit for the content of harmful substances.
The types of filter elements installed in the cabin are divided into two groups:
- anti-dust;
- coal.
Conventional dust filters are designed to capture large particles of dust and soot, as well as plant pollen. They are made from paper and synthetic fiber. Designed to capture solid particles larger than 1 micron. The advantage is their low cost. The downside is that they are not able to combat unpleasant odors and toxic gases.
Carbon filters remove various harmful compounds. The filter element is activated carbon. It absorbs harmful substances. The efficiency and quality of purification largely depends on the speed and temperature of the incoming air flow. The filter is a multilayer structure of carbon layers alternating with layers of anti-dust fiber.
Cabin filters for Lada car
Replacing the cabin filter of Lada Granta
To complete the work you will need:
- crosshead screwdriver;
- special “TORX” wrench (with a star-shaped working surface).
Stages of work:
- In order to get to the cabin filter, you need to open the hood of the car and, using a special key, unscrew the seven screws holding the plastic element (jabot) located between the windshield and the hood.
- After the lid is unscrewed, you need to remove the filter itself. To dismantle the product, you will need to release a special fastener, a latch. After removal, the element must be disposed of, and its installation location must be cleaned of any remaining contaminants. A vacuum cleaner is ideal for this.
- When replacing the cabin filter of a Lada Granta, do not confuse the installation side of the product. Usually there is a special arrow on the filter element housing that indicates the correct installation location. Next, put on a protective case to protect the device from damage. This completes the work.
Conclusion From all of the above, we can draw one, only conclusion - do not neglect the timely replacement of filter elements in your car. By saving an extra 300 - 500 rubles without changing the filter on time, you will harm your health.
How to change the cabin filter on a Grant
Praise to AvtoVAZ - changing the interior is relatively easy and the same on Grant and Kalina. It can be changed from the street in the engine compartment - no dismantling of complex elements is required.
All work will require
- Torx key T-20;
- Crosshead screwdriver;
- New filter.
All you need for the job: a star wrench, a Phillips screwdriver and a replacement filter.
Step-by-step filter replacement
To work, you will have to remove part of the decorative apron at the base of the windshield. To do this, raise the wipers to a vertical position .
To raise the wipers, turn on the ignition and start the wipers. As soon as they reach a vertical position, turn off the ignition. Now access to the apron is free.
Step 1: Raise the windshield wiper to a vertical position.
Next, open the hood and use a Torx key - unscrew the 5 stars that hold the right side of the decorative apron near the windshield. Remove the cover .
Step 2: remove the plastic trim from the right wiper.
We gained access to the filter casing - use a Phillips screwdriver to unscrew the 2 screws securing the cover . Let's take it off.
Remember the order in which you removed the cover. It is inconvenient to place it - it is better to know exactly which edge to place first.
Step 3: Remove the filter housing. We get access to the element itself.
The last thing is to bend the fastening latches and remove the filter . If there are leaves and debris underneath, you can vacuum or blow out the seat.
You can buy a new filter without a mounting frame. In this case, remove the old filter from its frame and use it to install the new one.
Step 4: replace the old part with a new one. If the new filter is in the frame, just put it in place. Otherwise, we use the frame from the old element.
Reassemble in reverse order :
- 2 fastening latches;
- 2 self-tapping screws in the casing;
- 5 screws in a plastic cover.
Features of replacement for Grant standard, 8 valves without air conditioning
On a number of Grants, the standard configuration does not have a filter from the factory . Regardless of body type: sedan or liftback. What to do with such cars?
Just install the filter according to our instructions. There is simply no filter in the car - there is a place for it and access to it is the same.
In relation to the cabin, the air conditioner affects only one way: after a long period of use, the air conditioner will begin to blow poorly.
Video instructions for replacement
Removing the air filter and air intake
Removing the air filter and air intake of Lada Granta (VAZ 11183, 21116)
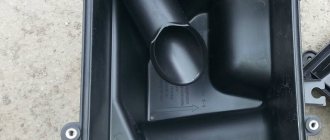
We remove the air filter to clean the cavity of the filter housing from dirt, replace it, and also to gain access to parts and components located in the front left part of the engine compartment.
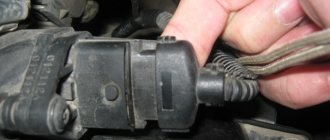
By pressing the lock of the engine control system wiring harness block, disconnect the block from the mass air flow sensor connector. Use a Phillips screwdriver to loosen the clamp securing the corrugated hose to the air filter cover pipe...
...and remove the hose from the pipe.
Using a Phillips screwdriver, unscrew the four screws securing the air filter cover...
...and remove the cover.
We remove the canister purge valve from the filter housing holder without disconnecting the tube and the wiring harness block from the valve (see “Removing the canister purge valve”).
Remove the replacement element from the filter housing. The air filter housing is mounted in the engine compartment on three rubber supports. The two front supports are located on the upper cross member of the radiator frame, and the rear one is located on the battery platform bracket.
We remove the front right support from the slot in the filter housing bracket. Similarly, we remove it from the slots of the other two brackets of the air filter housing...
We remove the filter housing pipe from the rubber coupling of the air intake...
...and remove the air filter housing. Install the air filter in reverse order.
We remove the air intake for replacement, as well as when dismantling the fan or radiator of the engine cooling system.
Using a 10mm socket, unscrew the air intake nut. Remove the air intake from the radiator bracket stud and disconnect the rubber coupling of the air intake from the air filter housing pipe.
Remove the air intake from the engine compartment.
Remove the rubber coupling from the air intake pipe. Install the air intake in the reverse order.
Video on the topic “Lada Granta. Removing the air filter and air intake"
Quick release for VAZ air filter, injector. Advice from an auto electrician Removing the air filter with housing Lada Kalina
How to remove the filter housing on a VAZ 2110.